
Application
The Application section lets you view and review all test center applications for TSM system enrollment, update their statuses as needed, and evaluate each application for approval, required changes, or rejection based on established compliance standards.
For test centers under the auto-approval process, their applications are automatically approved, and you can only view their application details in the section.
Manage Test Center Application
After submitting the application, you can view it. Follow the steps below to manage and review Test Center Applications:
- Navigate the left-side menu, then select Applications.
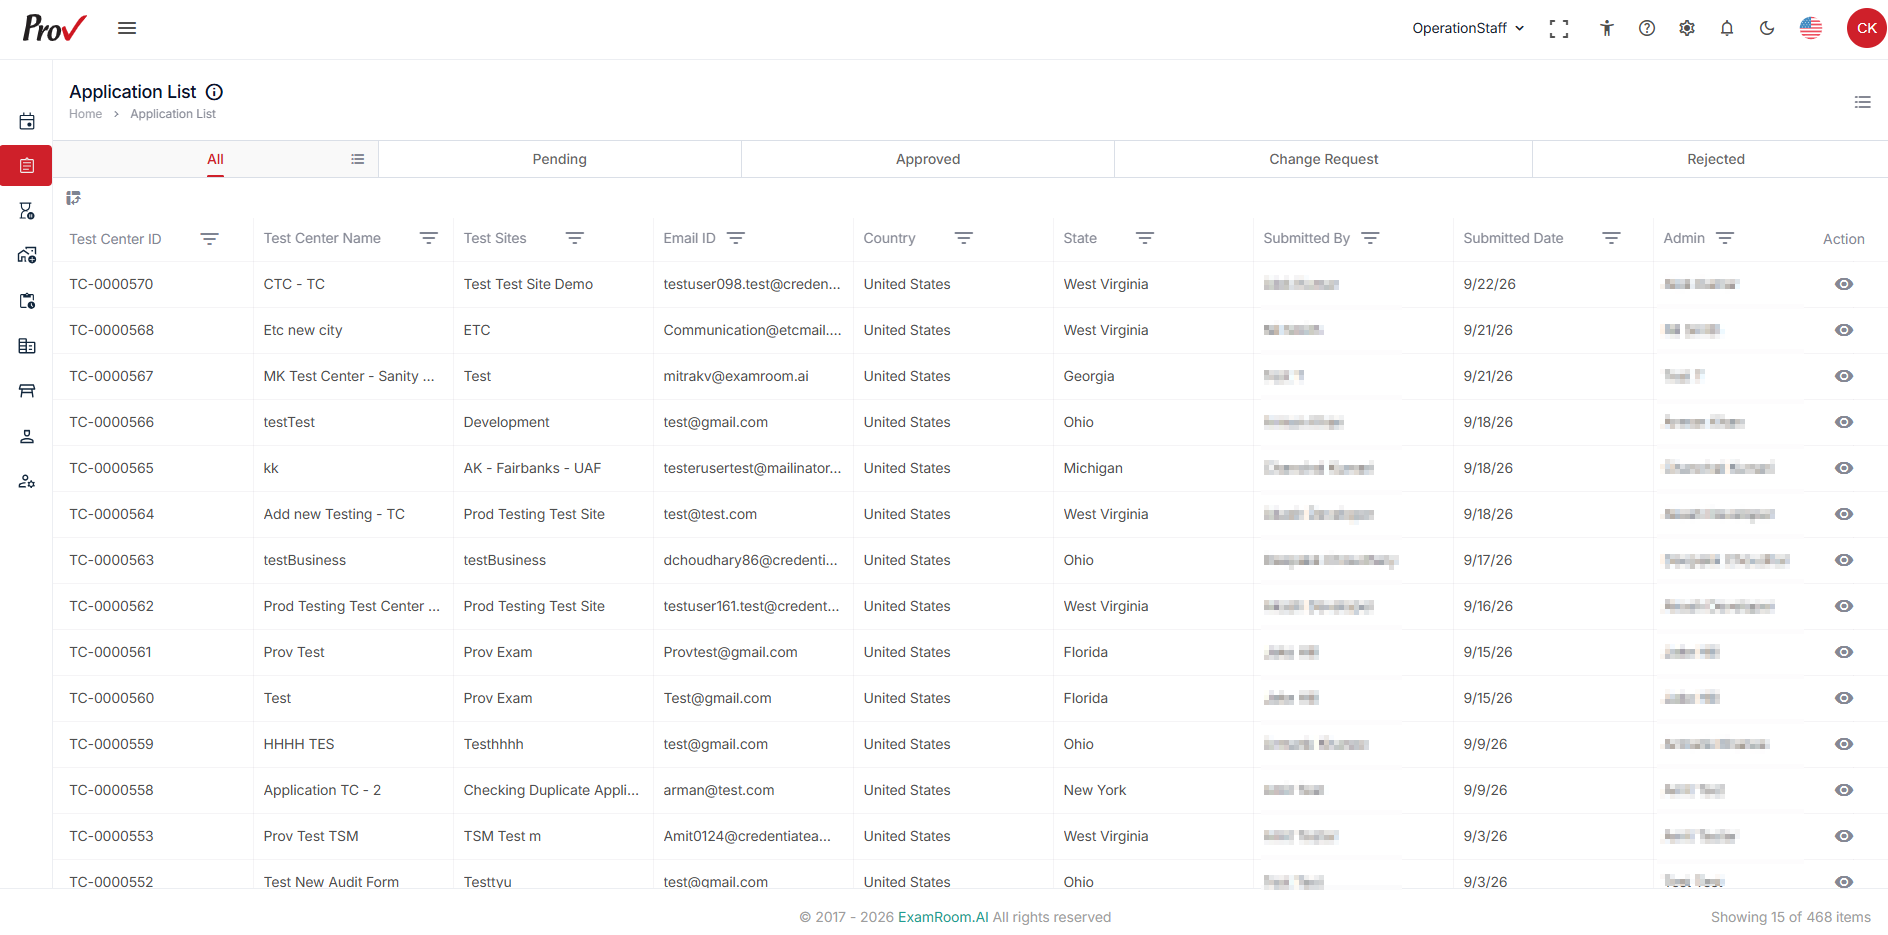
- In the Applications section, all submitted applications are displayed in tables containing key information to help identify each application. The tables are organized by application status:
- All: Displays a list of all applications.
- Pending: Displays a list of pending applications.
- Approved: Displays a list of all approved applications.
- Change Request: Displays a list of applications requiring changes.
- Rejected: Displays a list of all rejected applications.
- The application lists the key details needed to identify the submitted test center application, including:
- Test Center ID: Displays the unique code assigned for test centers.
- Test Center Name: Displays the name of the test center.
- Test Sites: Displays the name of the test site.
- Email ID: Displays the Email ID of the test site manager.
- Country: Displays the location of the test site.
- State: Displays the location of the test site.
- Submitted By: Displays the name of the person who applied.
- Submission Date: Displays the date the application was submitted.
- Admin: Displays the test site admin name.
- Status: Displays the status of the application from Pending, Approved, Change Request, or Rejected.
- Approved: Displays that the application is accepted and meets all required criteria.
- Pending: Displays the application is awaiting review or further action.
- Actions: Clicking on the view eye icon allows the user to view the detailed application form.
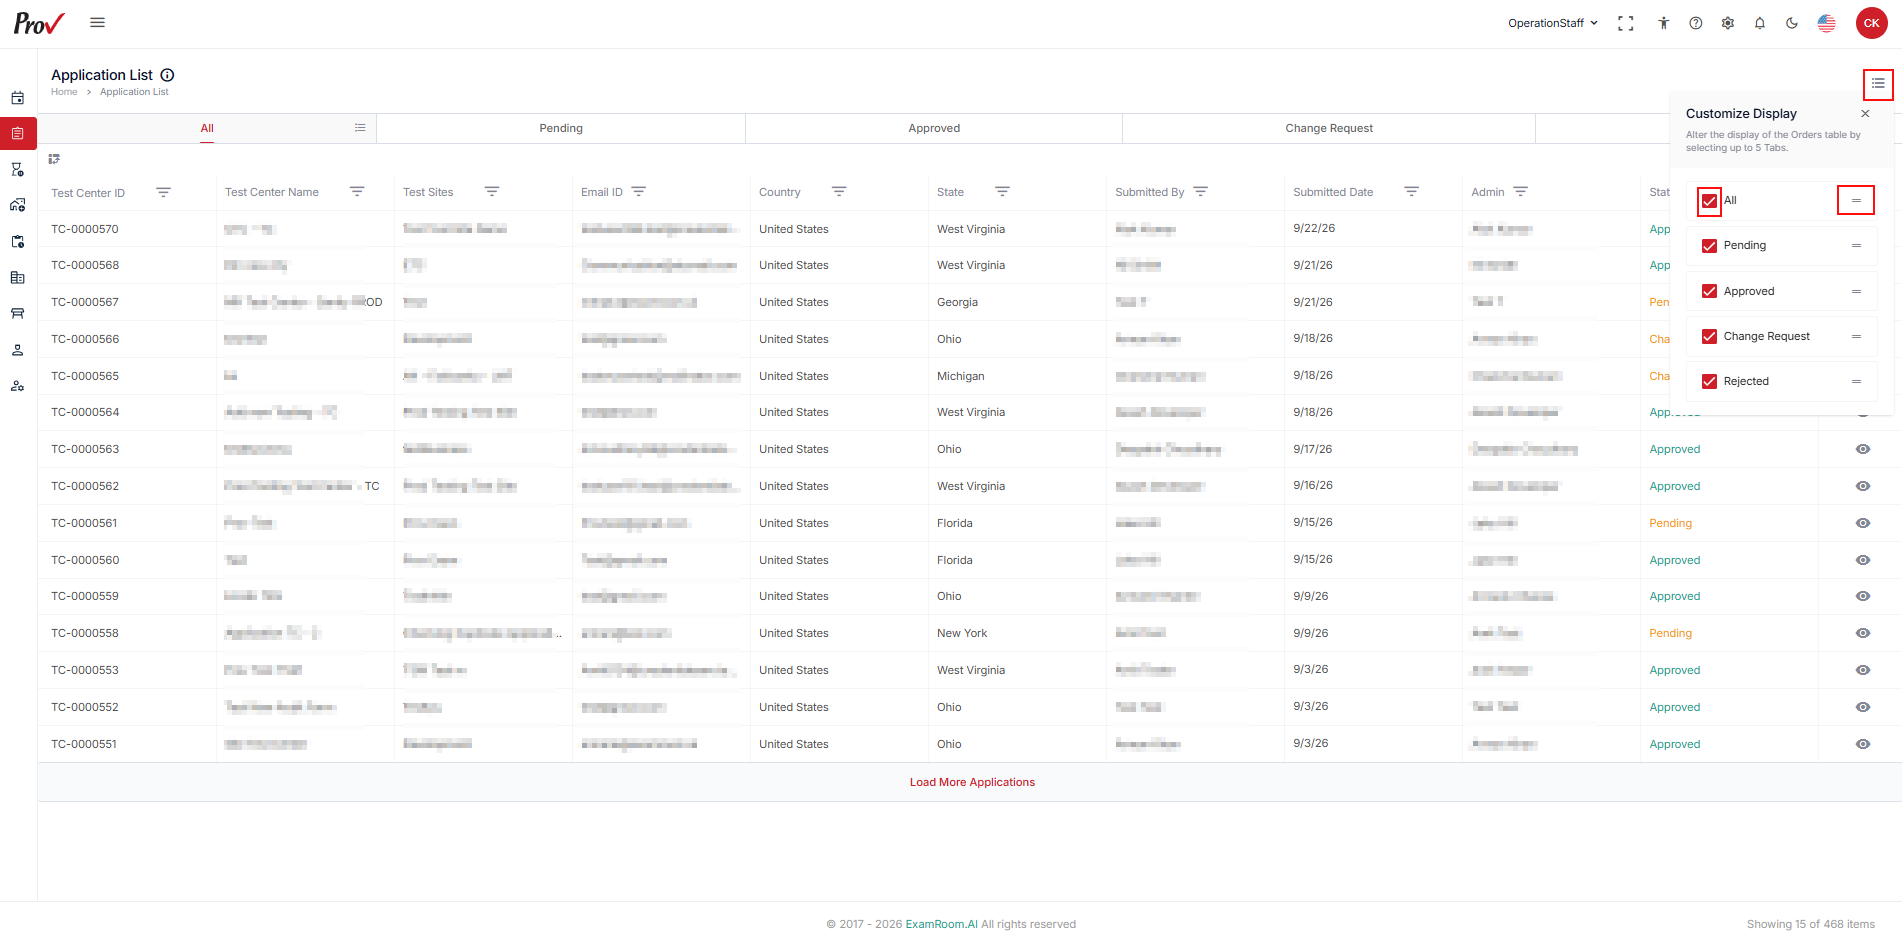
Customize the display of the Application list
You can customize the table and arrange the columns as per your preference by following the steps below to customize the display of the table:
- Click Customization Display and select the required checkboxes to view the respective columns in the table.
- To arrange/rearrange the order of the columns, drag the Drag Icon provided next to each column label.
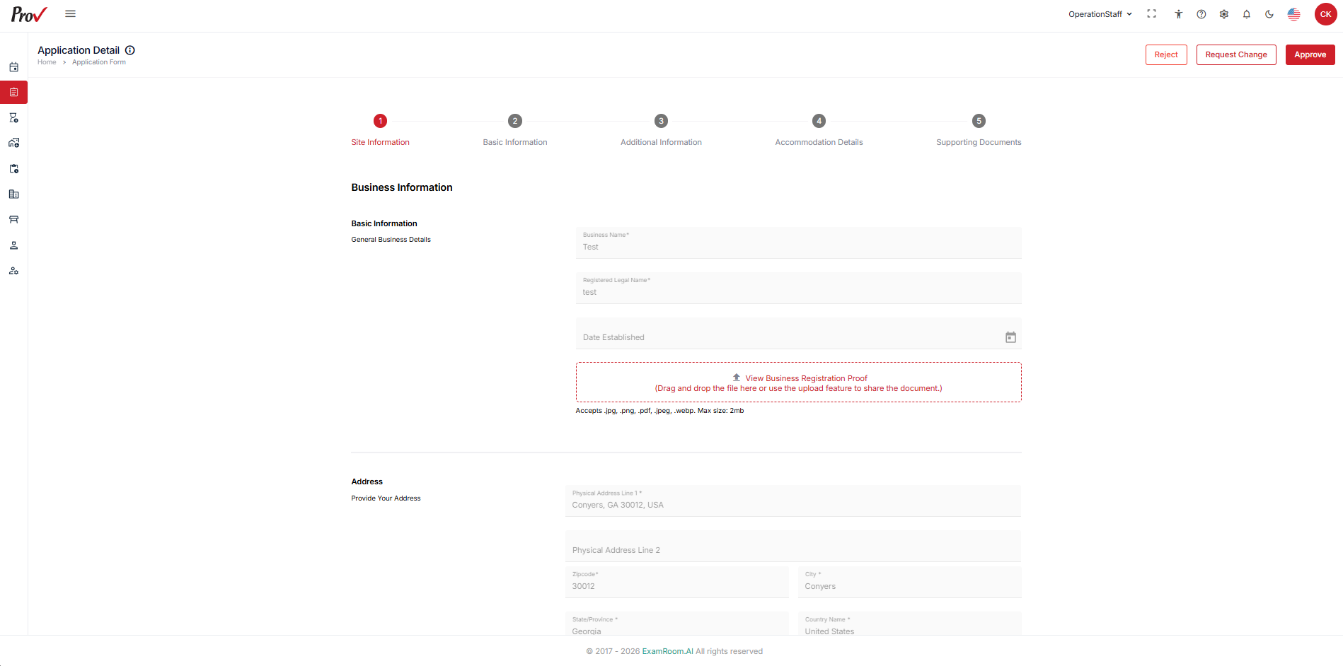
Application Form
Review the submitted application on the Application Details page and take the necessary actions.
Follow the steps below to review the application details.
Site Information
- In the Business Information section, review the official business name and details, along with the full information for the test center.
- Check the basic details and verify the uploaded documents.
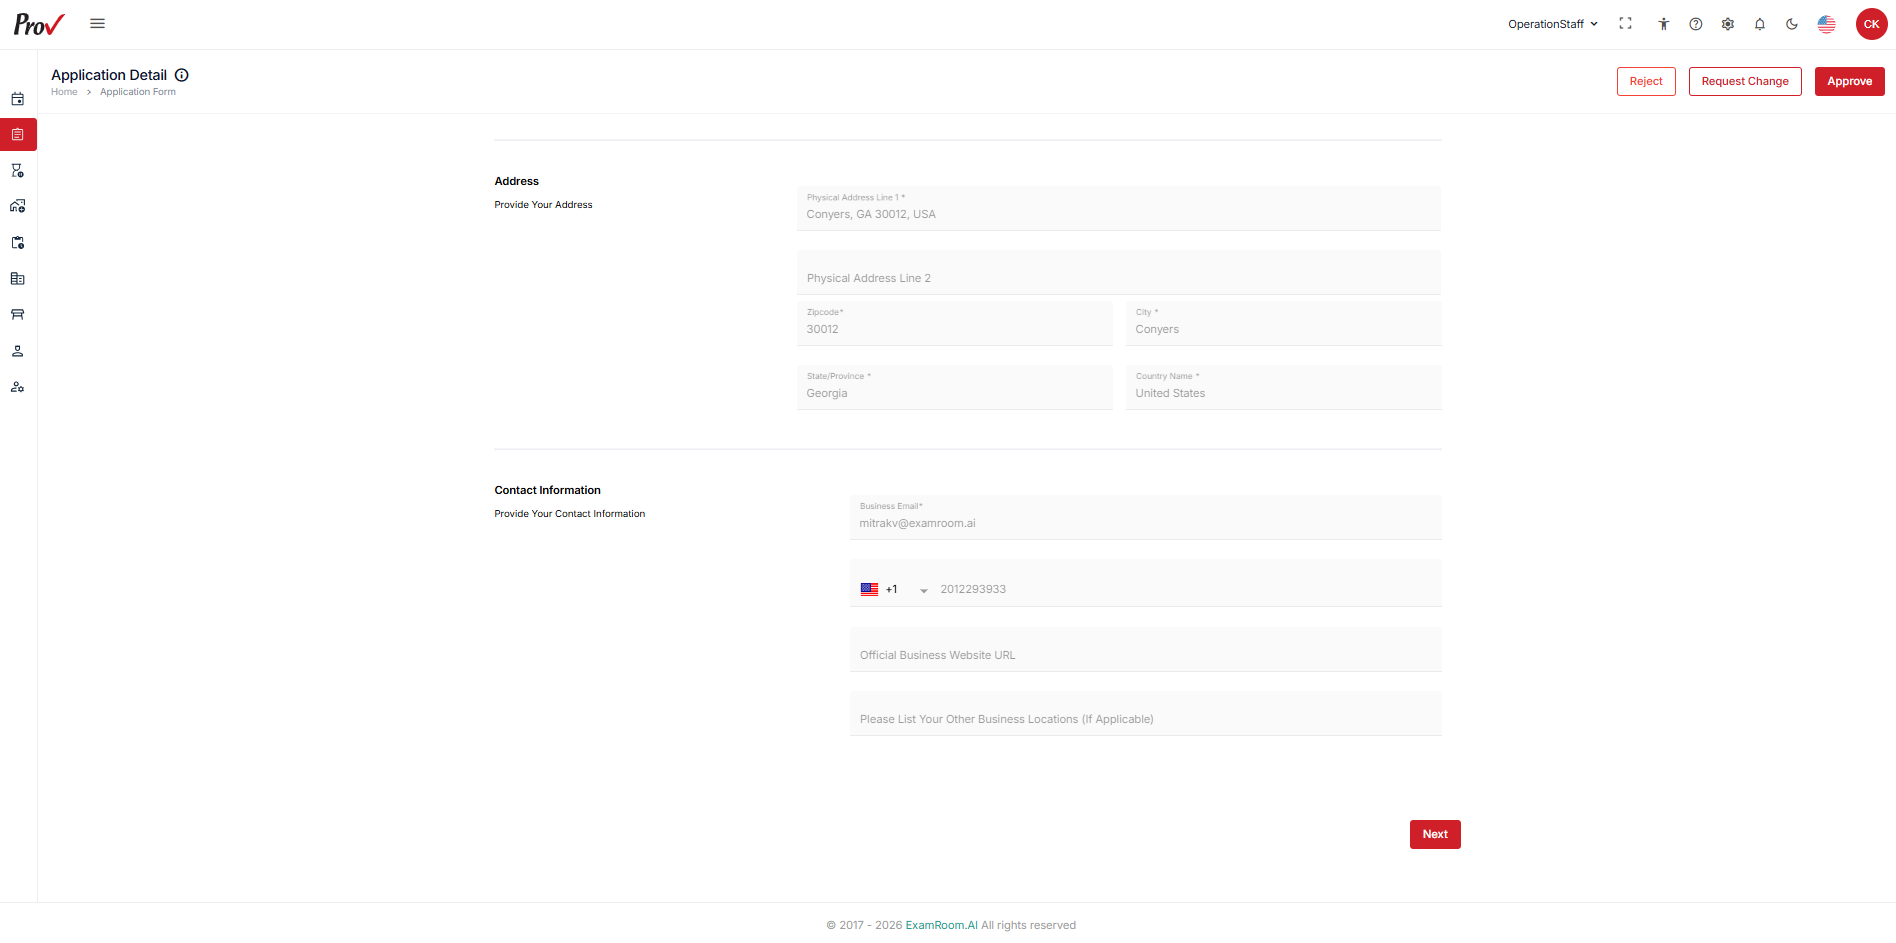
Note: The format and size of the document should be PDF, JPEG, or PNG and no larger than 2 MB. - Verify the full address details in the address information section.
- Review the Contact Information section, ensuring all business contact details are correct.
- Click Next to proceed to the test center Basic Information section page.
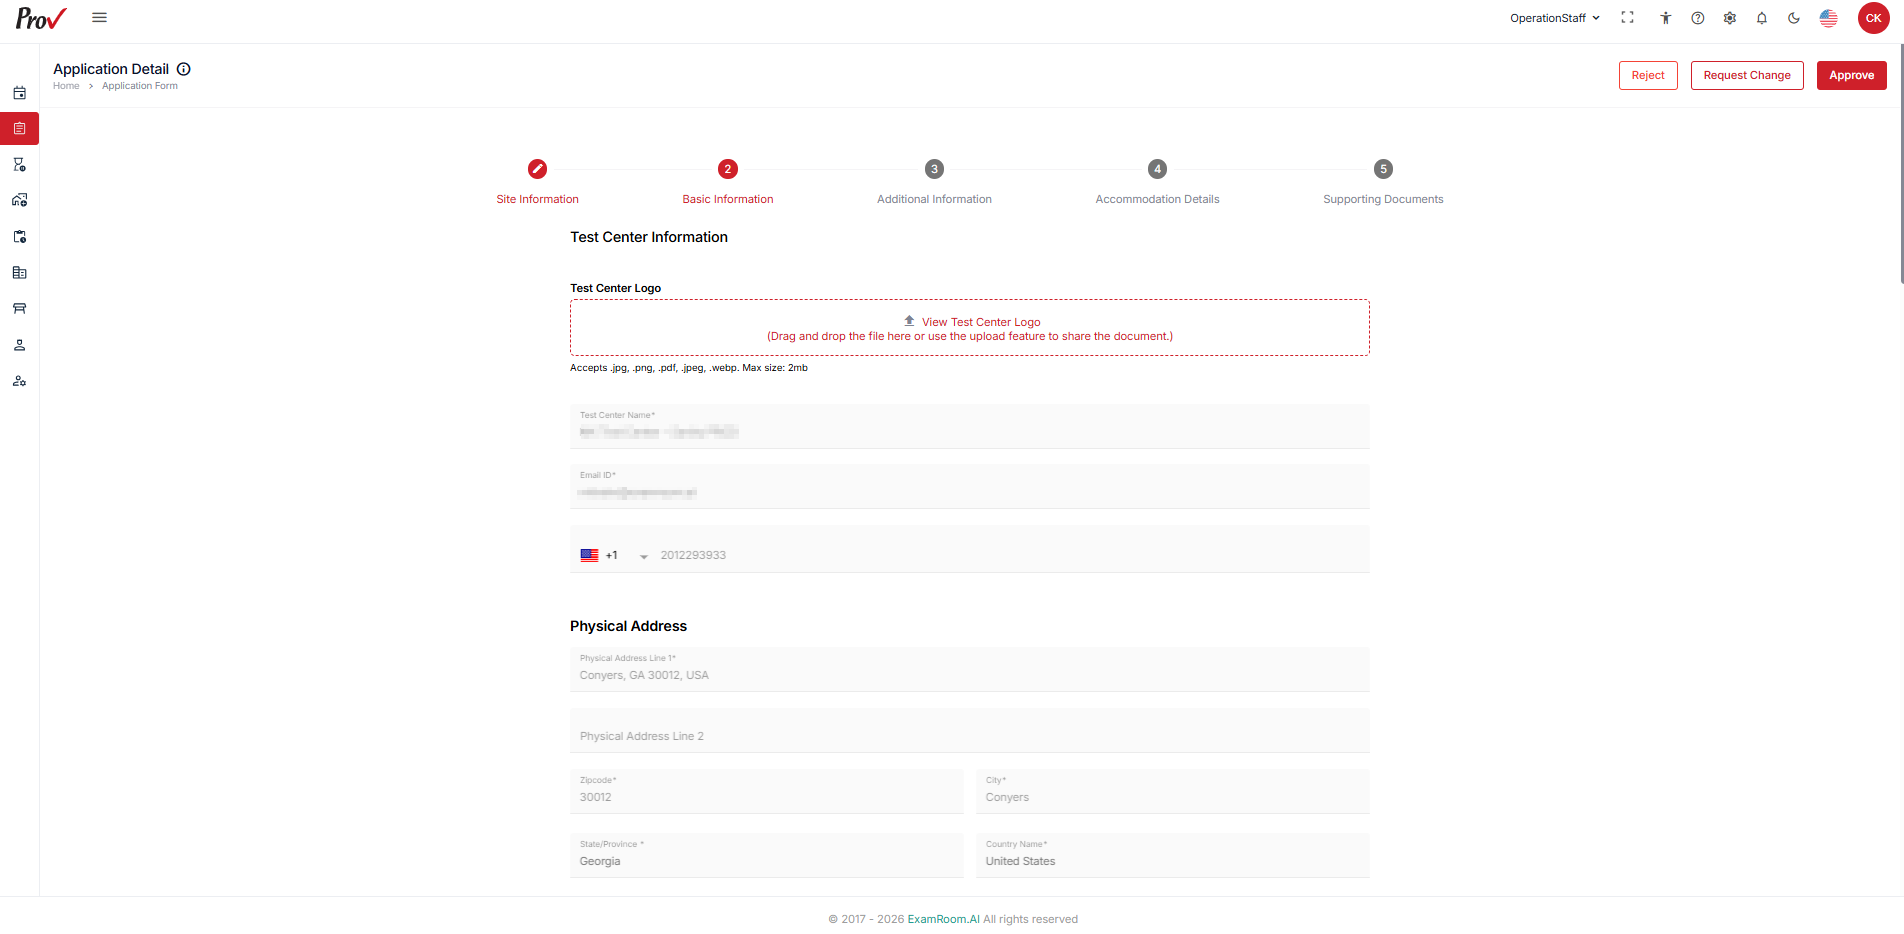
Test Center Information - Basic Information
In the Test Center Information section, verify the submitted details by following these steps.
- Review the Test Center Information section provided about the test center.
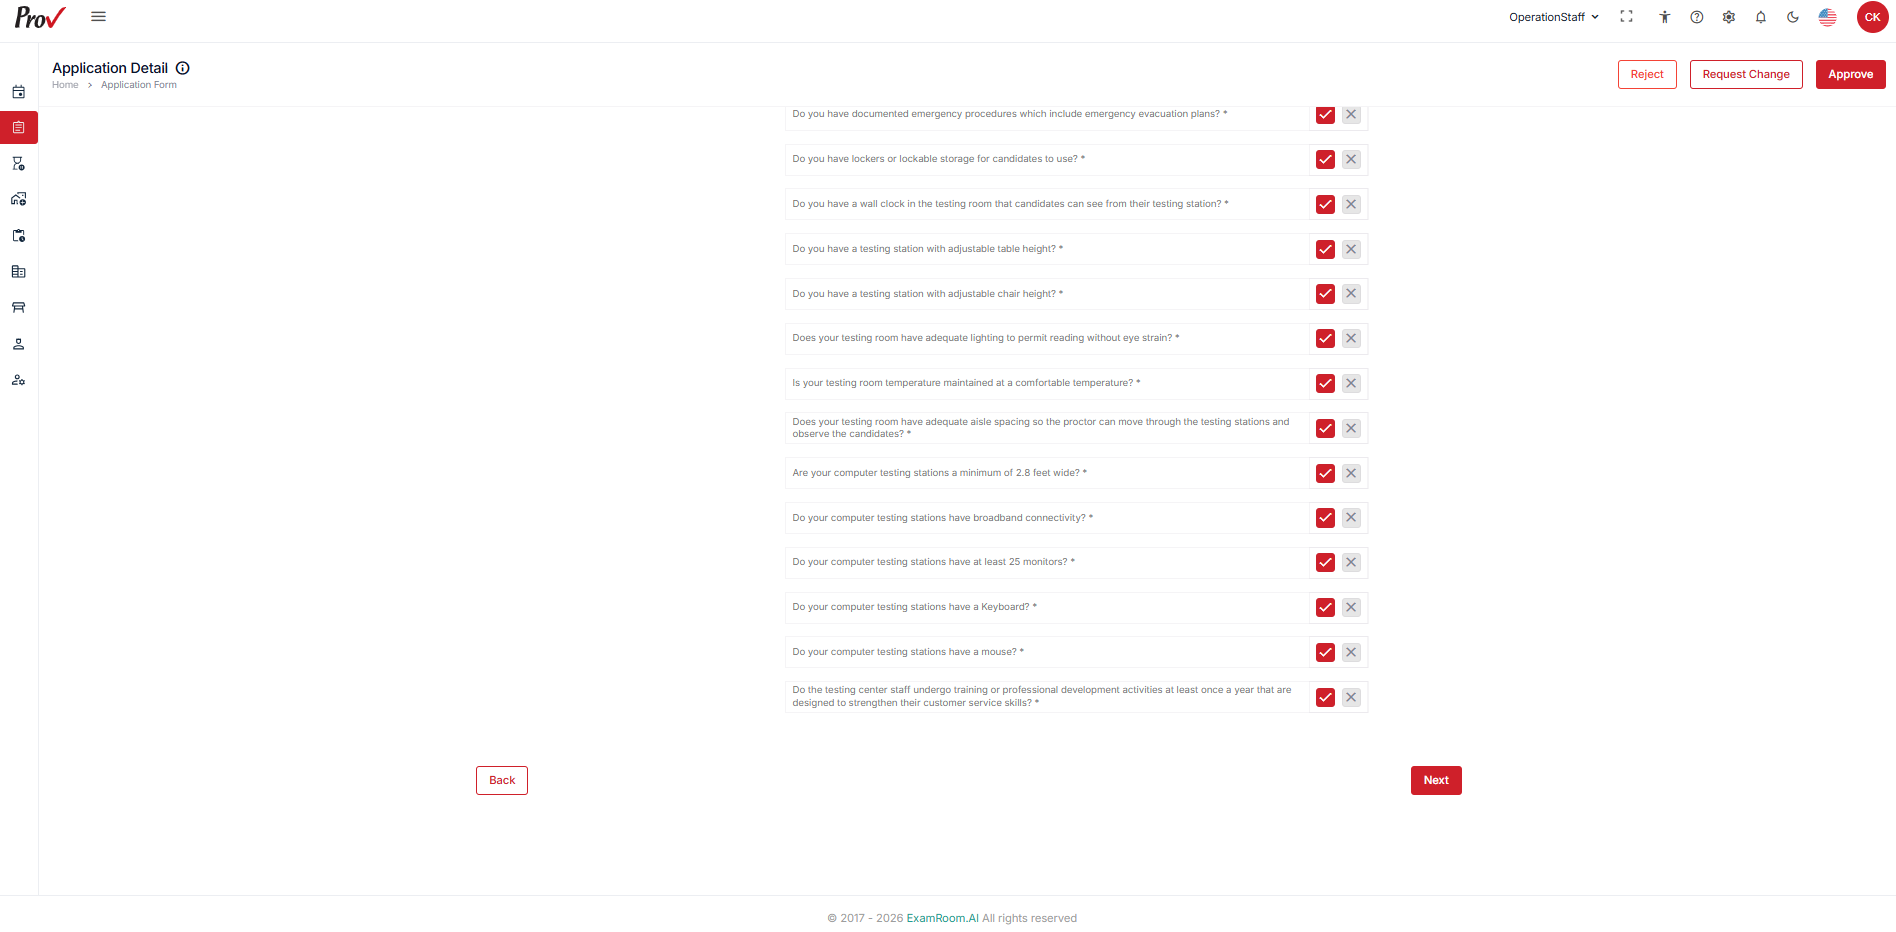
- Review the test center information questions and check the Yes or No checkboxes.
- Click Next to continue to the test center Additional Information section.
- Click Back to go to the Site Information page.
- Click Back to go to the Site Information page.
Additional Information
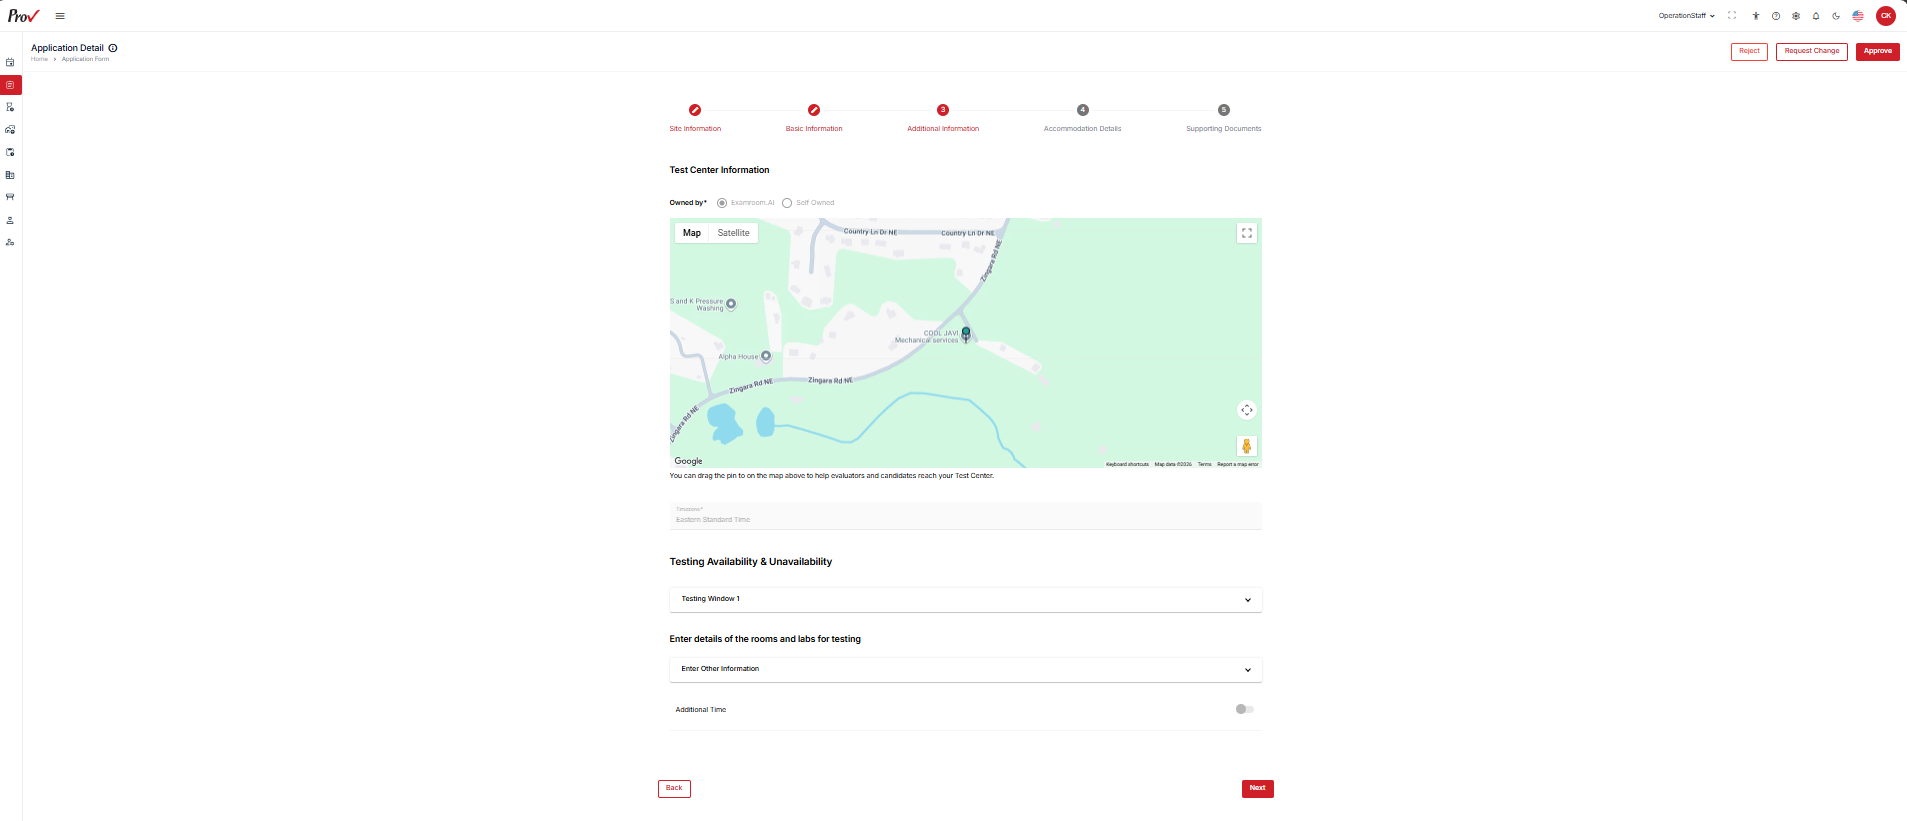
- Review the required details in the Test Center Information section.
- The operations staff will be able to access the form submitted by the Site Manager, review the application, and view both available and unavailable date and time ranges for scheduling
- Click Next to proceed to the Accommodation section page.
- Click Back to return to the Basic Information section.
- Click Back to return to the Basic Information section.
Accommodation
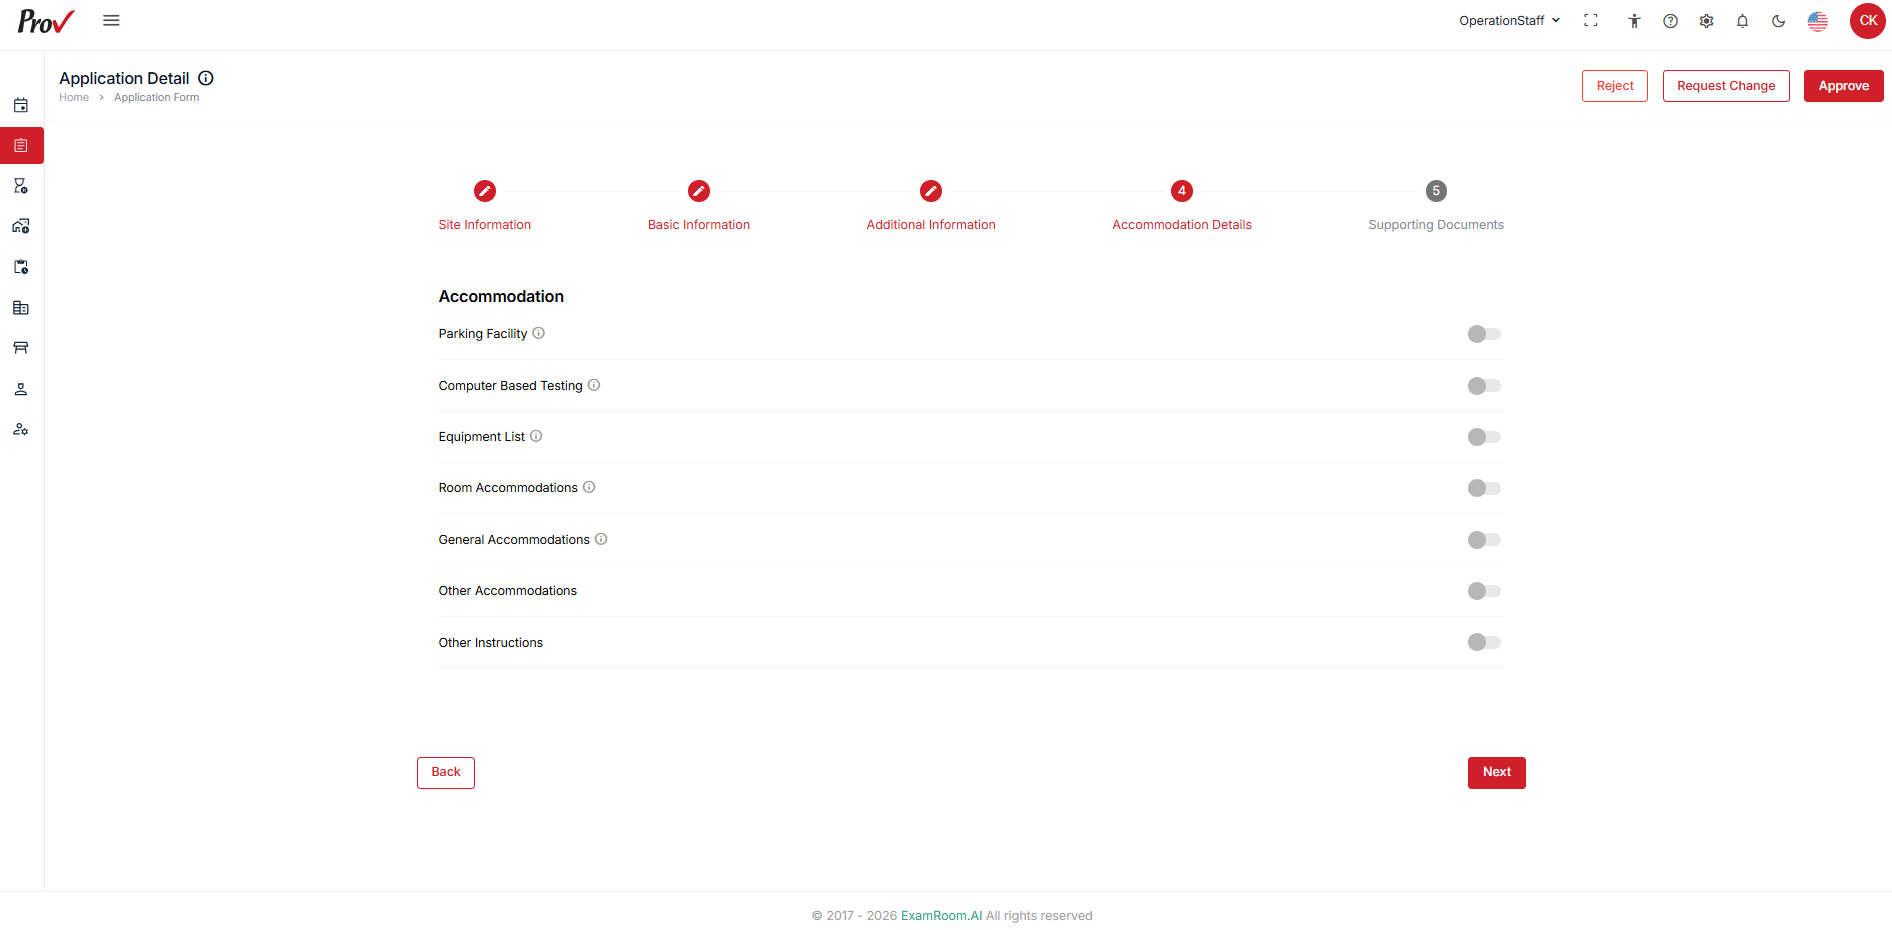
- In Accommodation, review the options and check the toggle buttons.
- Click Next to proceed to the Supporting Documents section page.
- Click Back to return to the availability and planned unavailability of the Test Center.
- Click Back to return to the availability and planned unavailability of the Test Center.
Supporting Documents
- Review and verify the uploaded supporting documents.
- Click Back to go back to the previous step.
- Click Back to go back to the previous step.
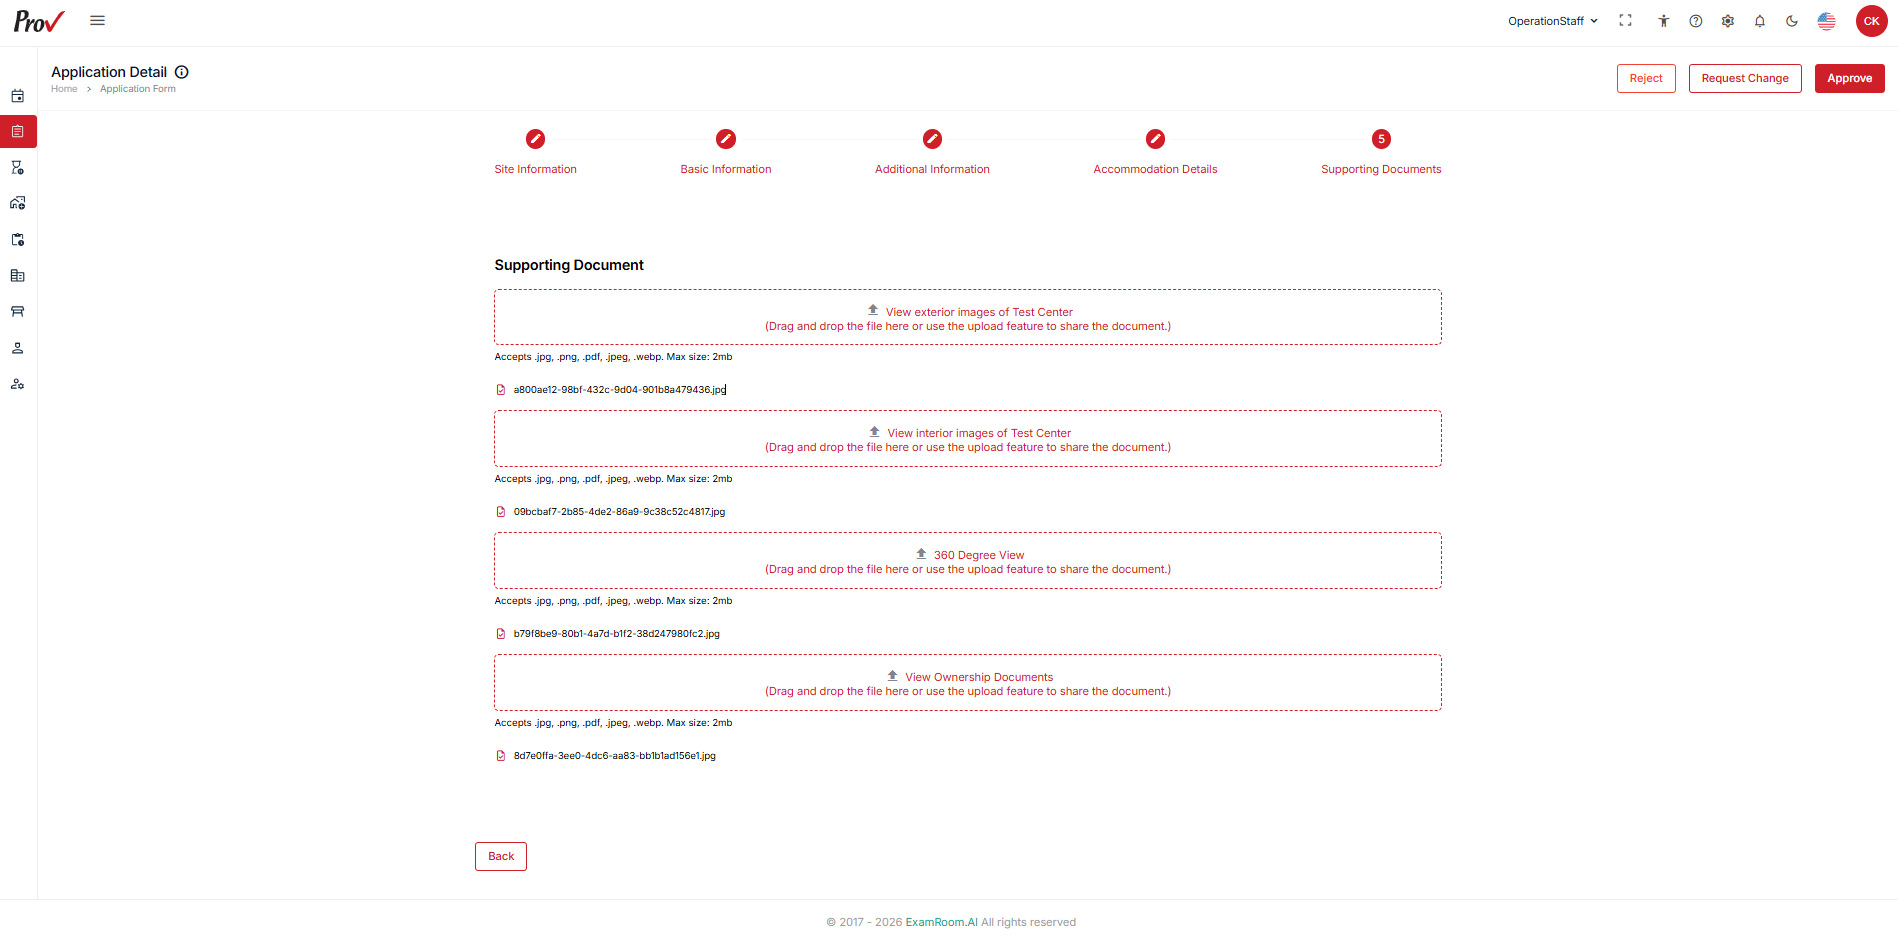
In the top-right corner of the screen, you can select one of three options.
- Click on Reject to deny the application if it does not meet the required criteria or standards.
- Click on Request Change to ask the applicant to make specific modifications to improve their application submission.
- Click on Approve to accept the application when it satisfies all requirements and meets our standards for enrollment, and a confirmation pop-up notification appears.
- Click Yes to approve the application form.
- Click No to remain on the current page without changes.
Note: A pop-up message appears as confirmation that the application form is approved successfully.
- Click No to remain on the current page without changes.
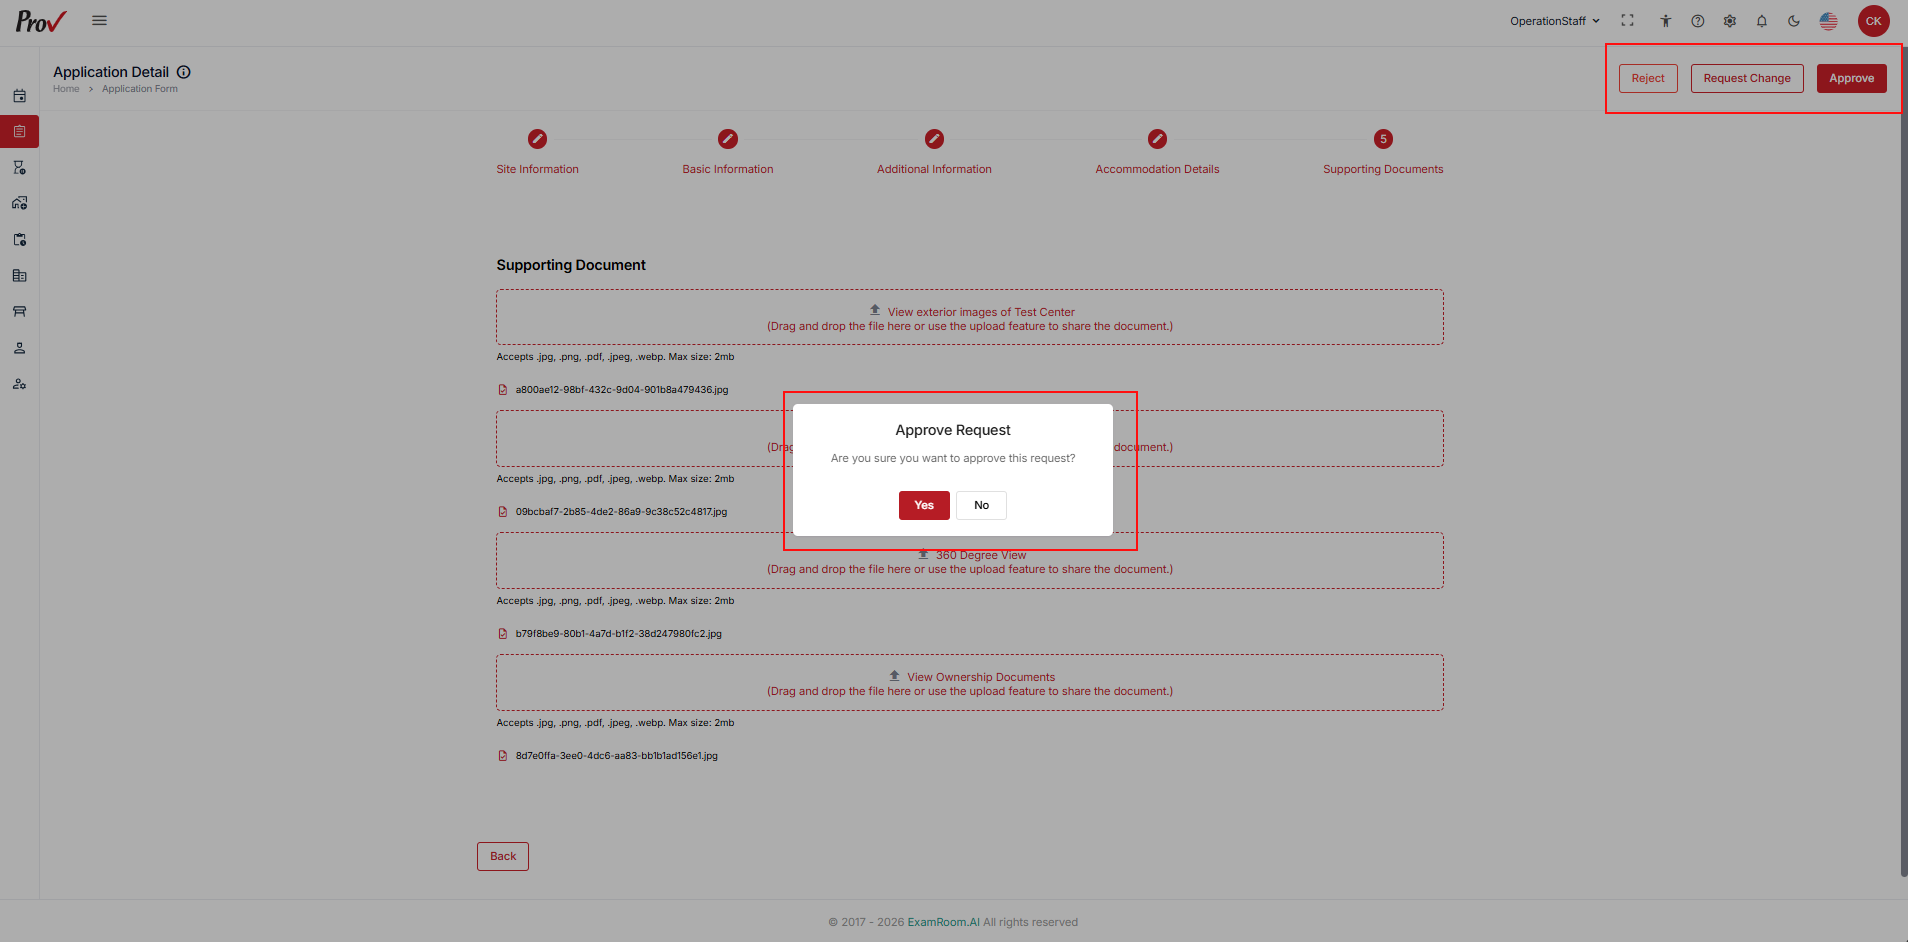
Note: The application form status may be approved, rejected, or returned for changes.
- Based on the approval, the Site Manager can assess the status of the application.
- Once approved, Site Managers can proceed to fill in the initial self-audit for the test center.