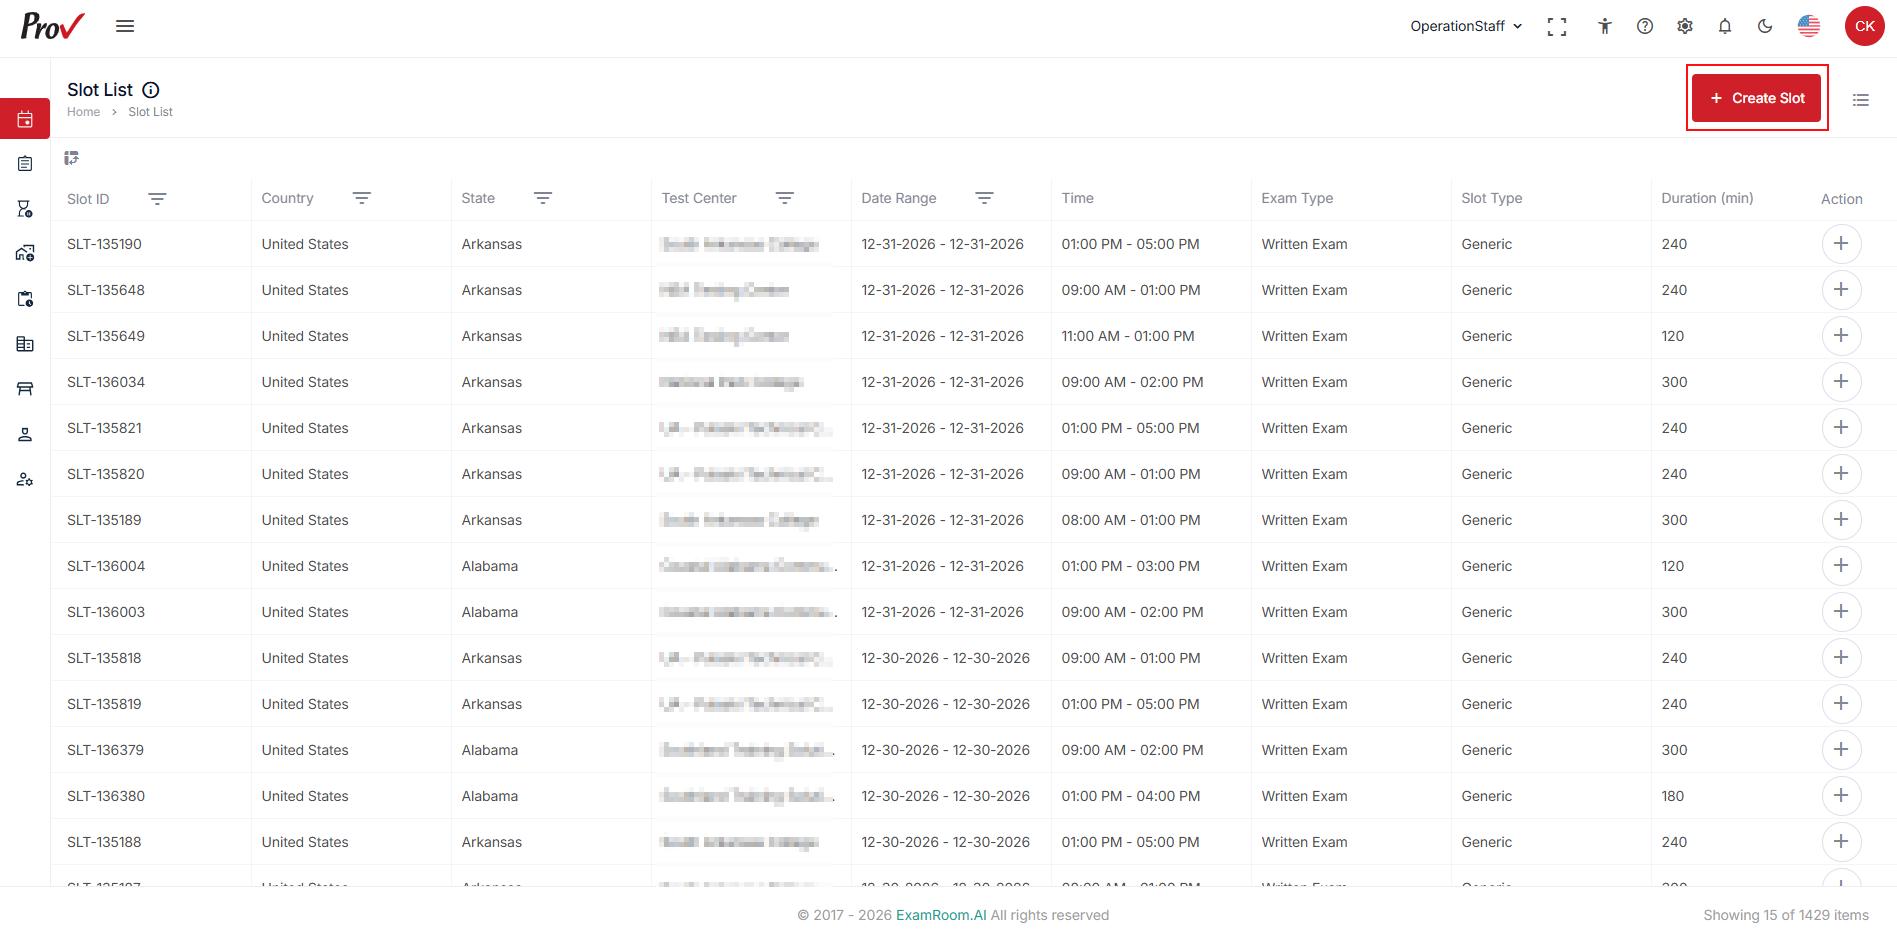
Create Slots
Seamlessly add new slots and make them available for scheduling after approval.
To create a new slot, click the Create Slot button in the top-right corner.
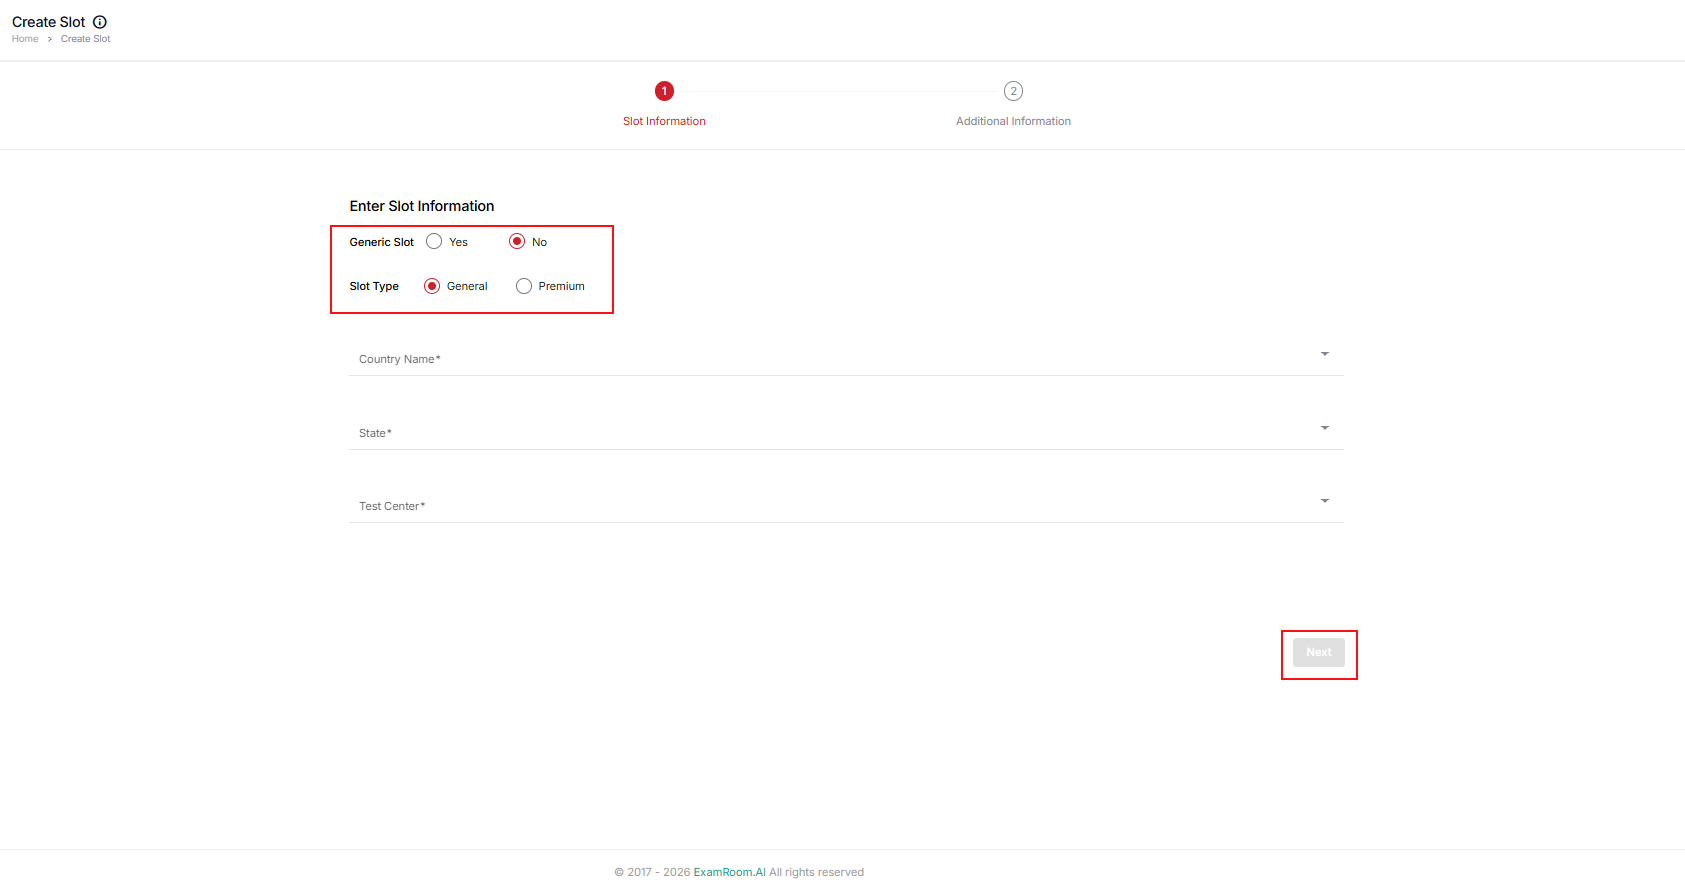
Slot Information
Enter the slot information. Follow the steps below:
- Select whether the slot you want to create is under a generic slot or any exam/client specific, if yes, select Yes. Or select No.
- Select the Slot Type, General or Premium, from the radio icon.
Note: To create a slot specific to the, choose the Premium option; otherwise, proceed with the General option. - Choose the Country and State from the drop-down menu.
- Based on the previous selections, you will then be able to pick the appropriate Test Center from the corresponding drop-down menu.
- Click Next to proceed to the following step.
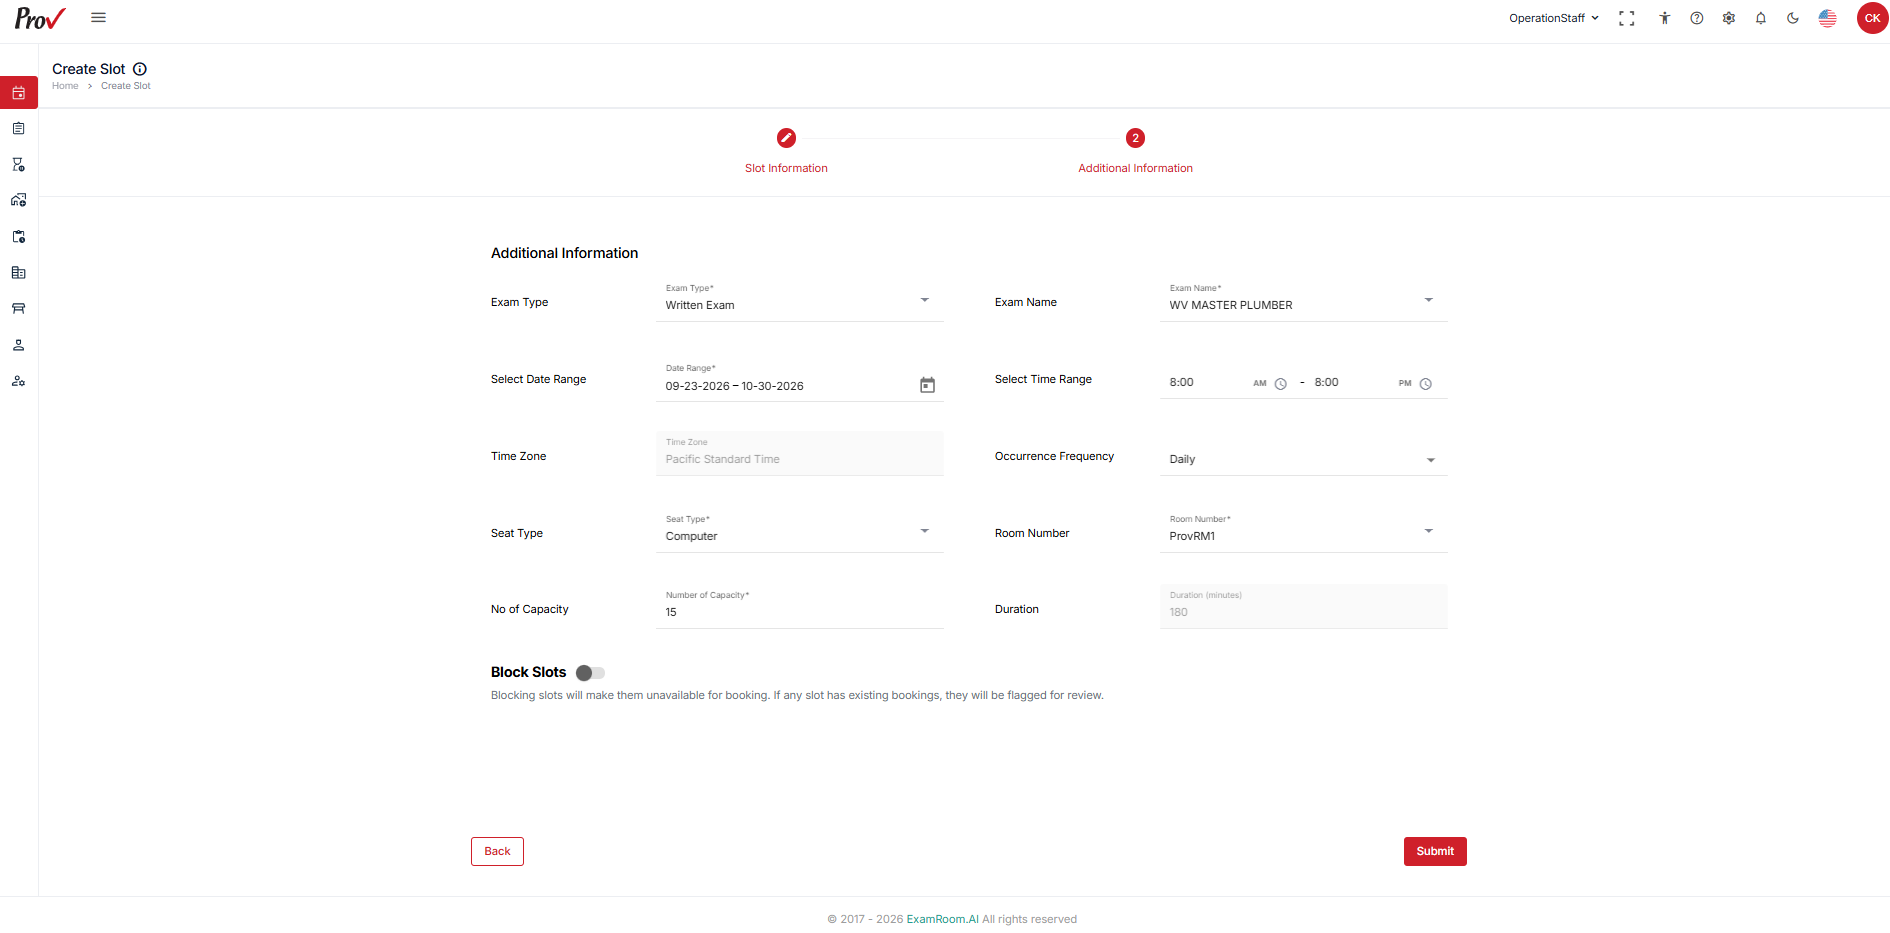
Additional Information
Add additional information to publish the slot. Follow the steps below.
- Exam Type: Select the exam type from the dropdown menu for which the slot is being created.
- Exam Name: Select the exam name from the dropdown menu. The list that appears is based on the exam type you have selected.
- Select the Date Range: Choose the date range during which the slot will be available. For a one-day slot, select the same date twice.
- Click the Calendar icon and choose the start and end dates by clicking the dates in the calendar.
- Select Time Range: Click to choose the start and end times for when the slot will be available.
- Time Zone: The time zone is automatically displayed based on the selected test center details.
- Occurrence Frequency: Decide on the occurrence frequency:
- Daily: The slot will be available on the specified date and time range.
- Weekly: The slot will be available on the chosen days of the week within the selected date range.
- Monthly: You can select specific dates or limit availability to certain weeks and weekdays within the chosen range.
- Seat Type: Under the seat type section, select either the “Computer” or “Paper Pencil” option.
- Room Number: Select the room number/name from the drop-down menu.
- No. of Capacity: Input the total number of seats you want to include in this slot.
Once all necessary information is entered, click the Submit button to save and publish the slot.