Slot Management
The Slot Management section allows you to manage test slots for candidates efficiently. Below are step-by-step instructions on how to view, manage, create, modify, and cancel slots to ensure smooth scheduling for exams.
Manage Slots List
Once the slots are created, you will be able to view them in the Slot Management section. Follow the steps below to manage the slots.
- Navigate to the left-side menu and select Slot Management.
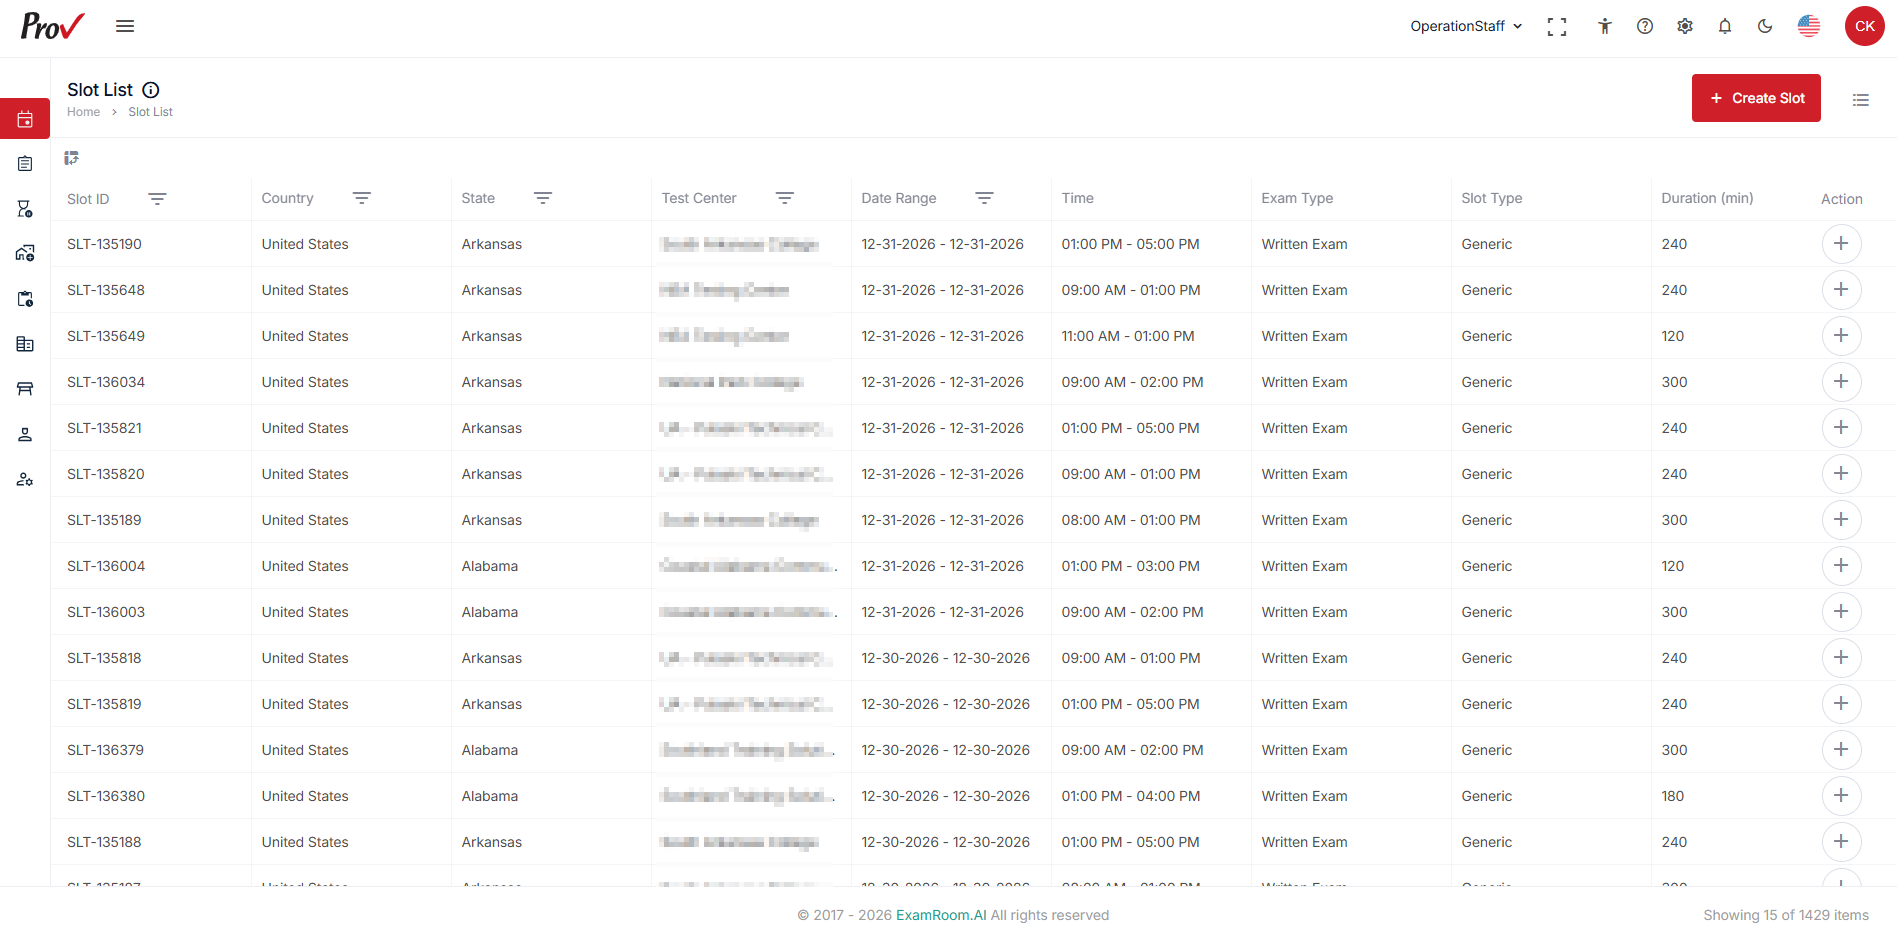
- In the Slot List section, all the created slots are displayed in a table format with the complete information:
- Slot ID: Displays the unique ID assigned to every test center.
- Country: Displays the location of the test site.
- State: Displays the state of the test site.
- Test Center: Displays the name of the test center.
- Date Range: Displays the duration of the slot.
- Time: Displays the scheduled time of the slot
- Exam Type: Displays the exam category.
- Slot Type: Displays the slot category
- Duration: Displays the total time of the slot.
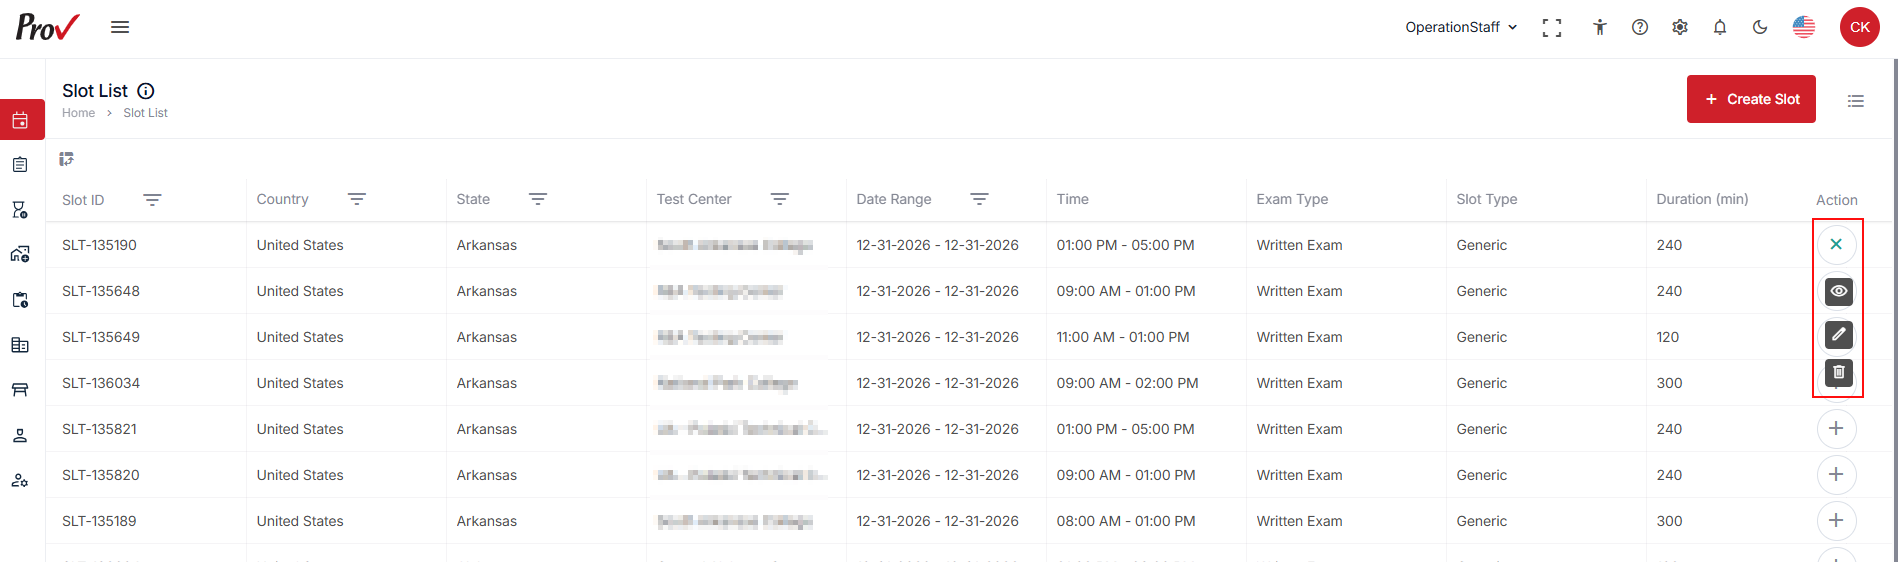
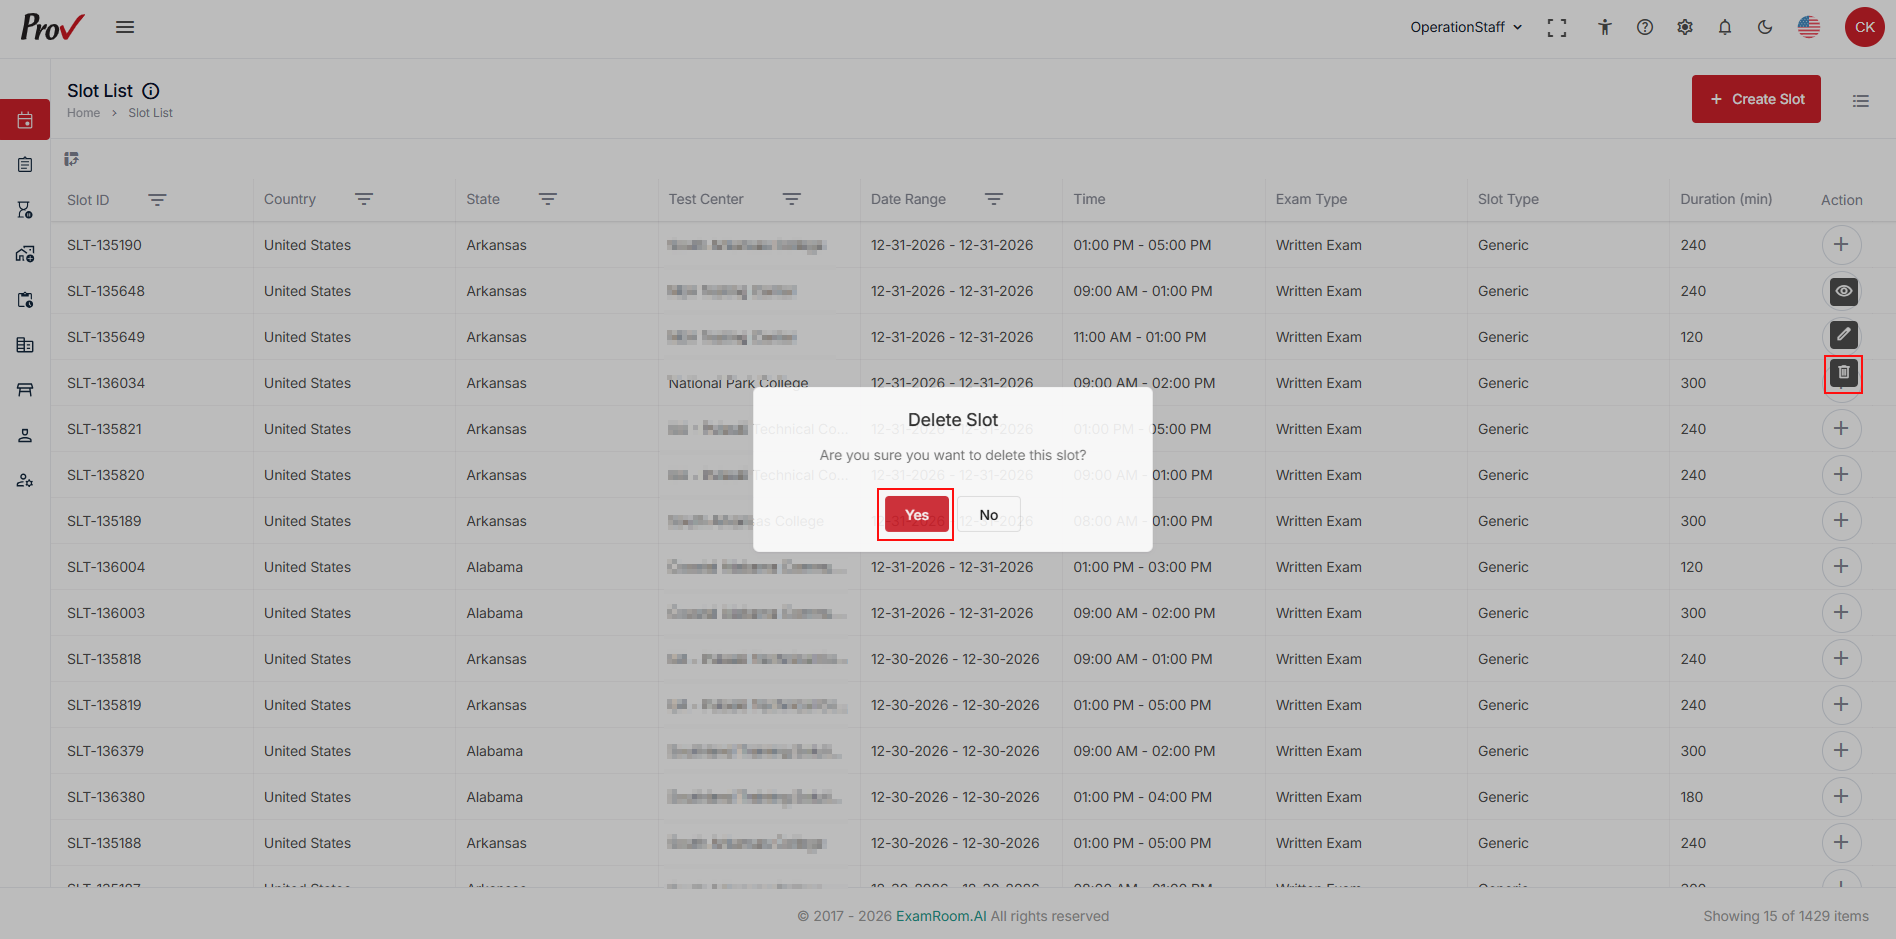
- Actions: Clicking on the plus icon allows the user to view, edit, and delete the slot.
Action Icon
Select the Plus icon in the Action column to display options for viewing, editing, and deleting the created slots.
Follow the steps below:
- Click the Plus icon.
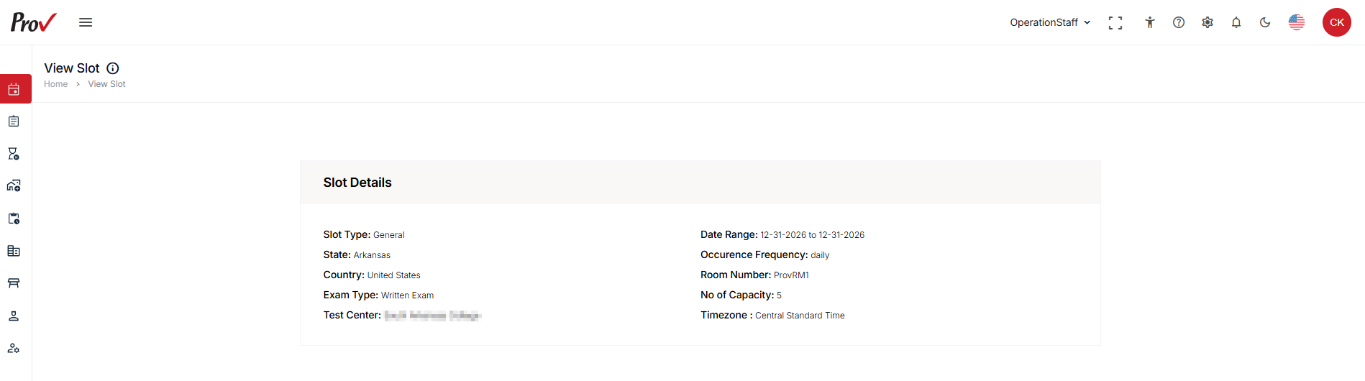
- Click the View icon to view the slot information.
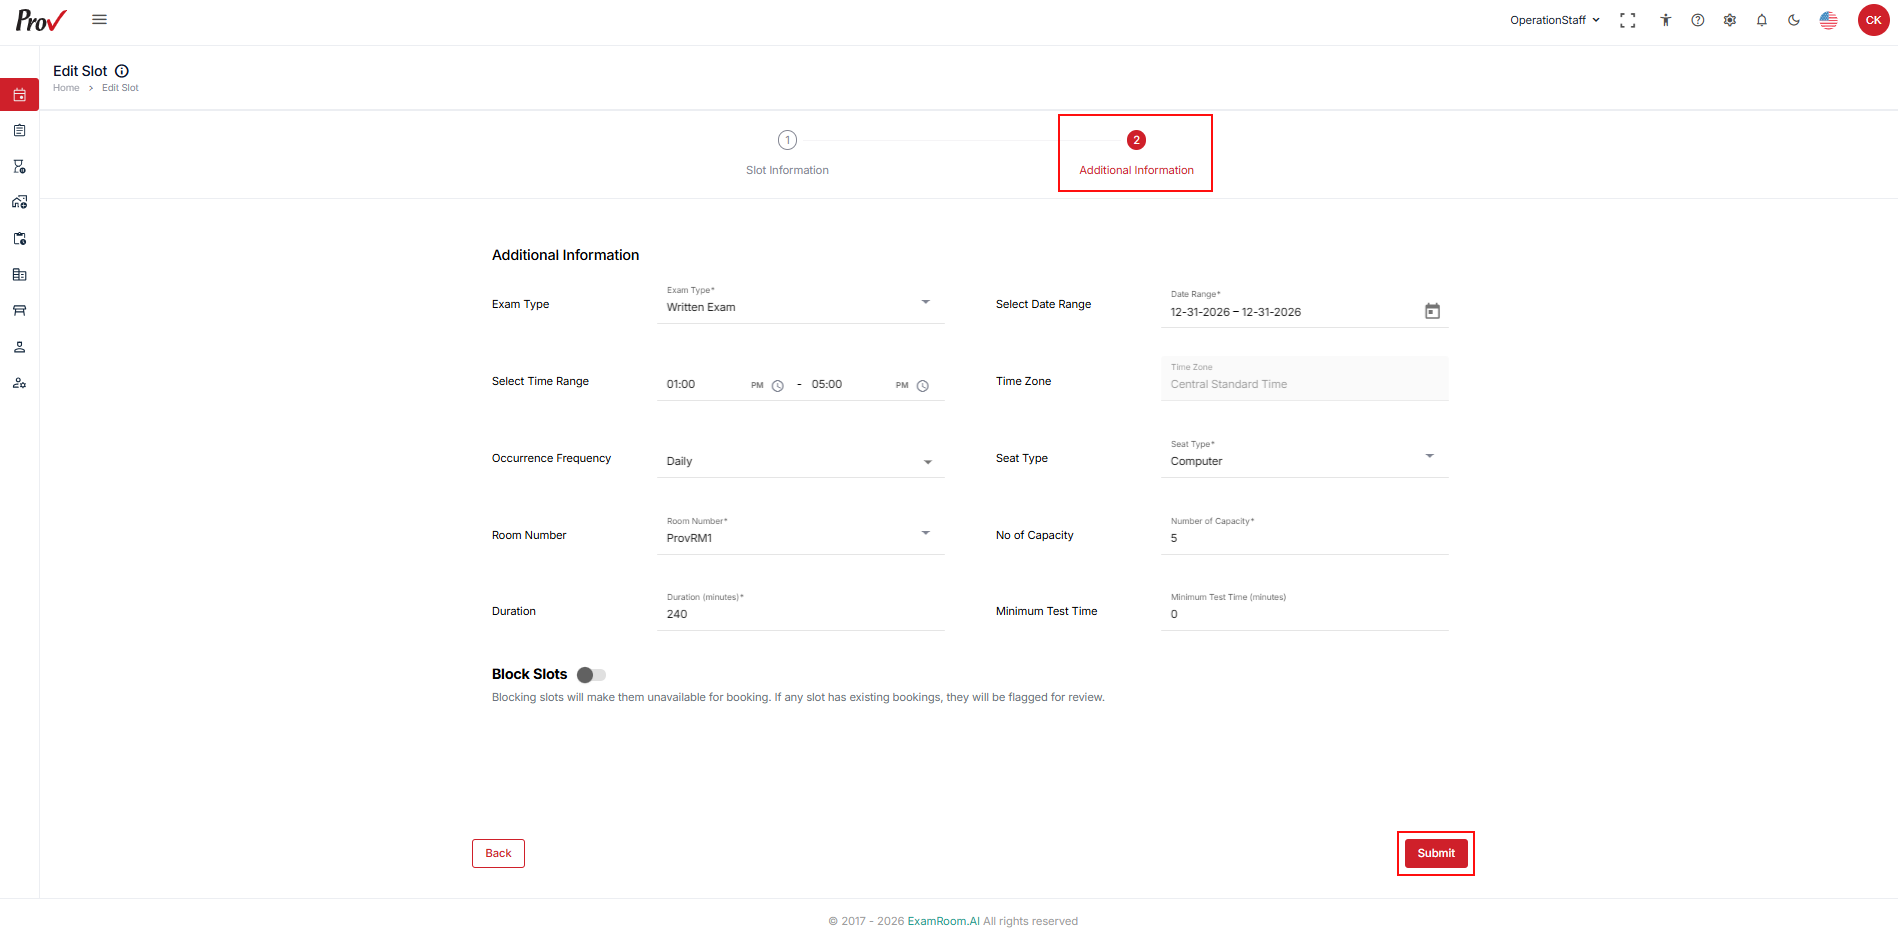
- Click the Edit icon to edit or update the slot details.
Note: Editing is restricted to the Additional Information section only. - Click the Delete icon to delete the slot.
Note: A pop-up will appear for confirmation to delete the slot. Click Yes to delete the slot; click No to cancel.
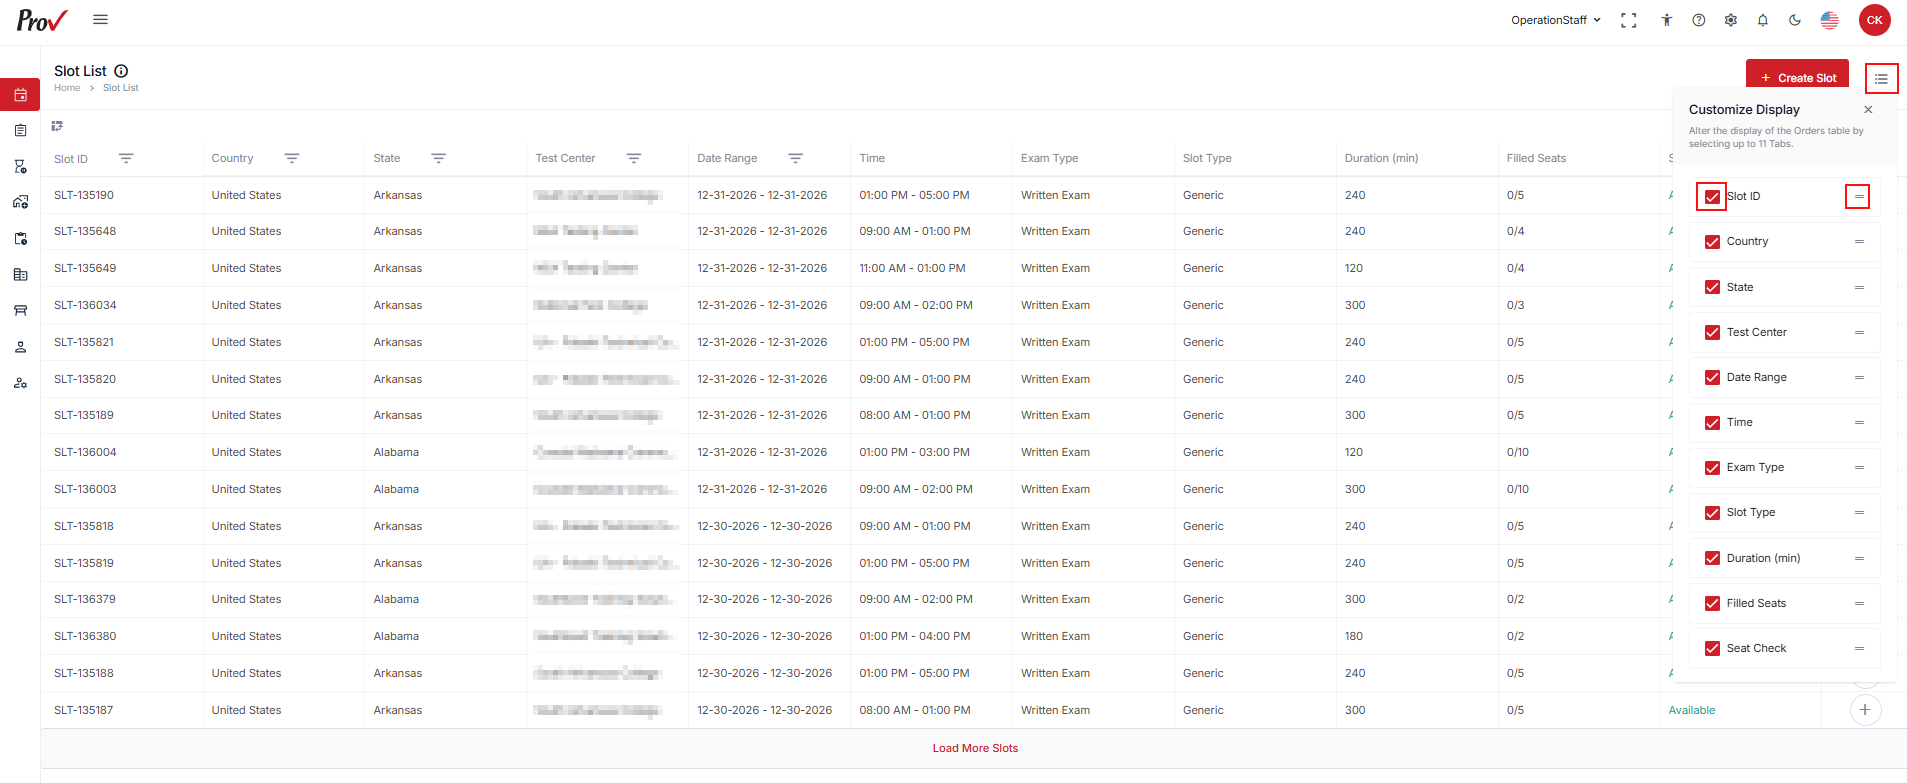
Customize Display of the Slot List
You can customize the table and arrange the columns as per your preference by following the steps below to customize the display of the table:
- Click Customization Display and select the required checkboxes to view the respective columns in the table.
- To arrange/rearrange the order of the columns, drag the Drag Icon provided next to each column label.