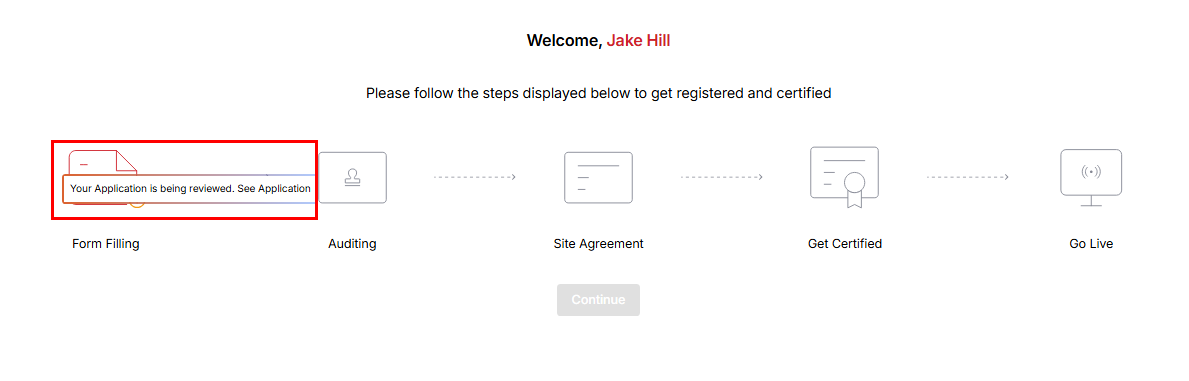
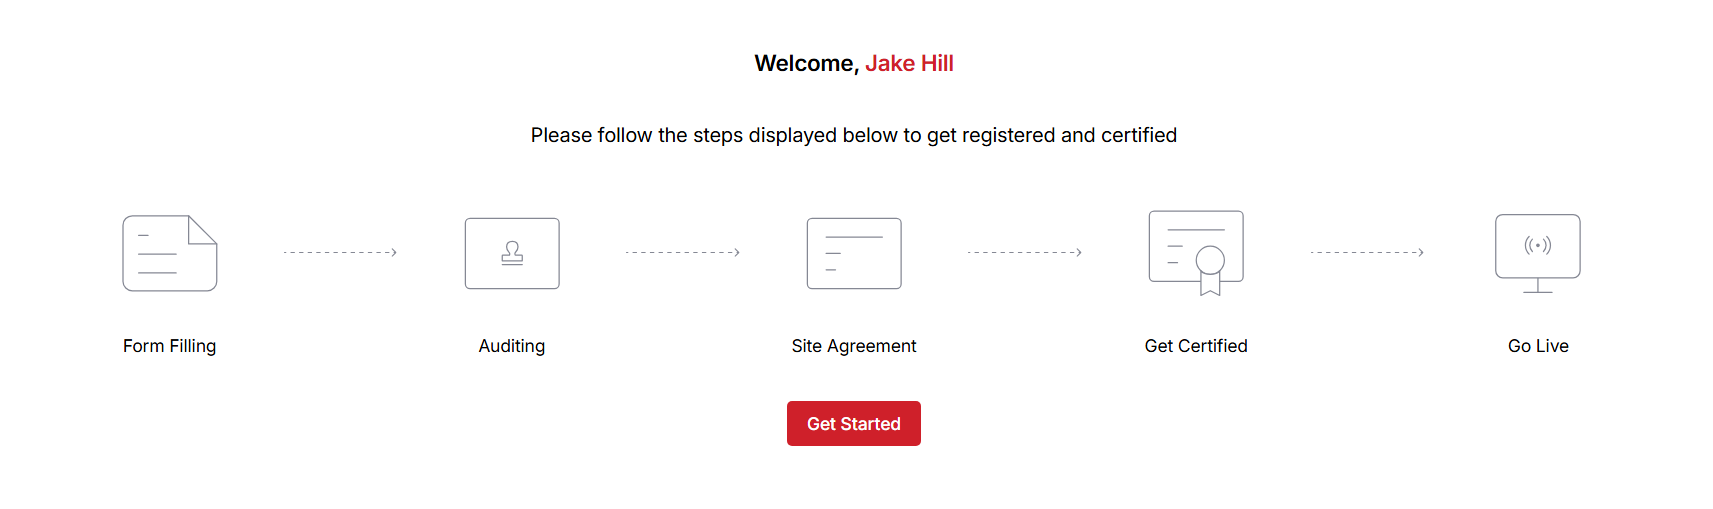
Form Filling – Submit Onboarding Application
Click Get Started to submit your application by filling out the form in the onboarding dashboard, which is necessary to proceed. The Application form contains several steps to gather all the required information for onboarding.
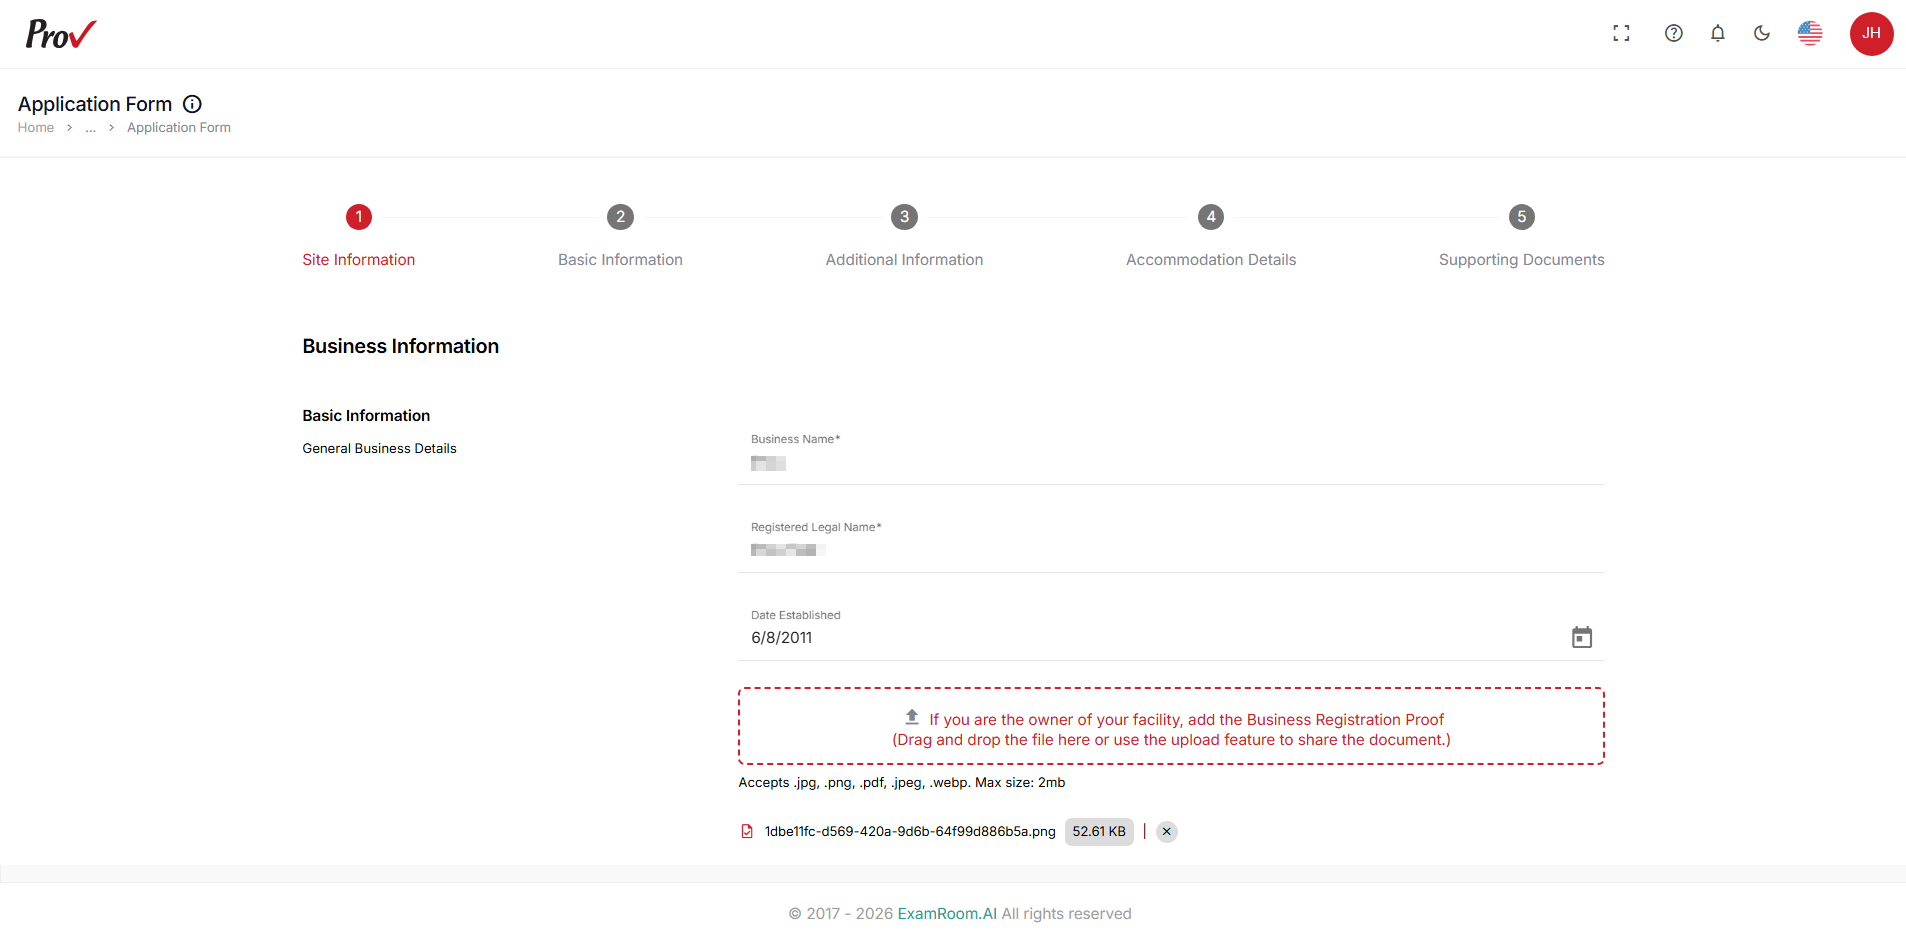
Step 1: Site Information – Provide the Business Information
The First step is to fill in the Site information, including basic information, address, and contact details.
- Fill out all mandatory information fields like Business Name, Registered Legal Name, and Date Established.
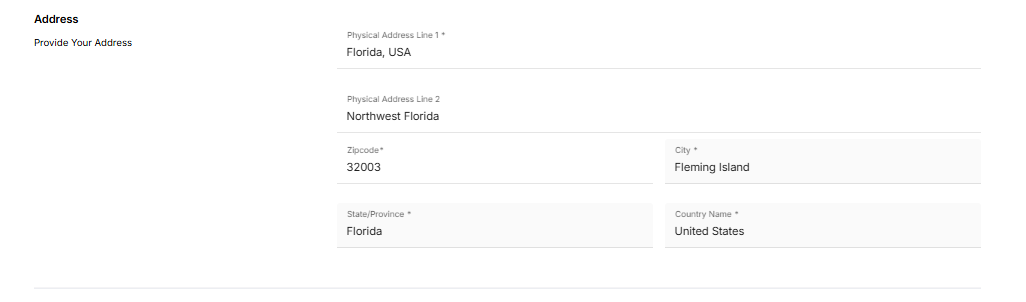
Note: If applicable, please upload Business Registration Proof with a maximum file size of 2 MB. (Acceptable file types are .JPG, .PNG, .PDF, .JPEG, and .WEBP) - Fill out the test site address information in the provided physical address field.
Note: Use Full Physical Address Line 2, if necessary.
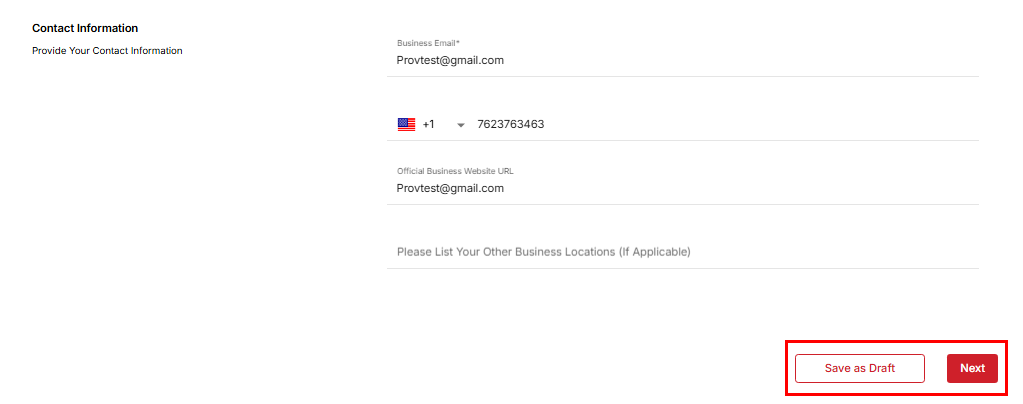
- In Contact Information, fill out the mandatory details like Business Email and Phone Number. Also, you may fill in the Business Official Website URL and Other Business Locations if applicable.
- Once you've entered all the required information, click Next to move forward or select Save as Draft to save your progress and resume later.
Step 2: Basic Information – Provide Test Center Information
In the following steps, enter your Test Center Information, including details about the Test Center, Address, and respond to the related questions. Note: You can add additional test centers after completing onboarding with one.
- In the Test Center Information section, complete all mandatory fields:
- You can upload the Test Center logo if you have one.
- Click the option to “Upload Test Center logo”.
- Select the logo from your local device in the pop-up window and ensure the file size does not exceed 2 MB.
- You may also use the drag-and-drop option to upload the logo.
- You can upload the Test Center logo if you have one.
- The Email ID and Phone Number are automatically populated using the details provided in the initial site information. If you have a specific email or phone number for the test center you’re adding, you can modify it as needed.
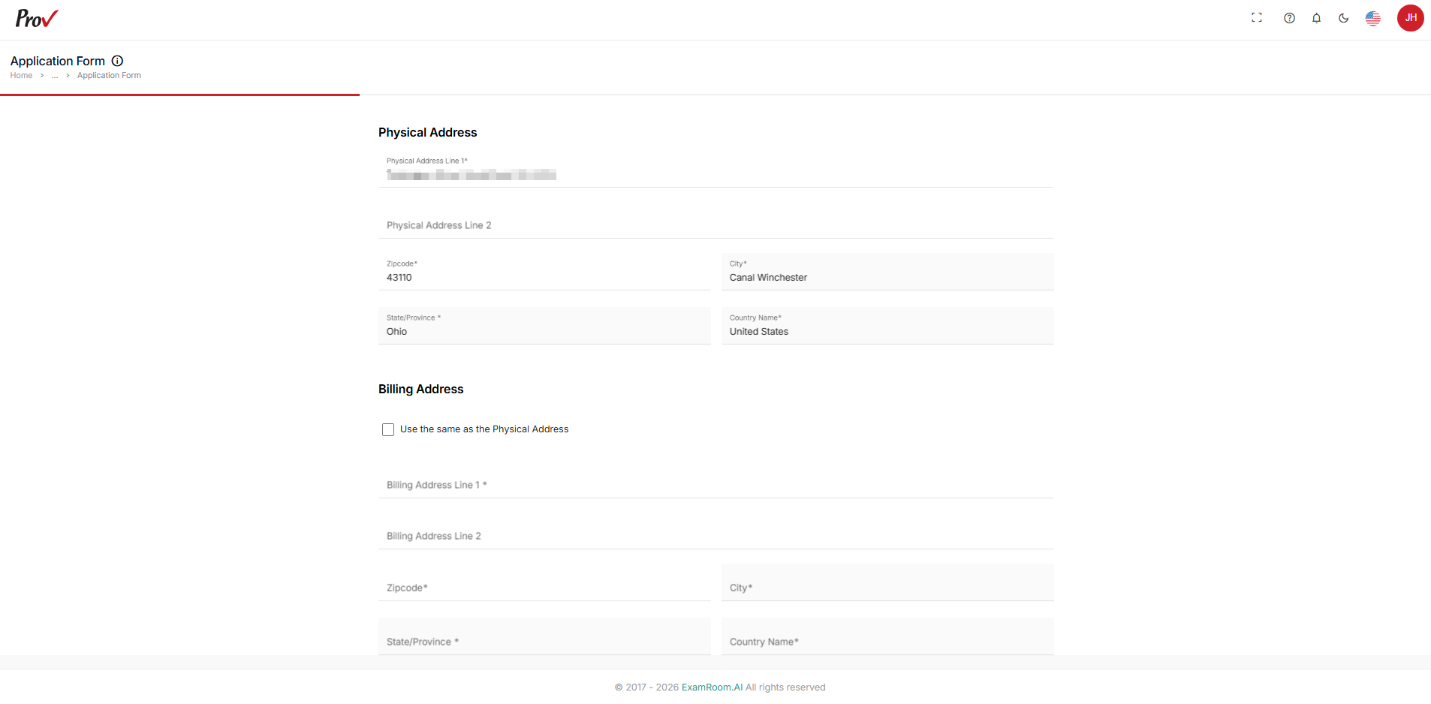
- Verify or update the physical address of the test center. This field is automatically populated using the details provided in the initial site information. If the address for the test center you are adding is different, you can modify it as needed.
- In the billing address section, enter your billing address, or if it matches your physical address, check the box and continue.
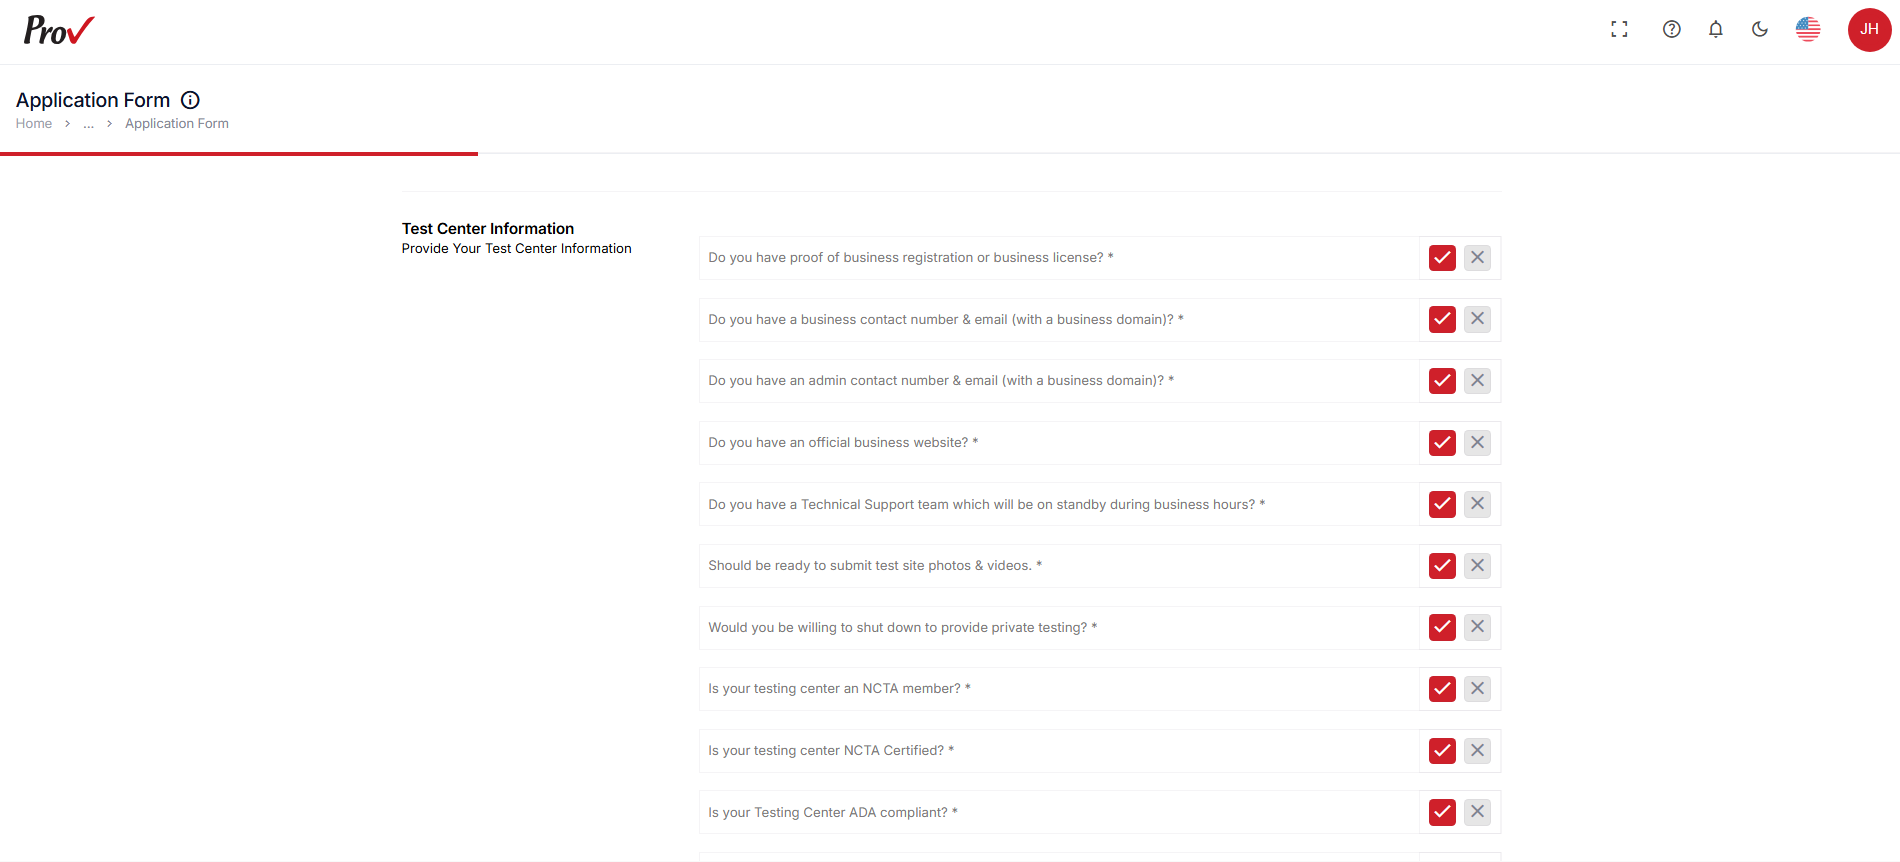
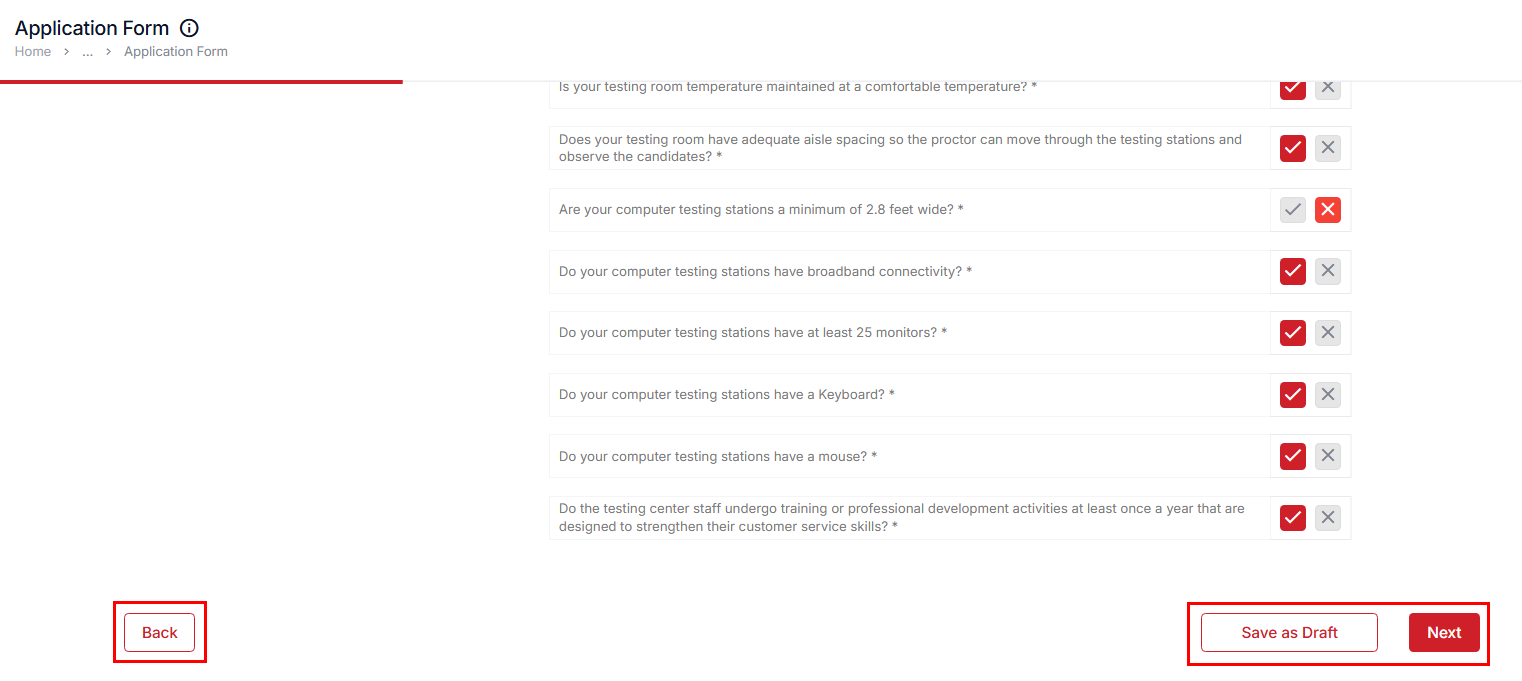
- Answer the listed questions to provide the Test Center Information, and check the fields that are suitable for the test center from the available list.
- Click Next to proceed.
- Use Save as Draft to save the application details and return later.
- Use Back to return to the previous step.


Step 3: Additional Information
In the Additional Information section, ensure the map shows the correct location to assist evaluators and candidates in finding your test center. Complete all required fields with the necessary details, including the time zone, testing hours, and other relevant information.
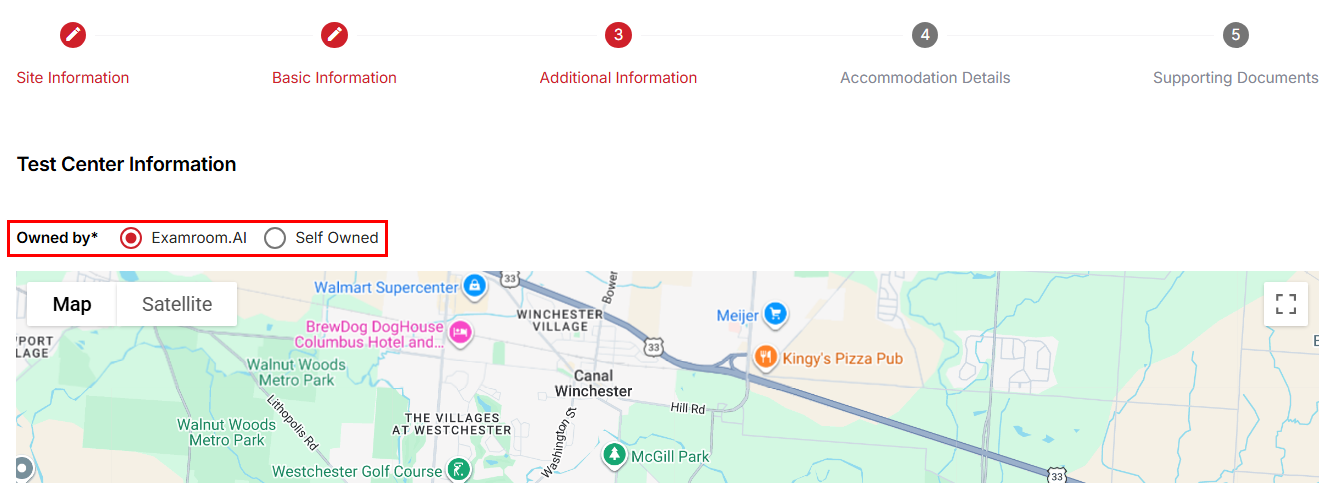
- Click the Option button to choose the Owned by option from the available list.
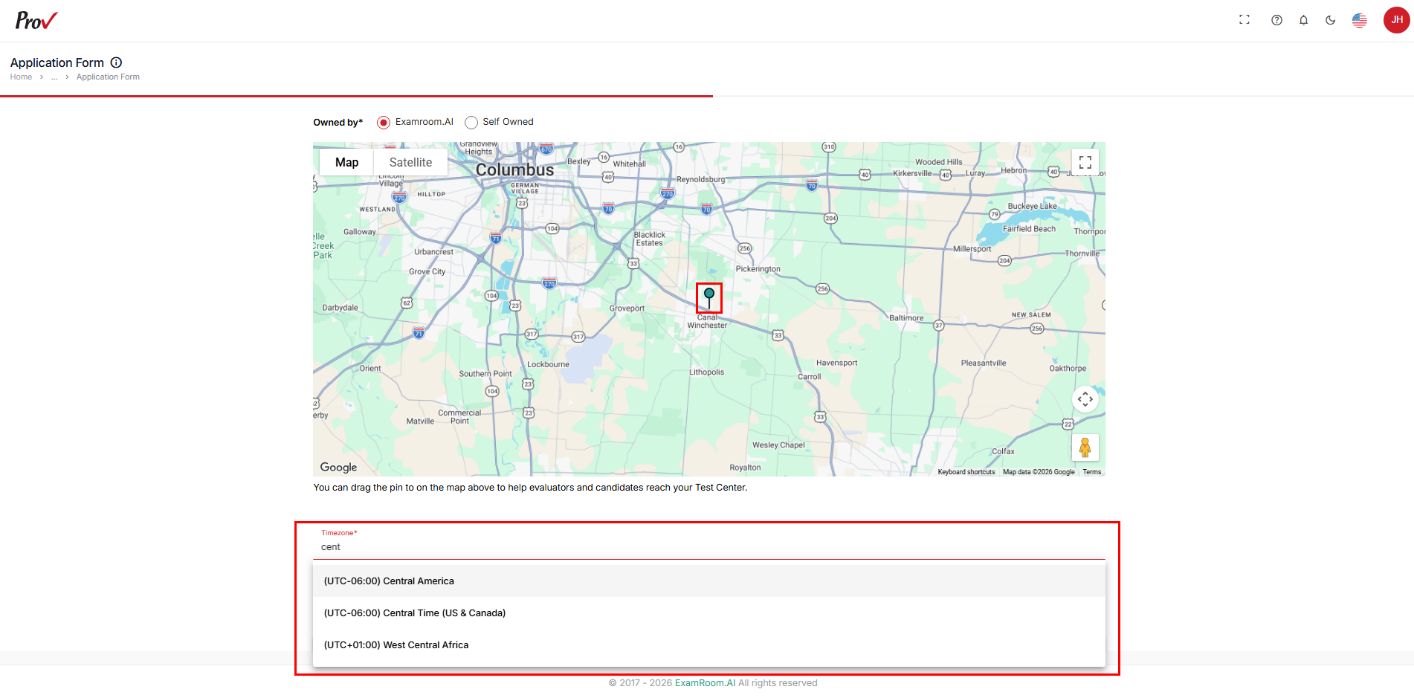
- Select the precise location of the facility using the map. Click and hold the Pin to drag it on the map to correct the pinned location.
Note:- Use a Map or Satellite view at your convenience to locate the test center.
ii. Use Map Camera Control to move and zoom in and out of the map.
iii. Use Pegman for the street view in Satellite.
- Use a Map or Satellite view at your convenience to locate the test center.
- Select the test center operating Time Zone from the Timezone field dropdown menu. The default setting uses the system time zone, so update it if the test center is in a different time zone.
- In the Testing Availability & Unavailability section, you can provide the operations Date and Time Range of the test center, and you can add unavailability details.
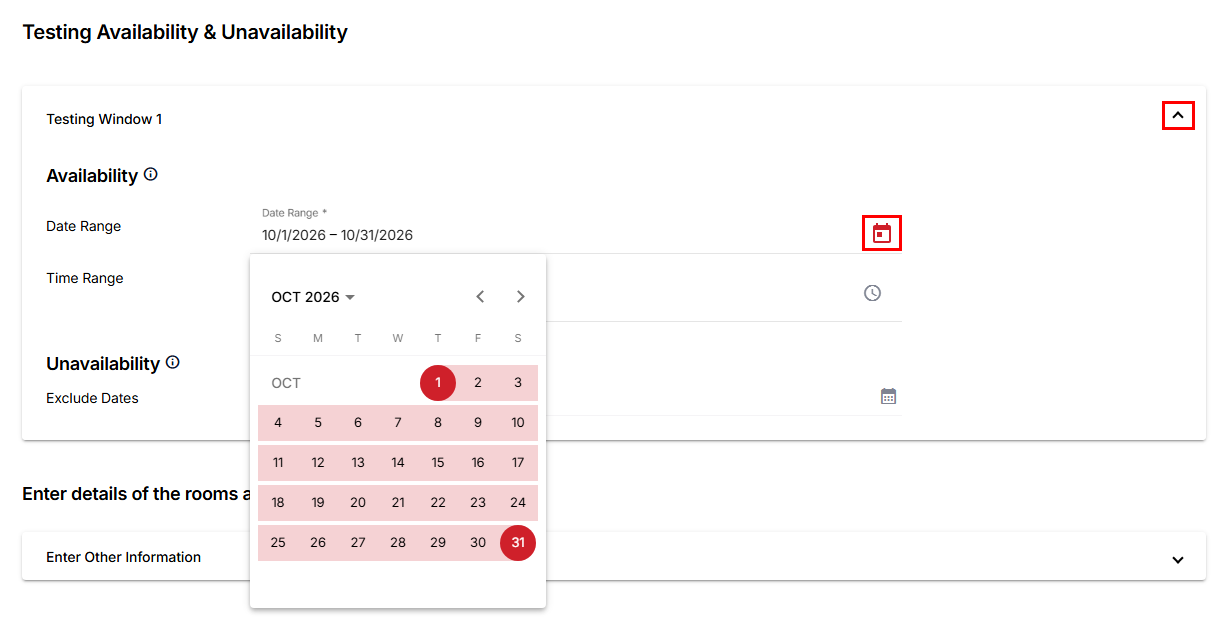
- Click the Testing Window 1 dropdown provided under Testing Availability & Unavailability.
- Click the Date Range Calendar icon and choose the upcoming availability date range from the calendar.
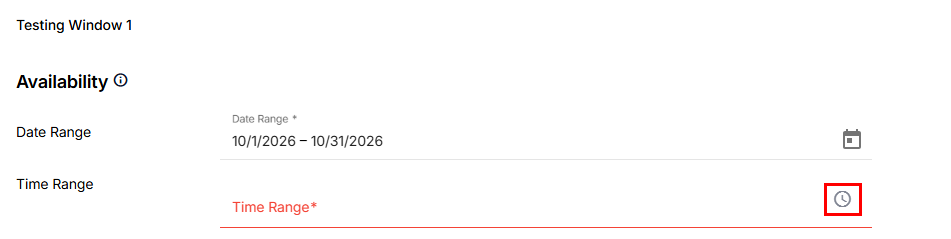
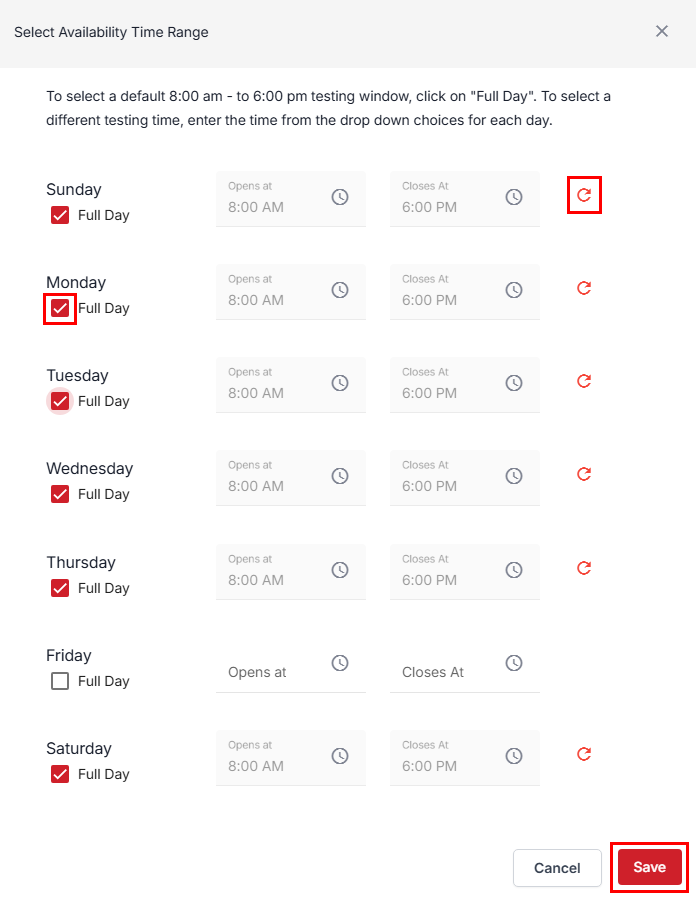
Note: You can exclude weekly off days when configuring the time range and mark any holiday dates as unavailable under unavailability. - Click the Time Range Clock icon and select the availability time range.
- Click the checkbox to choose the default full-day testing window. To select a different testing time, choose from the drop-down options for each day. To exclude weekly days off, keep this option unchecked and do not specify any testing time ranges.
- Click Save after you have added the time range.
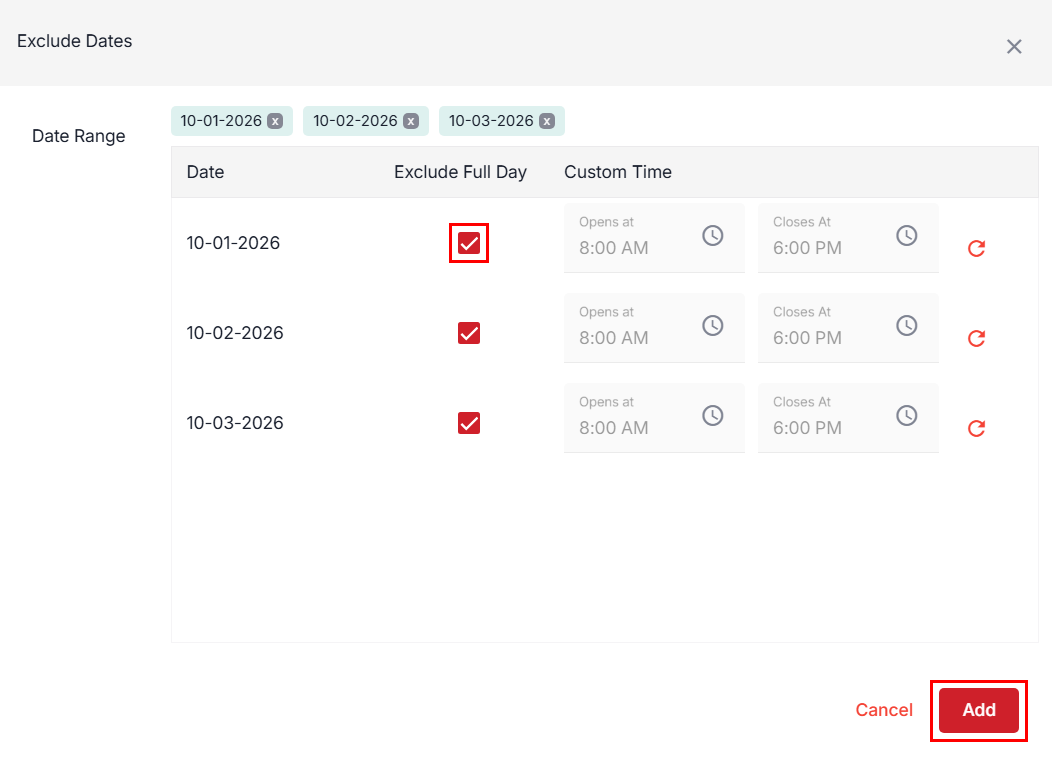
- Exclude Date option provided under Unavailability and choose the dates and times of any pre-planned closure of test center operations. You will be able to exclude dates within the specified availability date range.
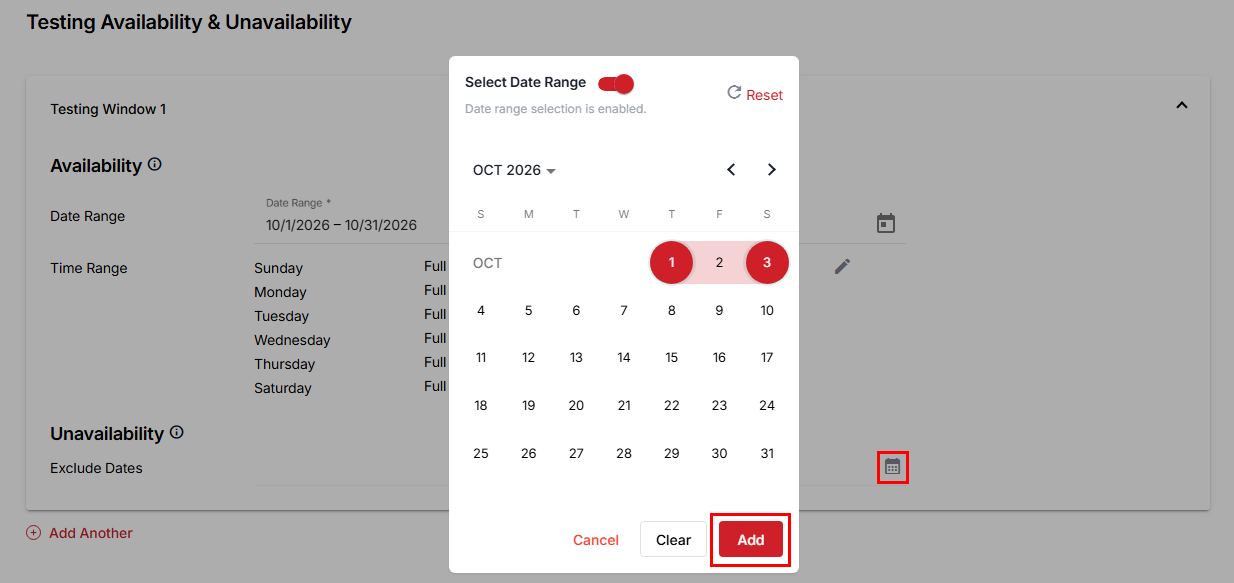
- Click the Exclude Date Calendar icon.
- To select a specific date, disable the Select Date Range toggle button and click on the desired Date in the calendar. Clicking the same date again will clear the selection.
- Or, to select a date range, enable the Select Date Range toggle button and click on the start and end dates to select the date range.
- Click the Add button to save and add the selected dates.
- Use Cancel to discard without making any changes.
- Use the Reset option to remove all excluded dates.
- Use the Clear option to clear the date selection you made on the calendar.
- Click the checkbox to choose the default full-day testing window.
- To select a different testing time, set the time in the Opens at and Closes At fields using the drop-down menu.
- Click the Add button.
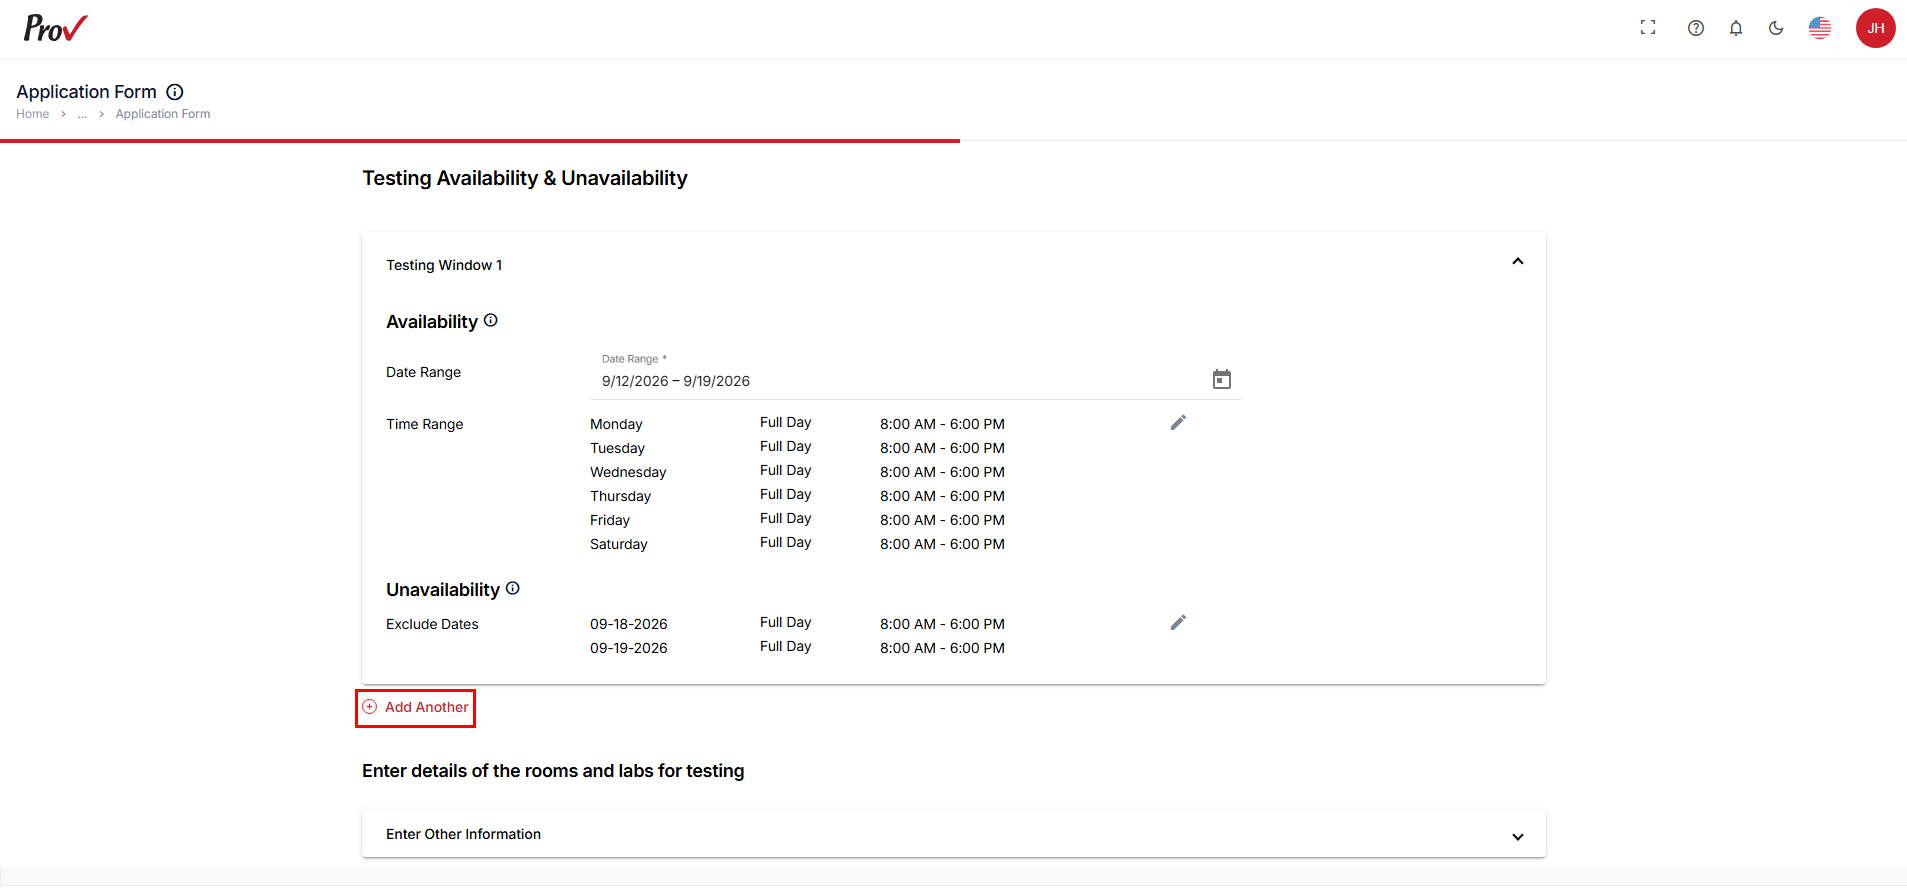
- If necessary, click Add Another to include additional testing dates for availability and unavailability.
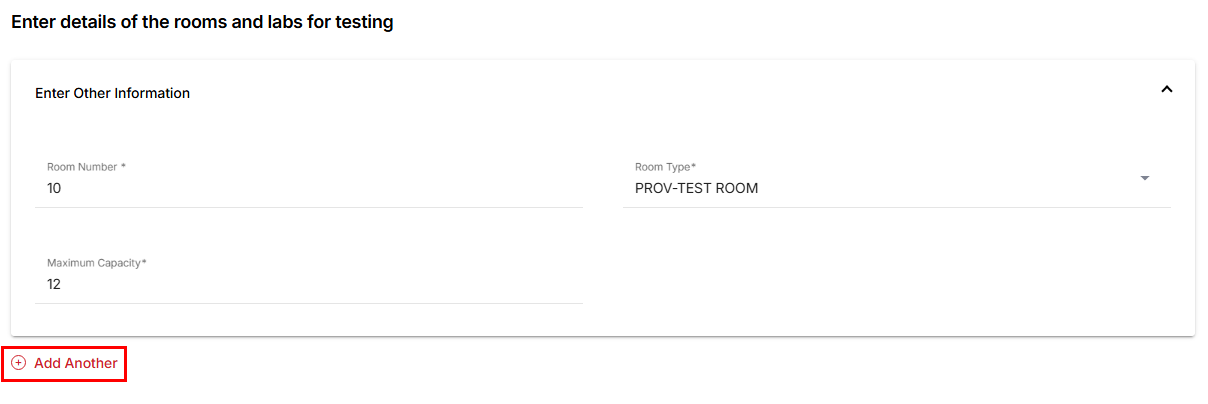
- In the Enter details of the rooms and labs for testing section, specify the number of rooms and choose their room type. Select the available capacity type and input the maximum capacity per exam. Use the 'Add Another' option to include capacity details for different room types.
- Enter the number of rooms for testing in the Room Number field.
- Select a Room Type from the dropdown.
- Select Capacity Type from the dropdown.
- Click Add Another to add more testing room or lab capacity information.
Note: You can add additional capacity details using the Add Another option.
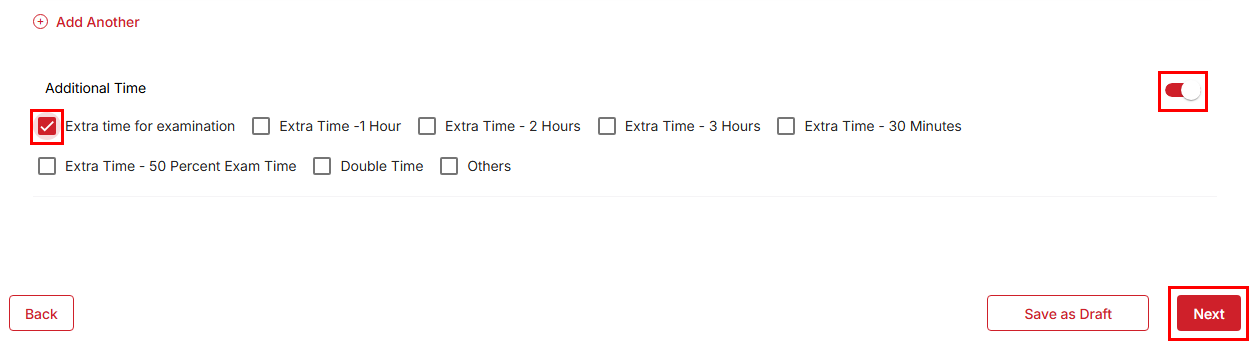
- Enable the Additional Time option if your test center allows.
- Click the Toggle Switch to enable.
- Click the checkbox from the available options to specify the extra time.
- After entering the details, click Next to proceed.
- Use Save as Draft to save the application details.
- Use Back to return to the previous step.
Step 4: Accommodation
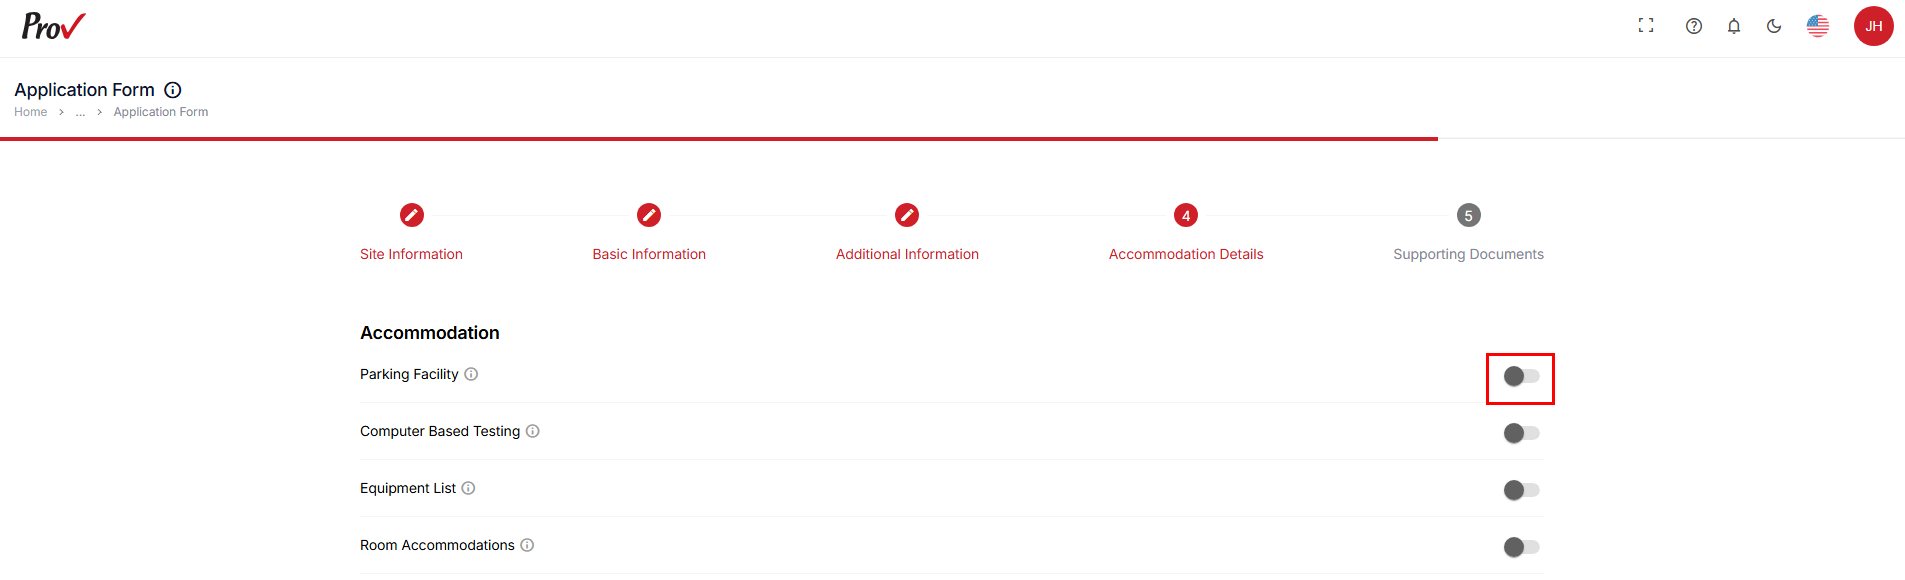
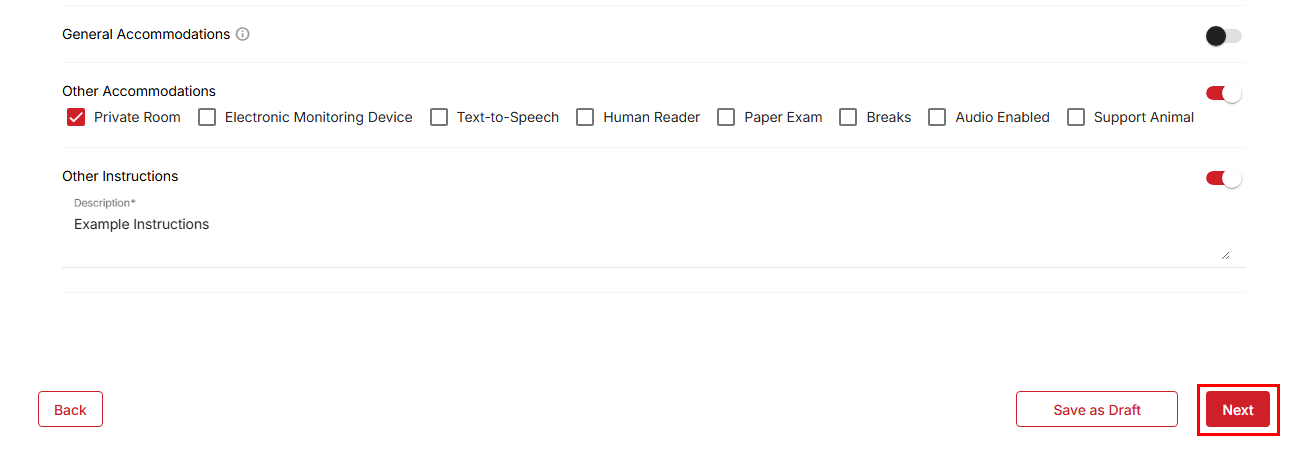
In the Accommodation section, specify available Test Center accommodations by enabling the relevant option and providing its details. If an accommodation is unavailable, keep the option disabled. Use the 'Other instructions' option to add any additional accommodation instructions.
- Click the Toggle Switch to enable each listed accommodation by the test center.
- Under each selection, ensure you select the pre-defined fields in the respective fields and fill in the details if necessary.
- Click Next to proceed.
- Use Save as Draft to save the application details.
- Use Back to return to the previous step.
Step 5: Supporting Documents
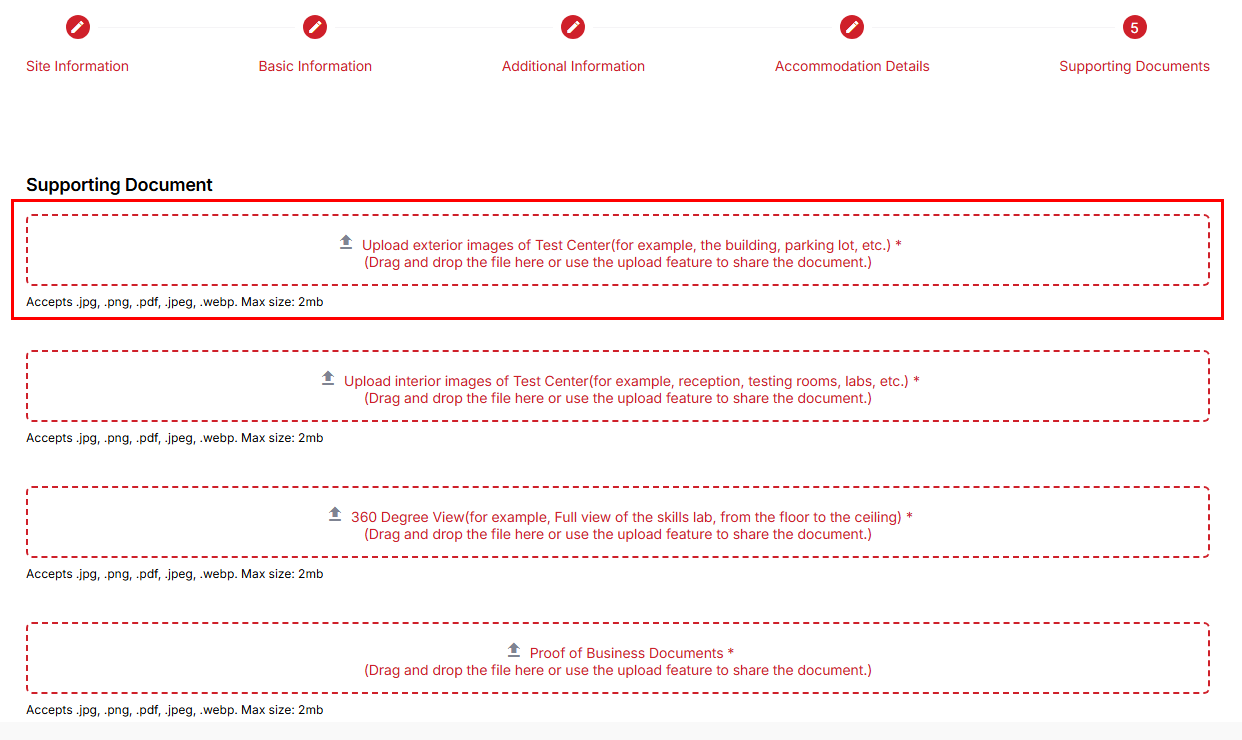
In Supporting Documents, upload all mandatory fields, such as Exterior Images, Interior Images, a 360 Degree View of the Test Center, and Proof of Business Document.
- To upload the document, click the Upload bar to choose the relevant file from your system/device. Or drag and drop the file to the Upload Bar.
Note:- Max document size shouldn’t exceed 2MB, and only the following file types are accepted: .PNG, .JPG, .PDF, .JPEG, and .WEBP.
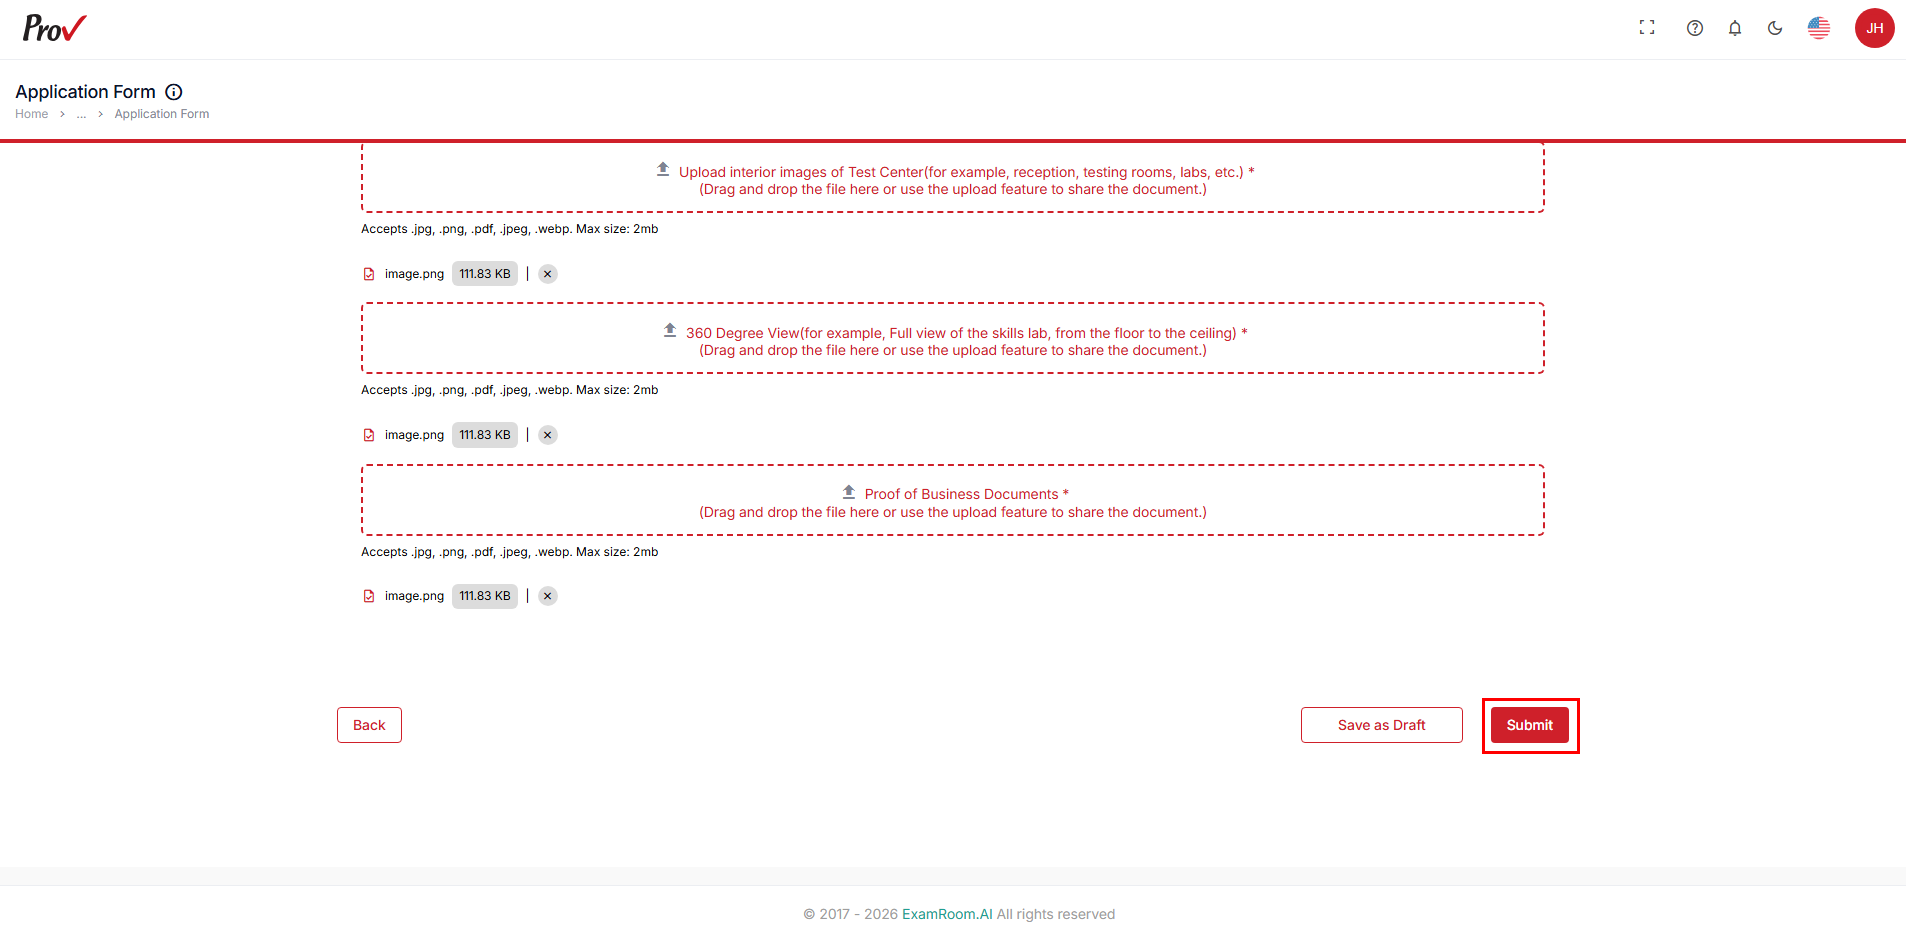
- Upload the Ownership Documents if necessary.
- Click Submit to send the application form for review.
- Use Save as Draft to save the application details.
- Use Back to return to the previous step.
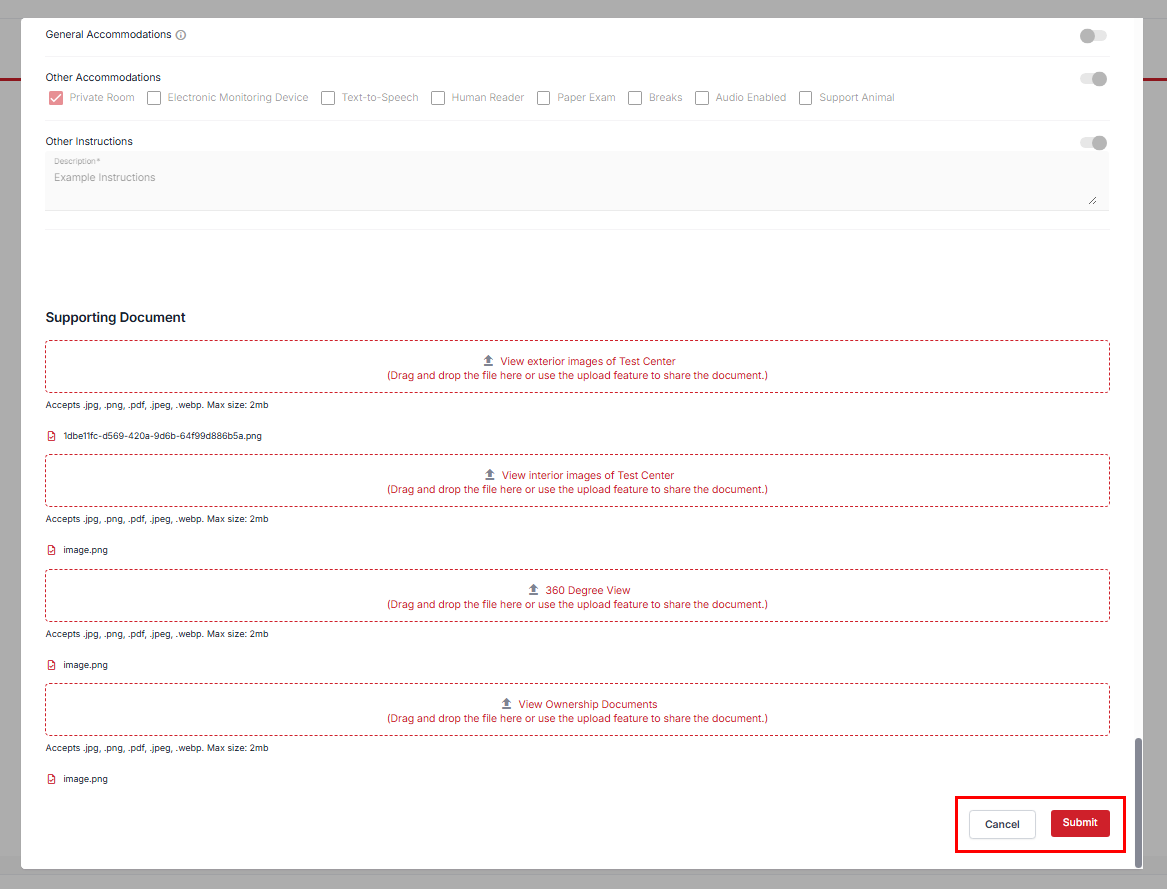
- After clicking on Submit, a preview window will appear. Ensure you recheck the application form displayed, scroll through the form to the bottom, and click Submit to submit the application.
- In case you need to make any changes to the application form, click Cancel to update the changes before submitting.
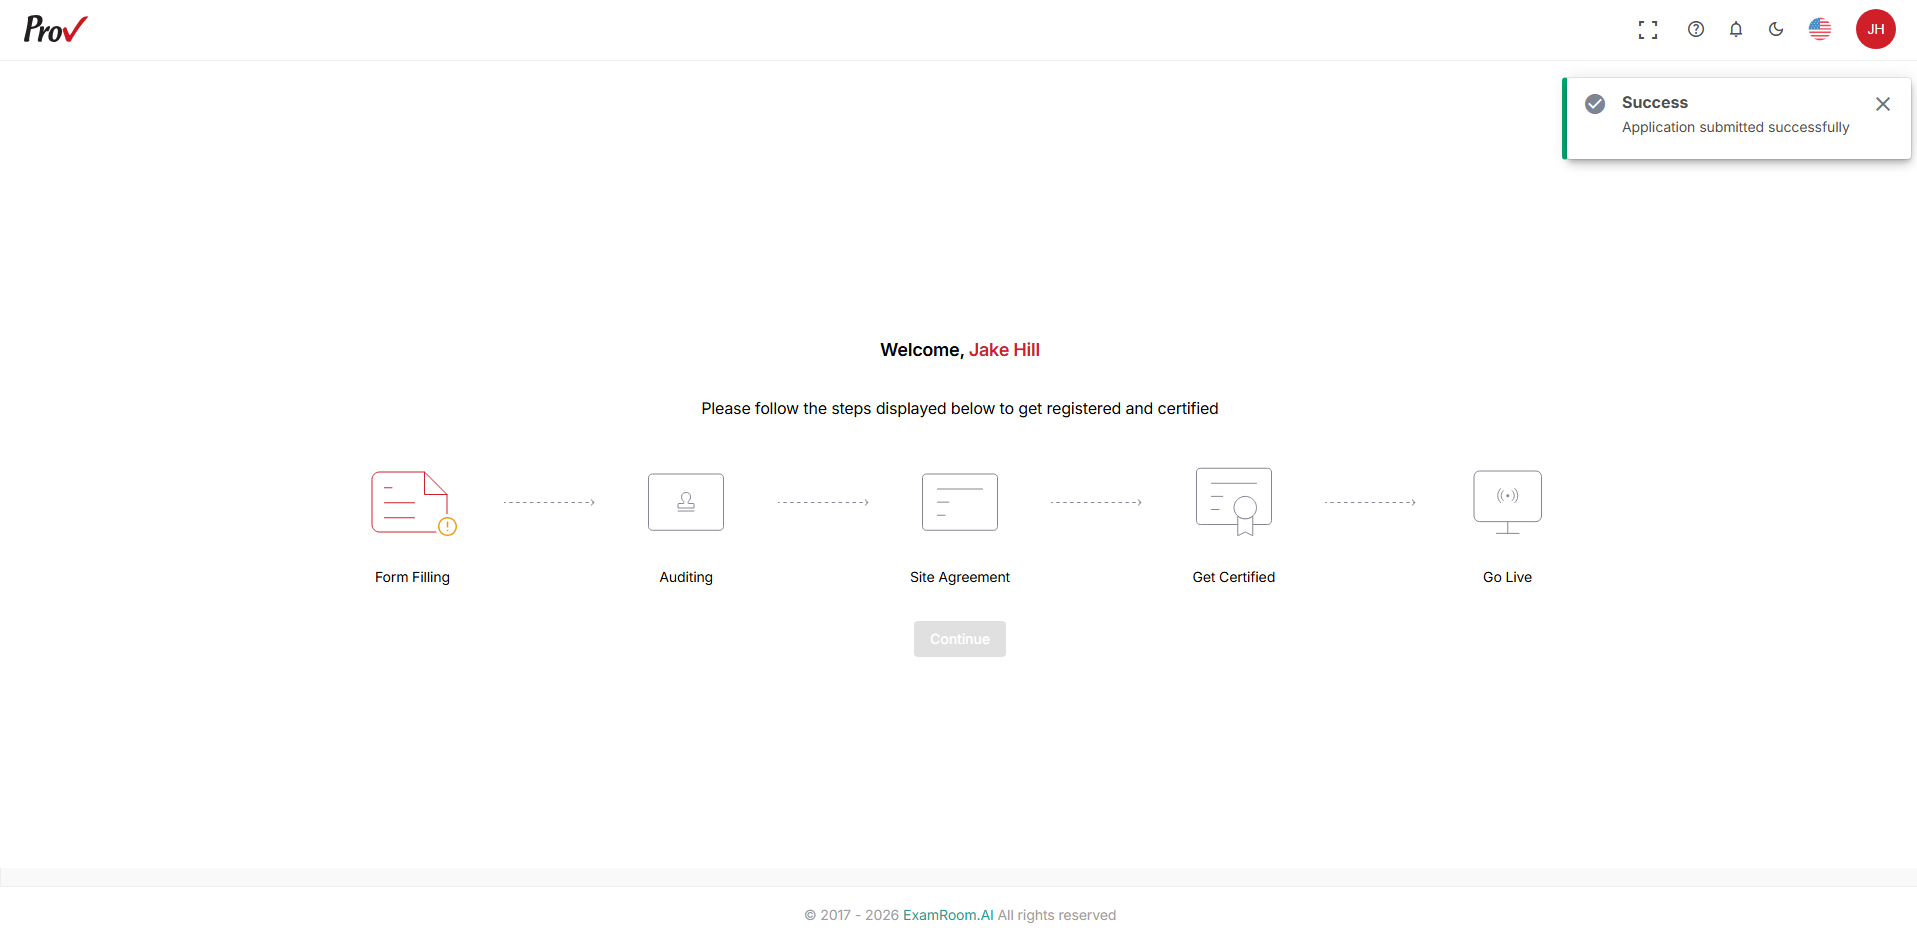
- After submission, you will receive a pop-up message stating that the Application has been successfully submitted and sent for review.
- Operations teams will review the application form and act (approve, reject, or request change) accordingly.
- Hover over the Application form to view the status of the application. You will also receive an email notification once the application has been reviewed.