Onboarding Queue
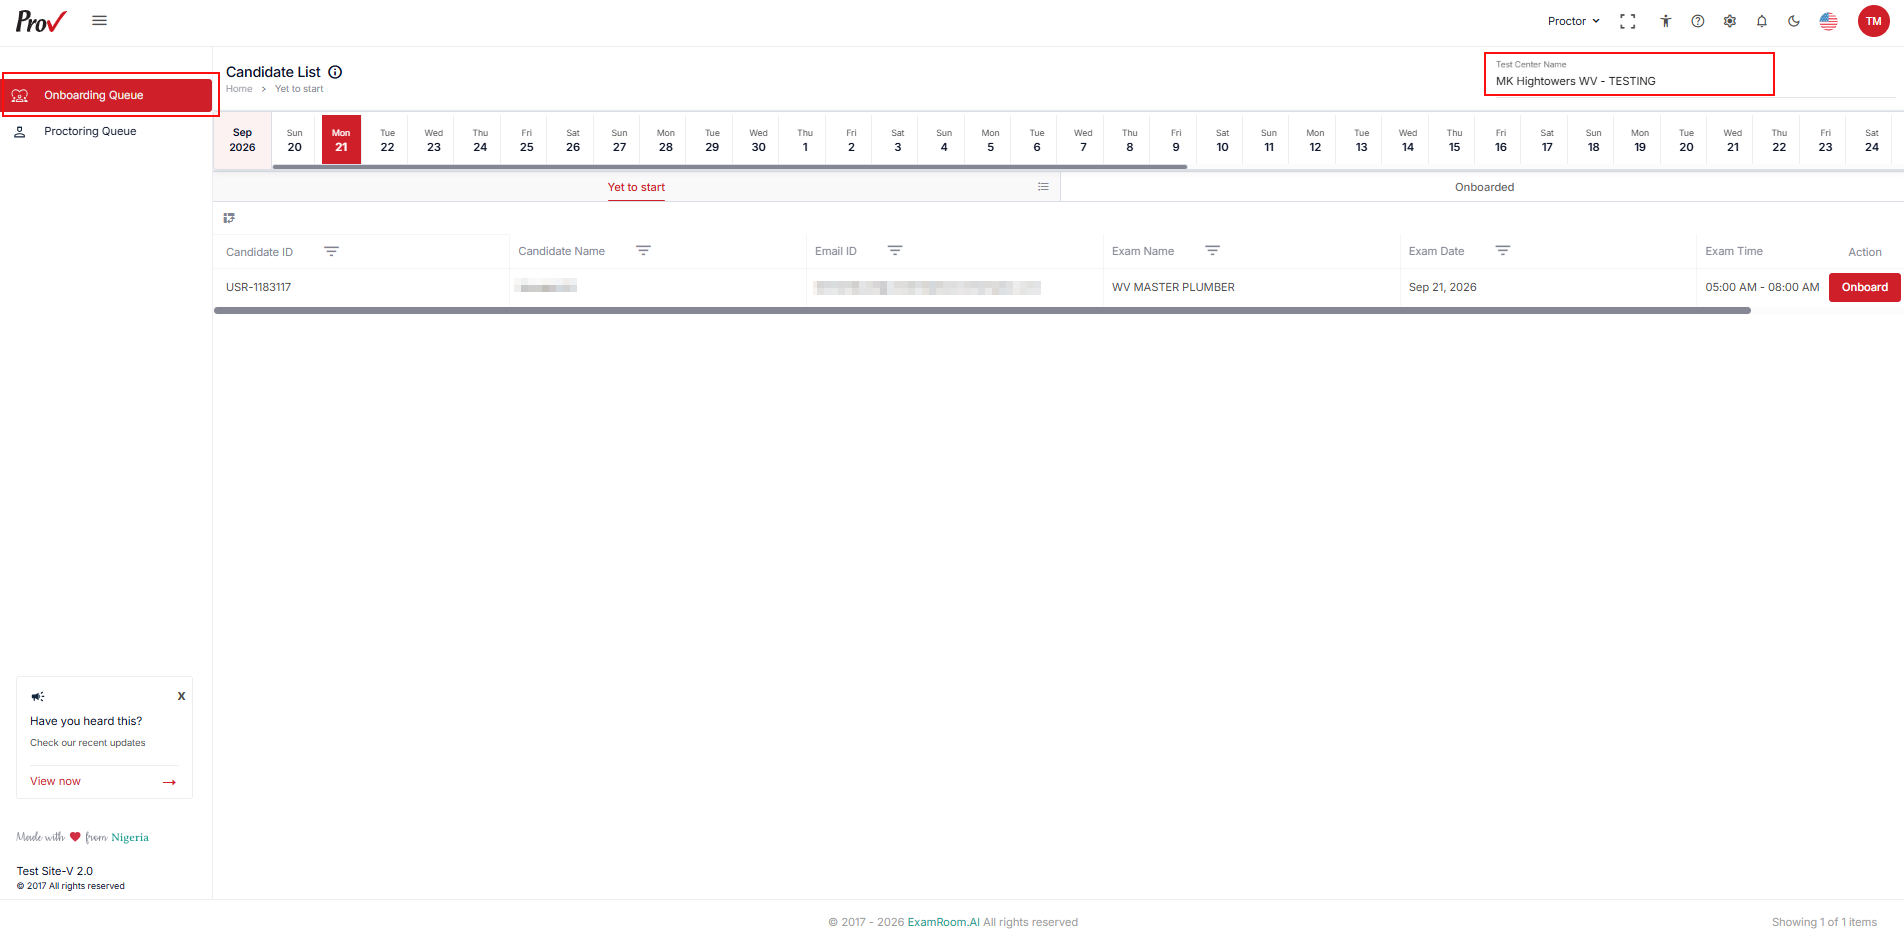
The Onboarding Queue lets you view and manage candidates scheduled for their exam in the test center, listed by date. Candidates need to undergo the onboarding process before they proceed to proctoring.
After logging into the Prov TSM console, follow the steps to complete the onboarding of a candidate:
- Navigate to the Onboarding Queue and verify that the required Test Center is selected.
- If you are managing multiple test centers, click on the Test Center Name field in the top right to choose the required test center from the list.
- If you are managing multiple test centers, click on the Test Center Name field in the top right to choose the required test center from the list.
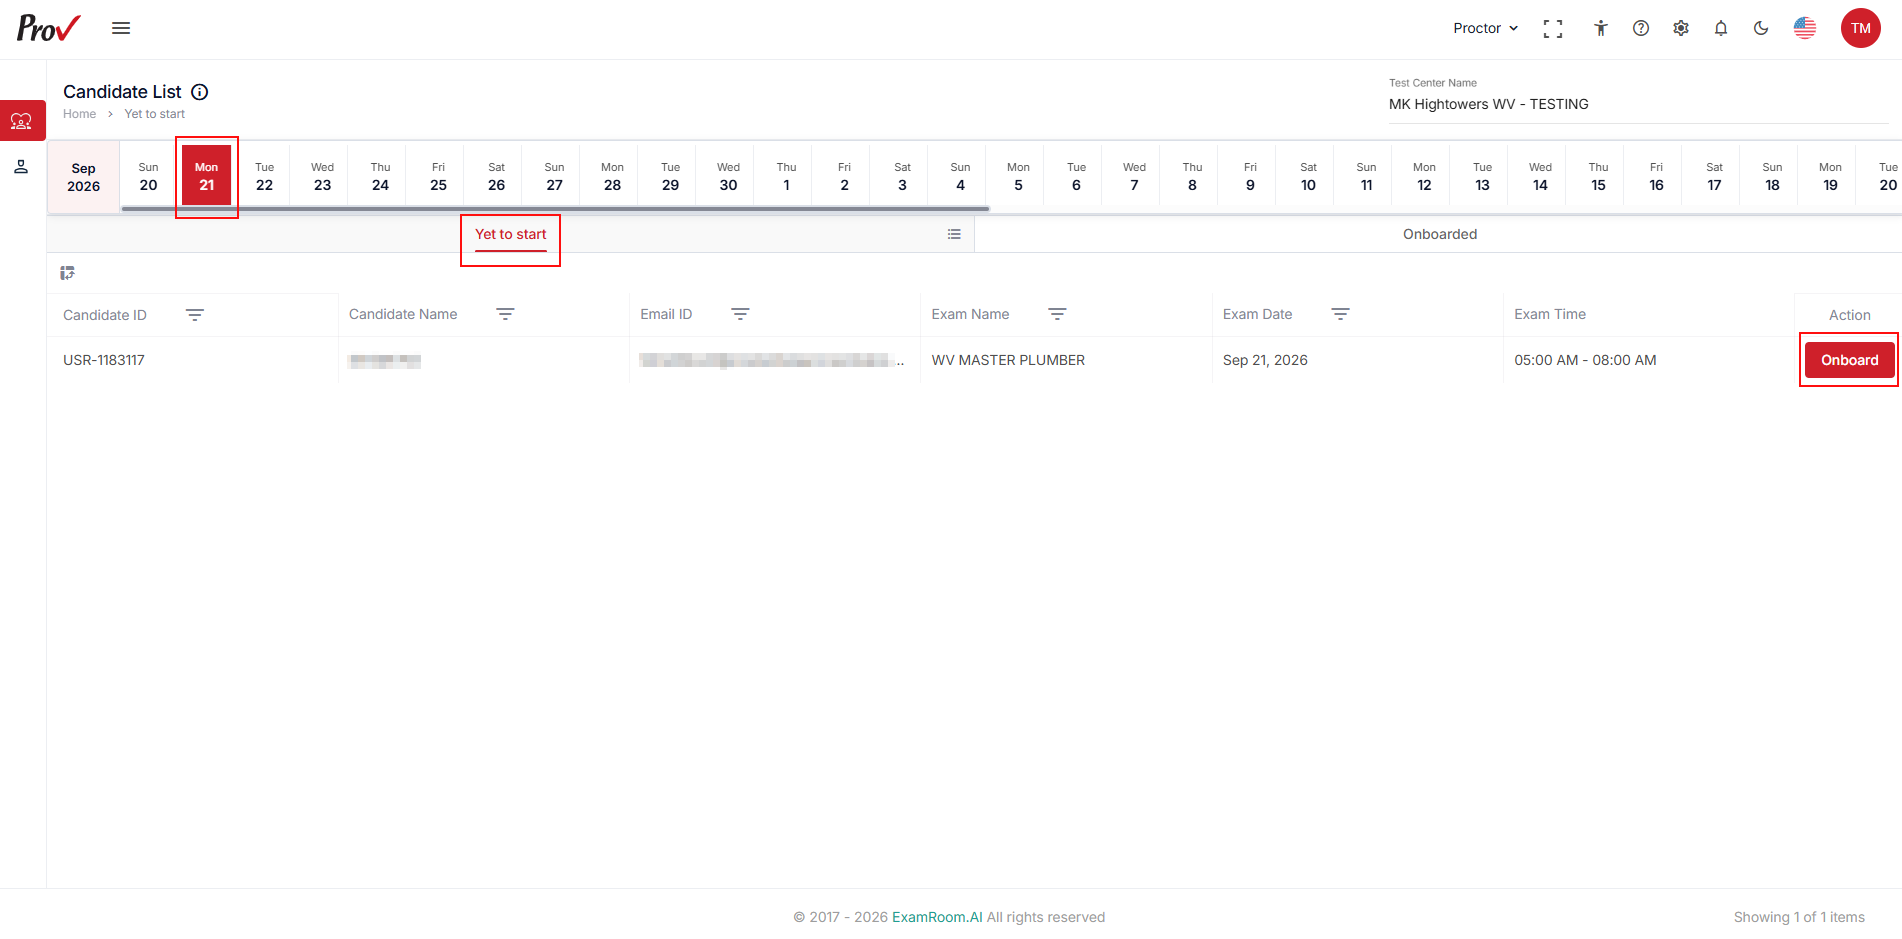
- Select the current date from the date bar to find the candidates for onboarding.
- Review the candidates listed in the Yet to start queue for onboarding.
- Click the Onboard button to begin onboarding the required candidate you intend to onboard.
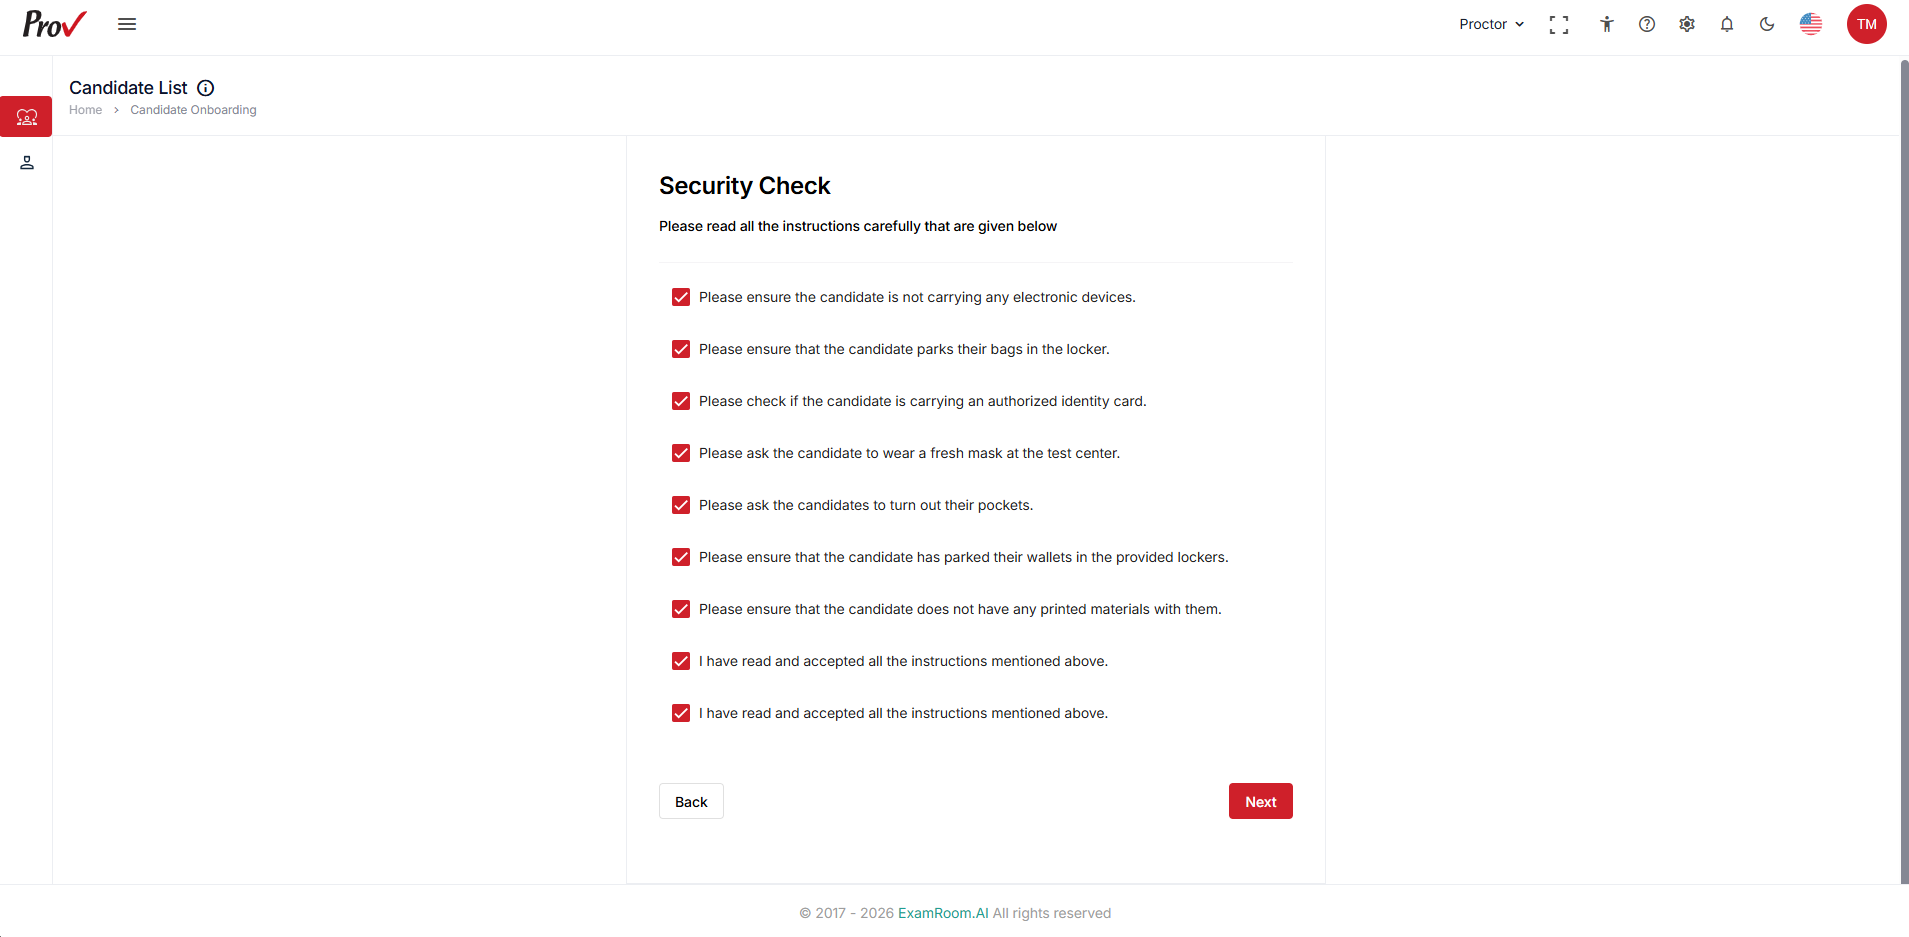
- Read the provided instructions and security checks you need to perform, click all the checkboxes to provide confirmation, and click Next to proceed.
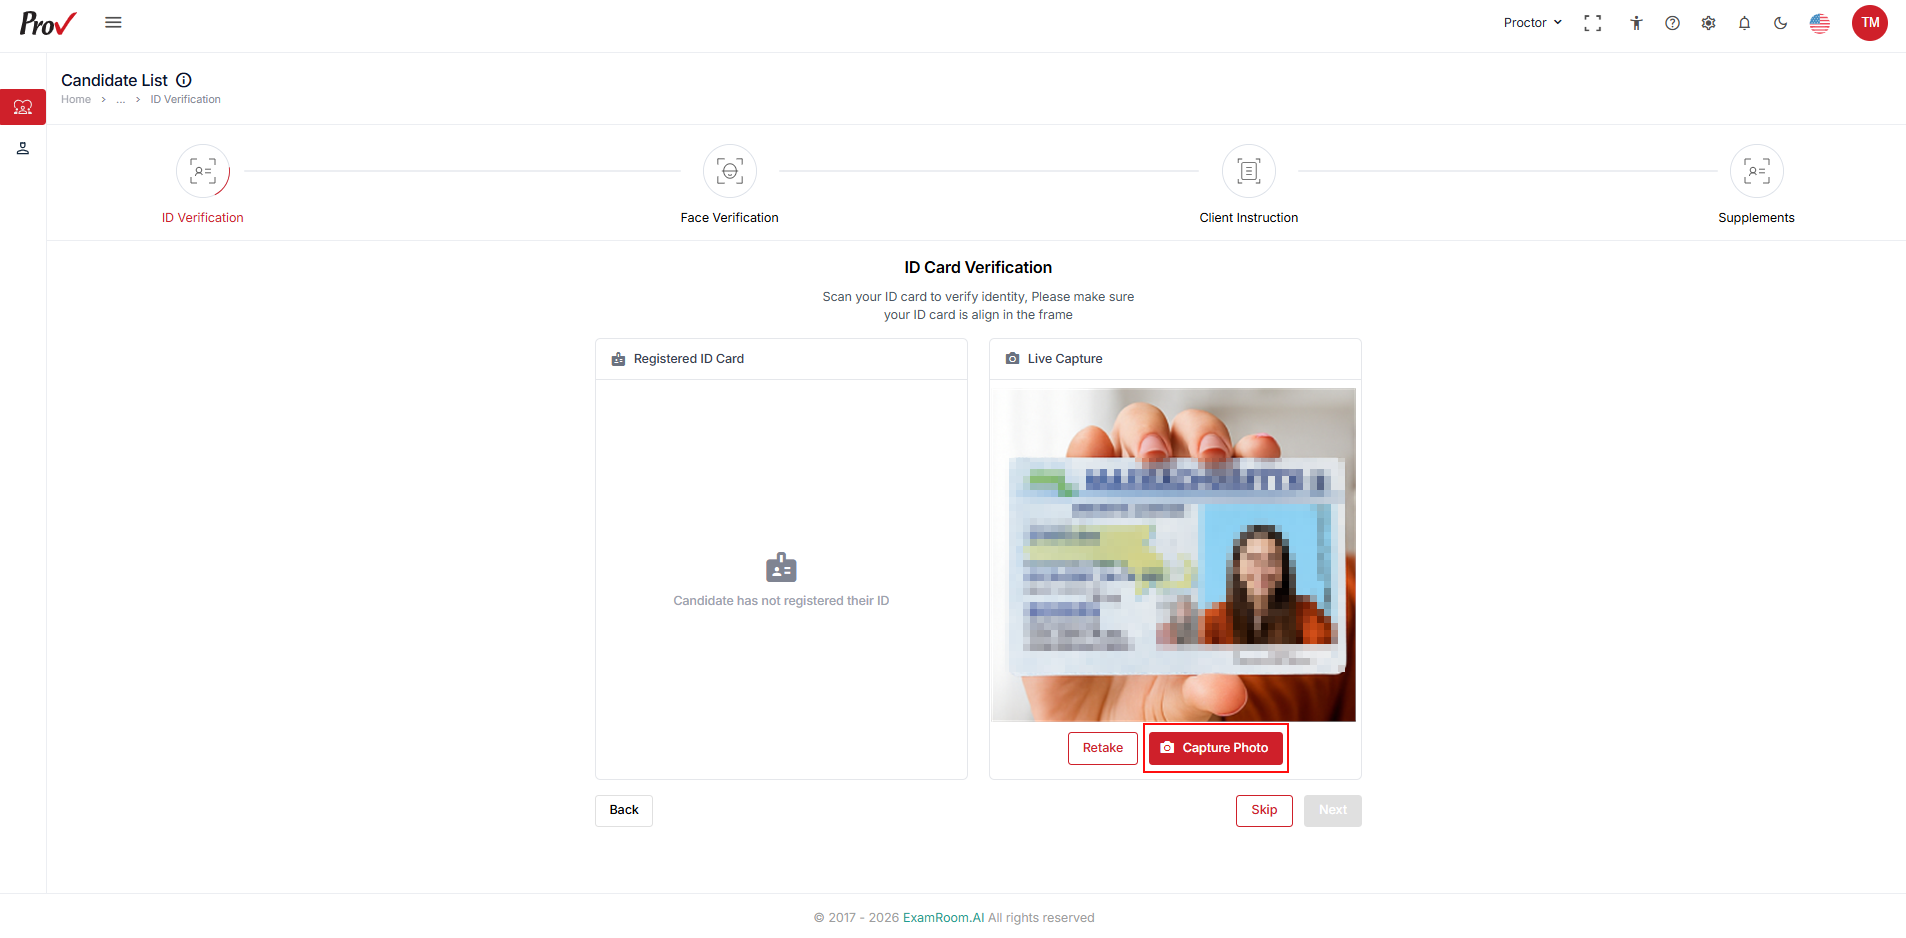
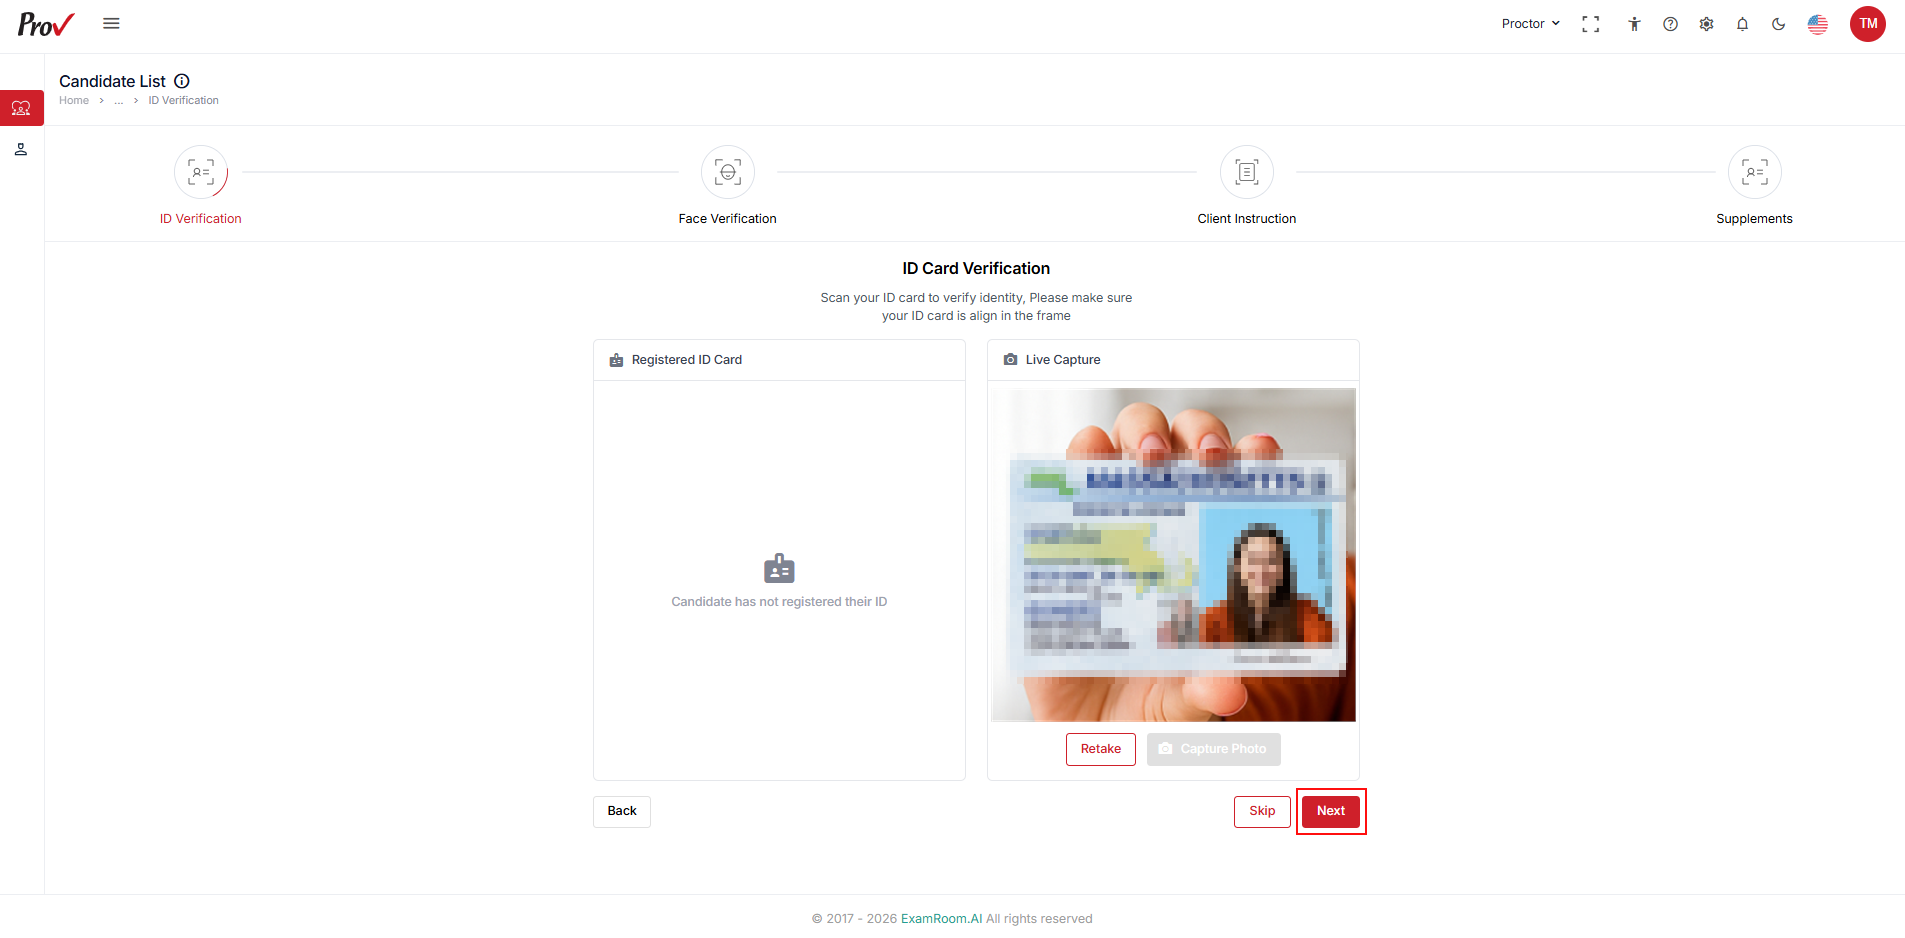
- ID Verification: On the ID verification step, capture and verify the candidate ID card.
- Place the candidate ID in front of your device’s camera and click Capture Photo to live capture the candidate ID.
- In the Registered ID card section, the candidate's ID may be displayed if they registered with their ID, and the availability of the registered ID card may vary depending on the exam type.
- If the captured photo is not clear or to recapture the ID card, click the Retake button.
- Once you have captured and verified, click the Next button to continue.
- Use Skip to go to the next step without completing an ID verification.
- Use Back to go to the previous step.
- Place the candidate ID in front of your device’s camera and click Capture Photo to live capture the candidate ID.
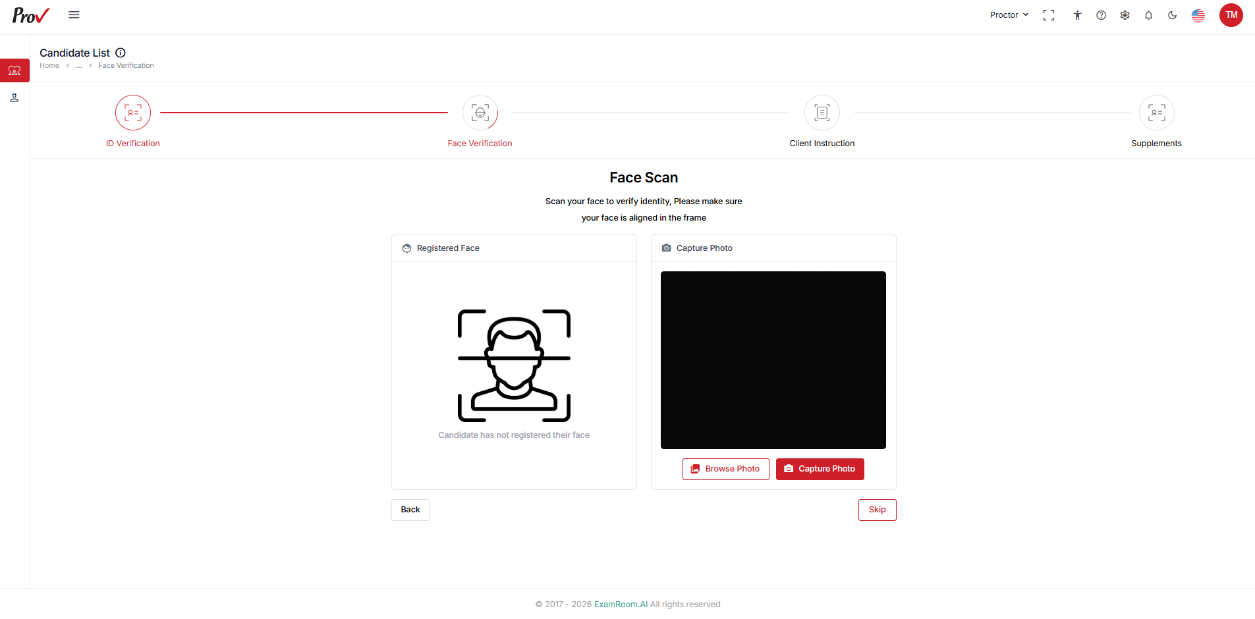
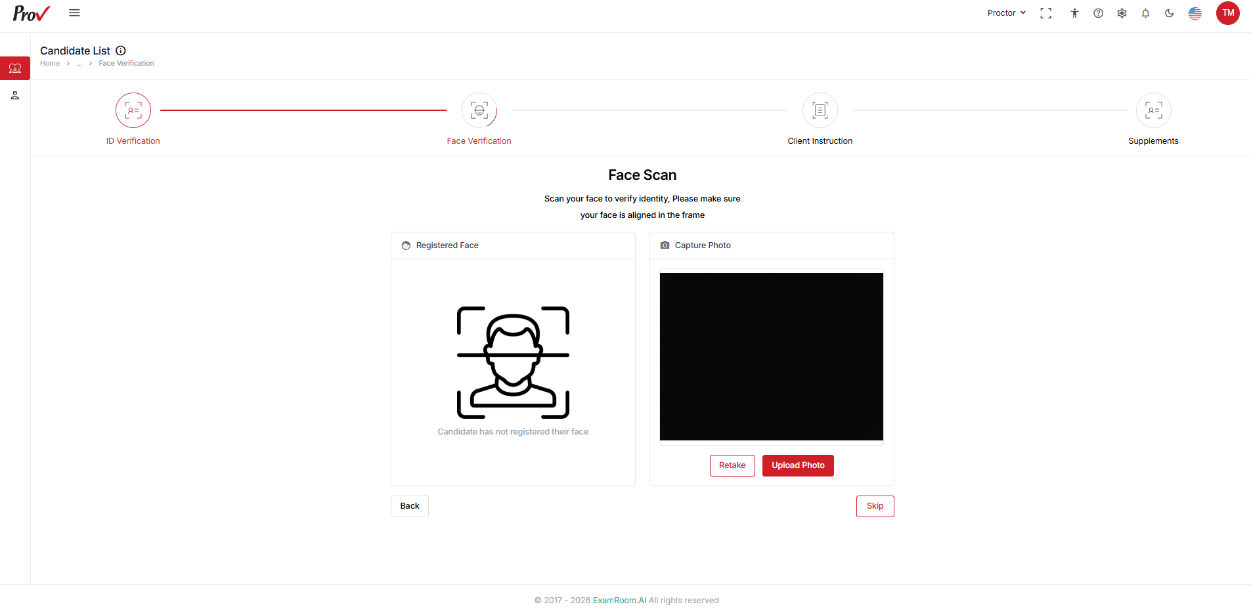
- Face Verification: On the Face Verification step, scan the candidate's face to confirm their identity.
- Capture the candidate's face using your device's camera and click Capture Photo to capture the candidate's face.
- Then, click Upload Photo to submit the captured candidate's face and move forward with the next step.
- Use Retake when the photo taken is blurry or incorrect.
- Use Skip to go to the next step without completing a face scan.
- Use Back to go to the previous step.
- Capture the candidate's face using your device's camera and click Capture Photo to capture the candidate's face.
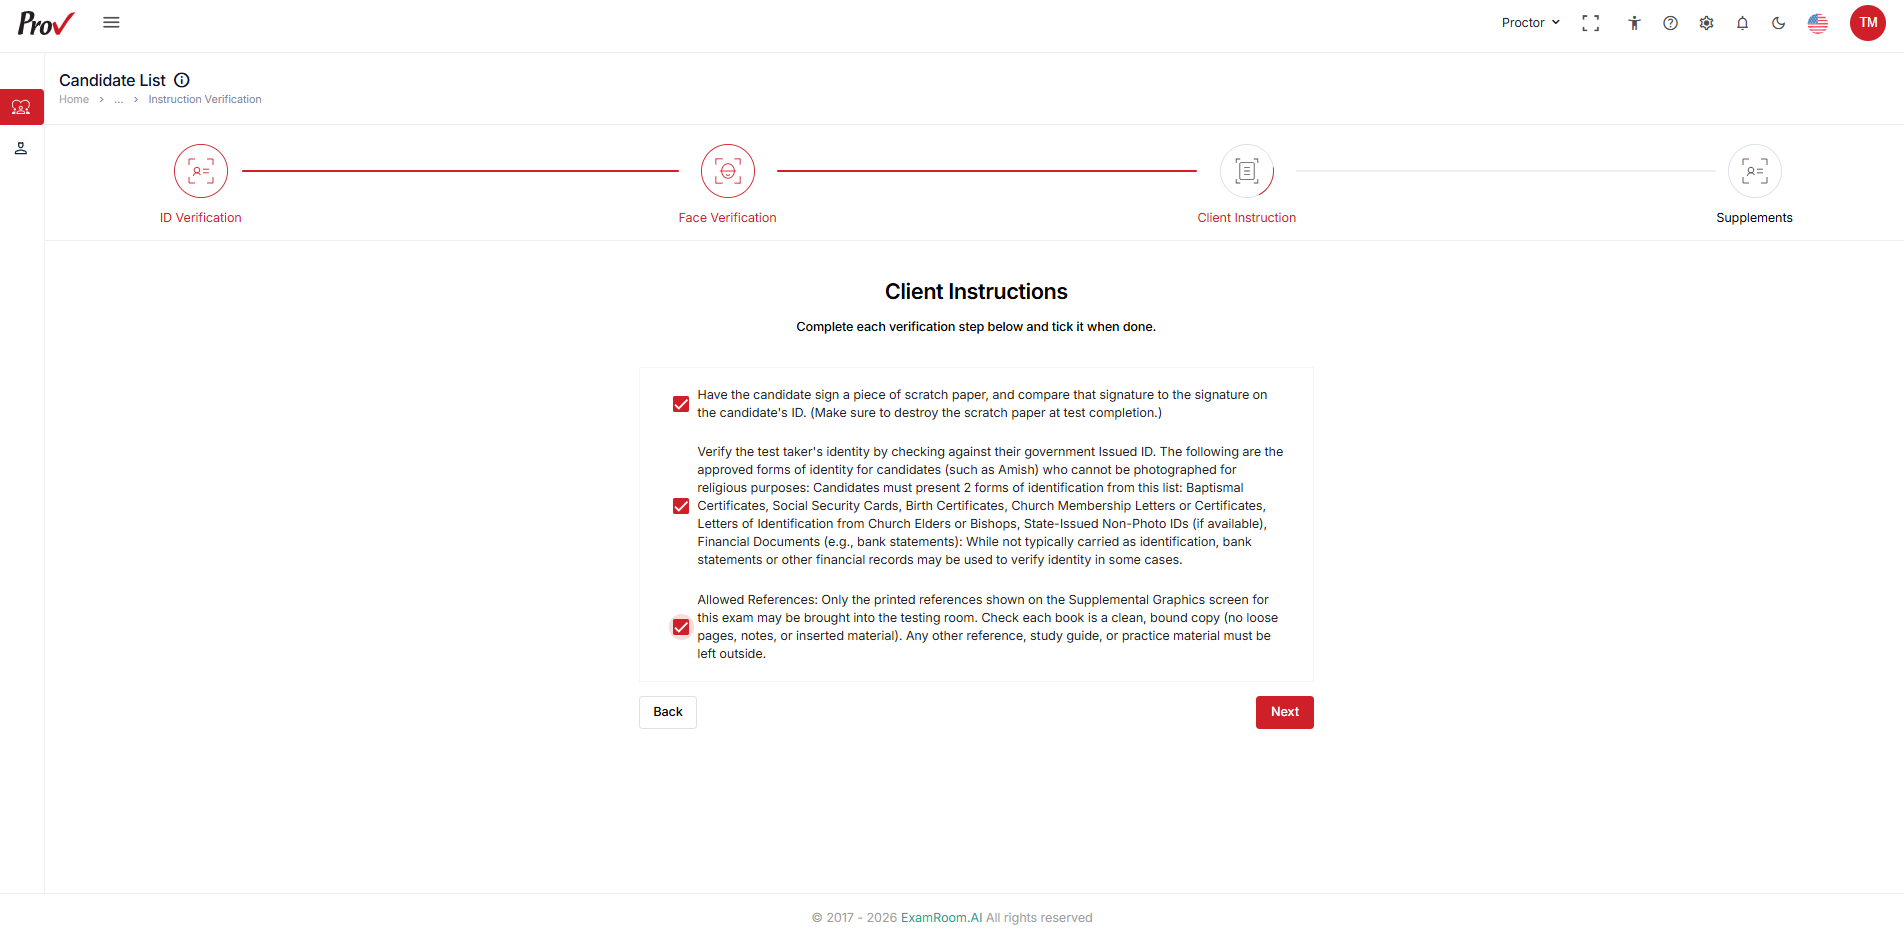
- Client Instruction: On the Client Instructions step, complete each verification step listed.
- Click the Checkbox after each verification step is complete.
- Click Next to proceed.
- Use Back to go to the previous step.
- Use Back to go to the previous step.
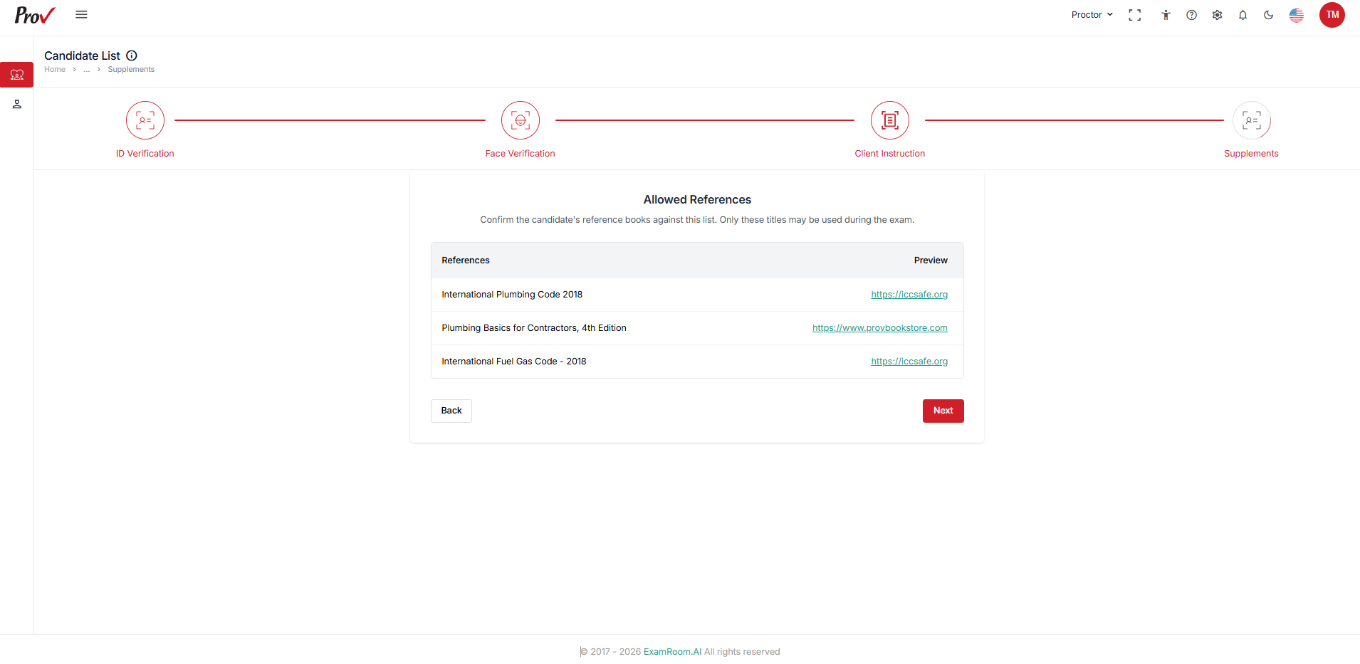
- Supplements: On the Supplements step, confirm the candidate’s allowed reference materials.
- Review the allowed references. Use the preview links to verify the allowed reference books that the candidate can use during the exam.
- Click Next to proceed.
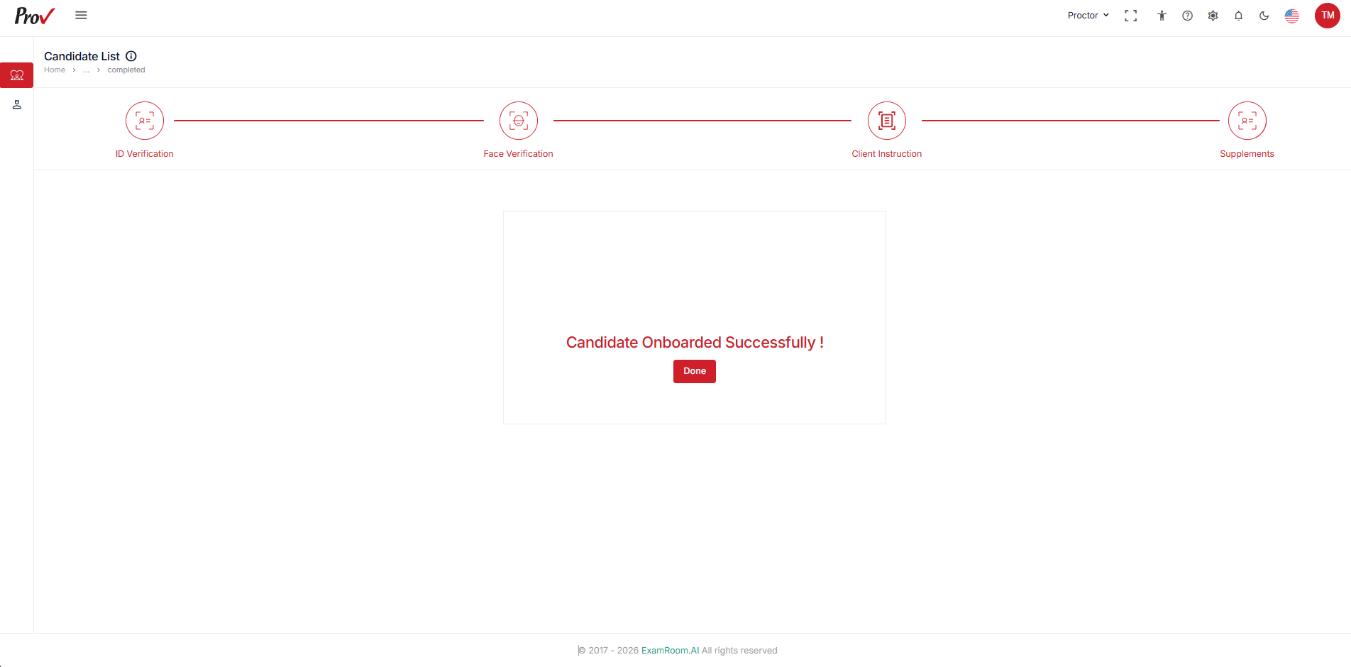
- Once complete, a confirmation will appear: “Candidate Onboarded Successfully.” Click Done to complete and get back to the onboarding queue.
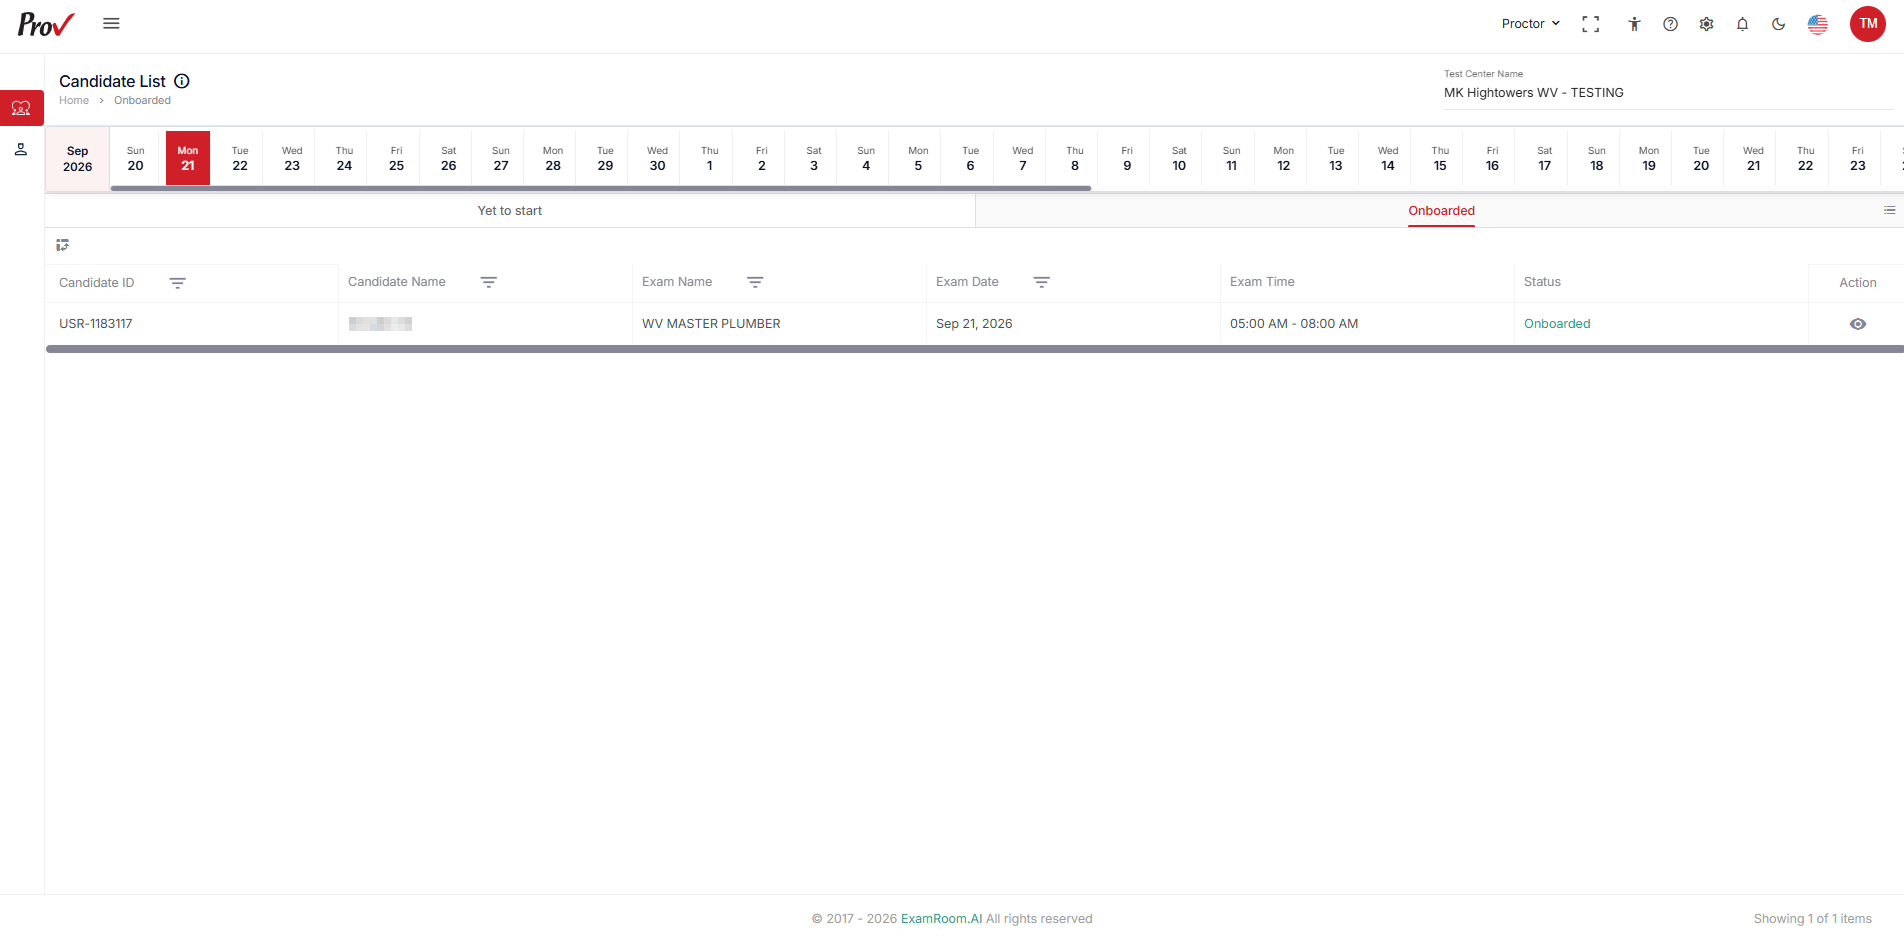
- The Onboarded tab displays the list of candidates who have completed onboarding. To start the candidate exam, go to the Proctoring Queue, where onboarded candidates are listed under "Yet to start." See Proctoring Queue for more information.
- Click the View icon under the Action column to view the candidate’s E- Admit Card.